
35+ Charming DIY Décor Ideas Even Experienced Crafters Might Not Be Aware Of
As homeowners, we look for different ways to decorate our spaces. There are so many intriguing ideas that you’ll want to try. These may include dying your blankets to look more vibrant or using books on the wall for decoration. DIYs are great alternative to investing a lot of time and money in large over-priced decor pieces. You’ll just need a few supplies to get started, or you might already have what you need at home. In a few hours, you’ll have something artistic to make you proud of your newly learned skills. If you’re looking for some unique ideas, we have amazing decorating tips and tricks to inspire you. With these, your home will look appealing, and everyone who visits will be talking about it.
1. Duct Tape stencils
You can use duct tape to make easy stencils for your kitchen or bedroom tables. First, remove the old paint from the wood. Choose a shade that will complement the other furniture in the room. Tape the top of the table to create a stencil.
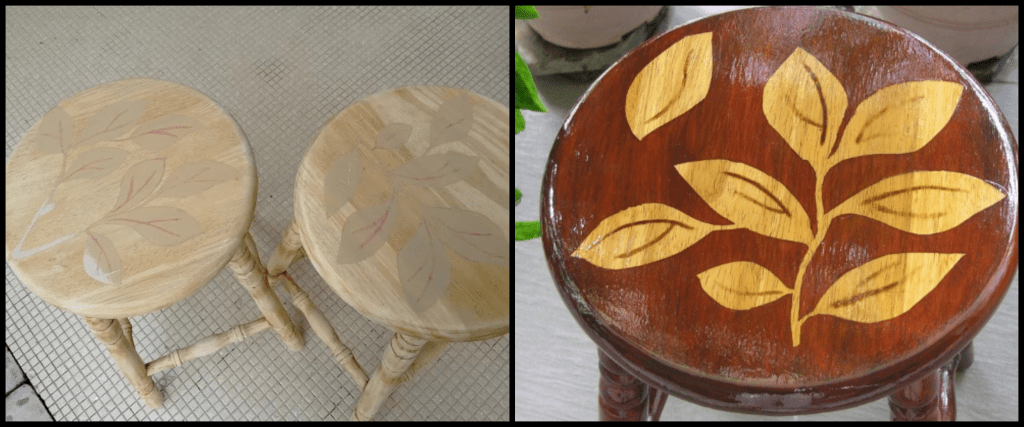
Use a dark marker to draw the design on the tape, then carefully use a crafting knife to trace your design. Paint over the table using a brush or a roller and let the paint dry completely before moving the table. Carefully remove the tape to reveal the beautiful design.
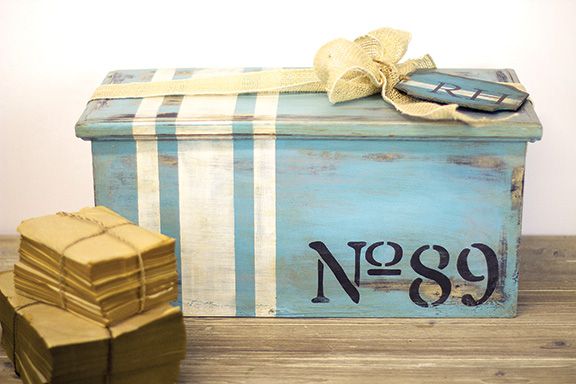
2. Wet and dry distressing furniture
Have you ever wanted to give your furniture a distressed look? Distressing paint is a great way to achieve a weathered, vintage appearance. There are two main methods of distressing paint: wet and dry. Wet distressing involves wetting the paint after application. This creates a more uneven, rustic look.
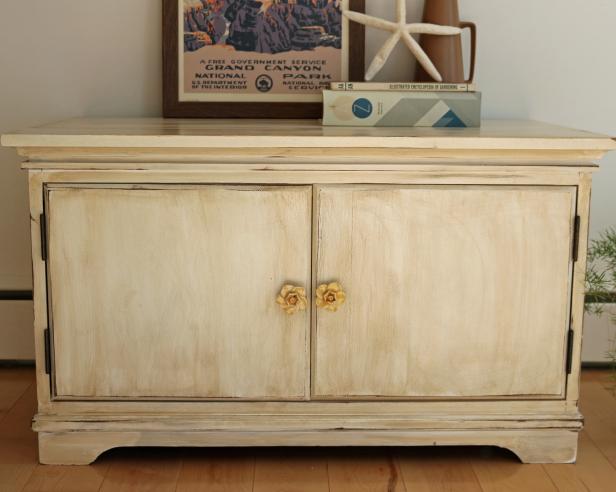
Dry distressing involves distressing the paint after it’s already dry. This produces a more clean and consistent look. Whichever method you decide to use, distressing paint is a great way to add character to your furniture. You may use sandpaper for a distressed look or use a cloth dipped in water over the paint.
3. Trash to treasure
If you have an old glass bottle that you’re looking to get rid of, don’t just throw it away! With creativity, you can turn it into a beautiful decor piece using stained glass colors. To start, gather some supplies. In addition to the glass bottle, you’ll need glass paint and glass glue.
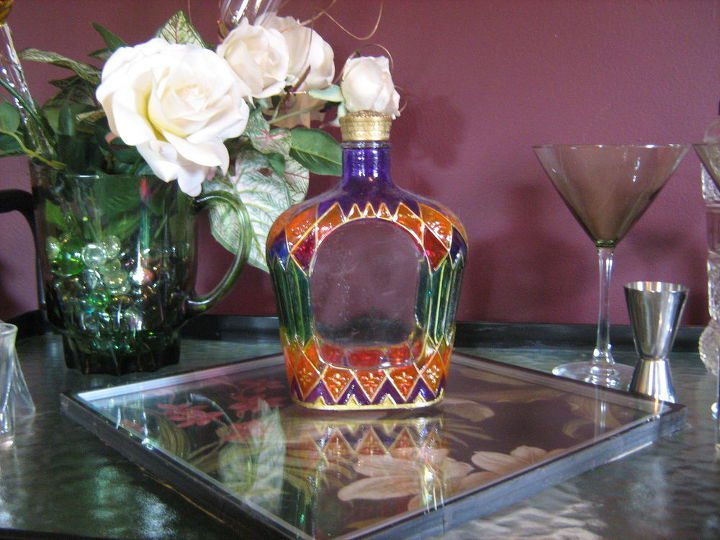
Begin by painting the glass bottle with your chosen glass paint color. If you’re using multiple colors, paint each section separately. After the paint is dry, use a layer of glass glue around the edges. Once you’re finished, you’ll have a beautiful, one-of-a-kind decor piece that is sure to impress your guests.
4. DIY galvanized decor
Metallic galvanized decor instantly adds a rustic and vintage charm to your home. All you need is some galvanized iron sheeting, a few simple tools, and patience. You can create stunning pieces that add personality to your home with a little hard work.
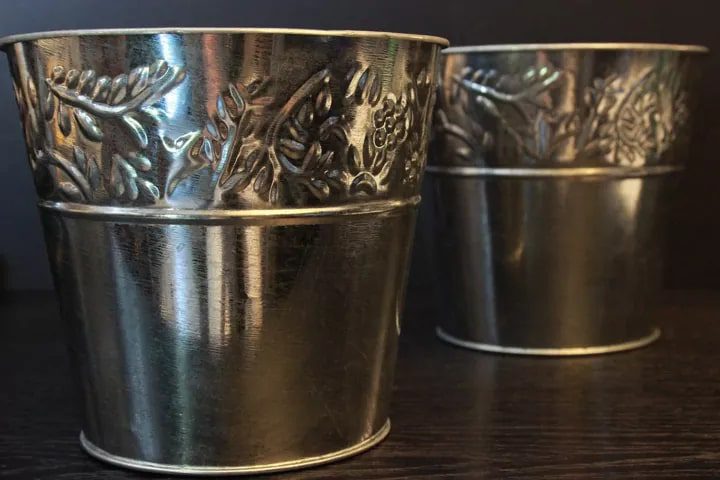
Cut out shapes from the sheeting and use them to create one-of-a-kind wall art. You may use the mix of white vinegar and salt in your spray bottle to add an aged look to the metal. Another idea is to galvanize buckets or planters.
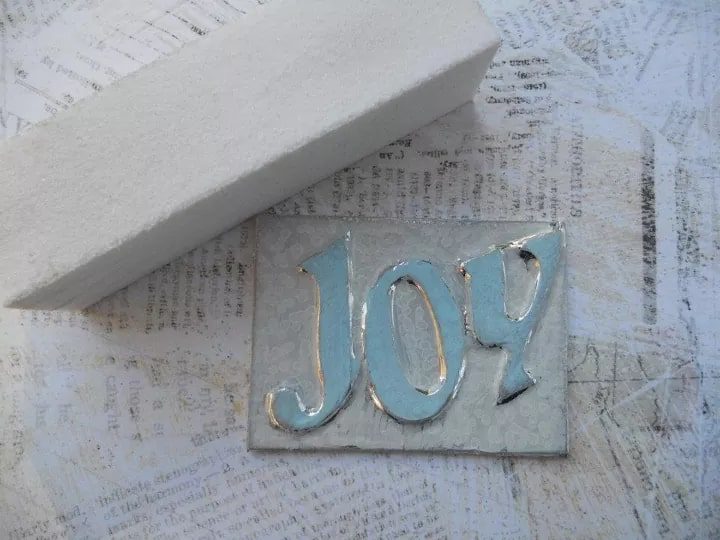
5. DIY wooden plaques
Wood burning, also known as pyrography, is a great way to create unique and personal decor pieces for your home. Not only is it a fun and interesting hobby, but it can also save you money by allowing you to create one-of-a-kind pieces. First, find a design that speaks to you.
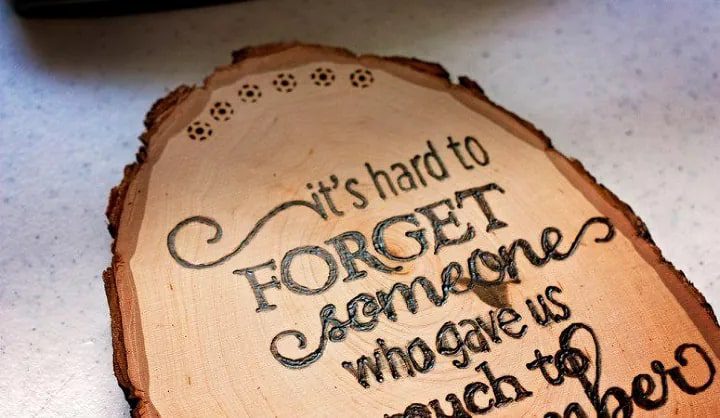
You should have a few things to get started with wood burning, such as a wood burning tool, some wood, and some paint or stain. You may find all of these items at your local hardware store. Make sure to wear gloves and use protective eyewear.
6. DIY faux polished countertops
Have you wished your laminate countertops looked like polished stone? Don’t spend hundreds or thousands of dollars on it when you can DIY this upgrade. All you need is some gel stain, shimmery paint, and a little elbow grease. Apply the gel stain to your countertop in a thin, even layer. Let it dry for at least 24-30 hours.
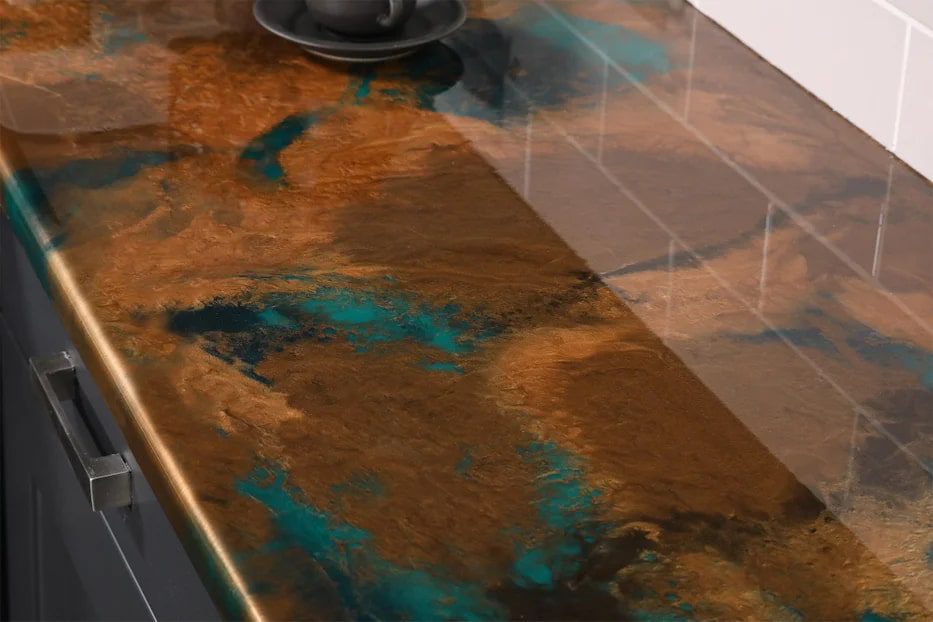
After it dries, paint over it with shimmery paint. Again, make sure to use thin, even layers. You can start buffing the countertop with a soft cloth. Keep buffing until you get the desired shine. And that’s it! You now have a beautiful, polished-looking stone countertop.
7. Wall makeover with watercolors
Here’s an idea to spruce up your blank walls without using harsh paints. Consider giving them a watercolor makeover! This project is easy and can be done on the weekend. And it’ll add some vibrant or monochrome colors on your walls. You’ll need watercolors, brushes, masking tape, and gloves.
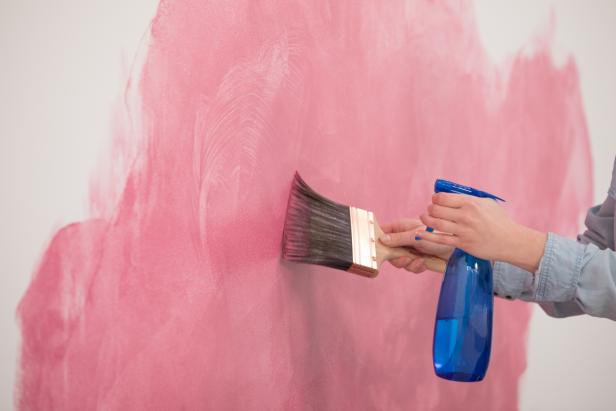
Start by applying the paper to the wall. Then, using paint brushes, create different patterns and designs over the wall. You can go for an abstract look or paint something more specific. Just have fun with it! Once you’re finished, let the paint dry, and then remove the tape from the corners.
8. Metal paint for an aged look
One way to give wood an aged look is to use metal paint or a metallic glaze. You can also achieve a metallic aged look by using metallic wax. Use a metal paint primer on your wood surface before applying your metallic paint.
Apply a thin layer of metallic paint to your wood surface, and let it dry completely. Follow it with a second coat, if needed. Use a sealant to protect your metallic paint finish. You can do this with old tables, credenzas, chairs, and dressers.
9. Stain using glue
Have you ever had a project where you were working with wood and glue and accidentally created a design? Instead of freaking out over mistakes you made, why not turn it into art? There are a few ways to get creative.
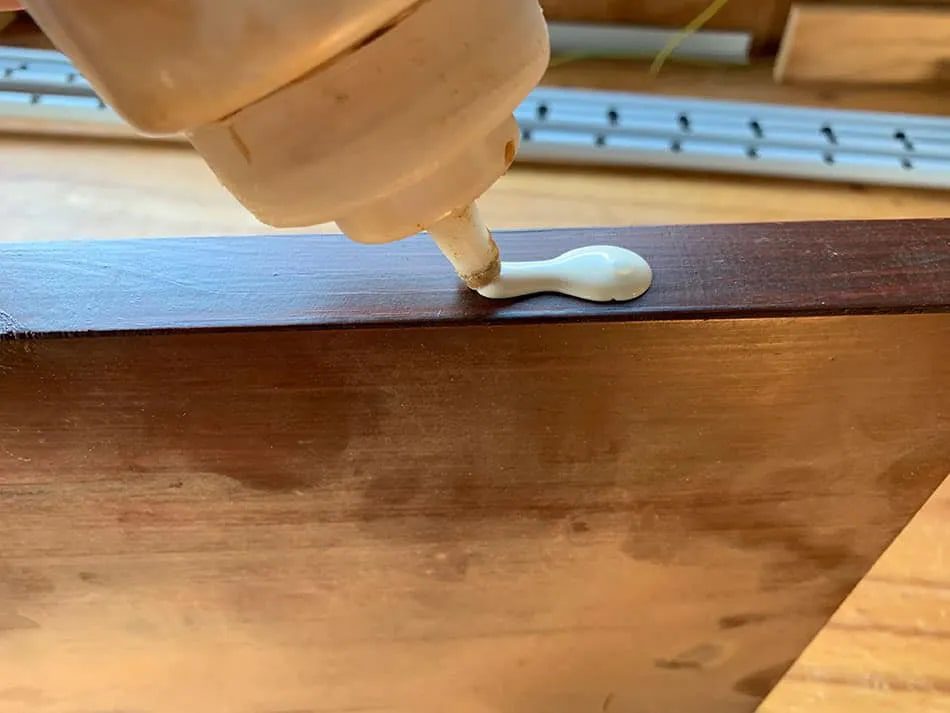
One is to a good wood use glue or Mod Podge on bare wood with a stencil to create a design, then stain over it. You can create unique designs using glue before staining. This will give you the desired effect on an old piece of furniture instead of discarding it.
10. White floral napkins
Try pressing flowers on white napkins! This simple DIY project is a fantastic way to personalize your housewares. This project requires a hammer, white napkins, and flowers. Start by gently pressing the head of the hammer into the center of the flower.
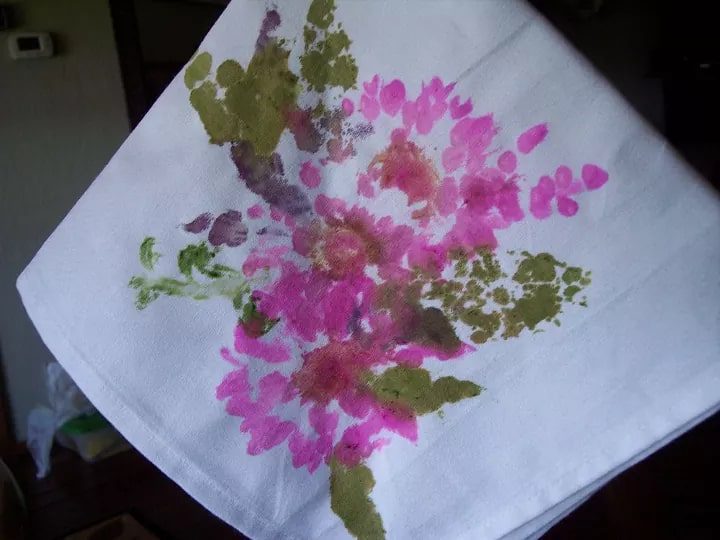
Slowly and evenly tap the hammer around the edge of the flower to create a pretty stamped effect. Repeat with additional flowers until you’ve created the desired look. When done, remove the flowers to reveal the beautiful pattern. Now you have one-of-a-kind napkins your guests will love.
11. Soap for a vintage effect
Adding a distressed look to a photo frame is easy with soap. This project is easy to do and only requires a few supplies. You’ll need a wooden photo frame, soap, paintbrushes, and paints. Rub soap over the frame and paint it with vibrant color.
After drying, use sandpaper, and the areas with soap will come off quicker, giving it a vintage look. You can display this frame in your living room, family room, or bedroom. This may also work as a personalized gift with your pictures for a loved one.
12. Floss and wire flowers
Adding floral art can create a focal point in any room. Instead of wasting money on fresh flowers every week, make your own flower decor using wires and wool thread. Cut a strip of wire at least 15 inches long. Bend the wire in half to form a loop.
Create a center spiral by twisting the wire in the middle. Cut a piece of wool and tie one end of the wool around the spiral. Wind the wool around the spiral, twisting it as you go. Repeat this process several times and make a bouquet!
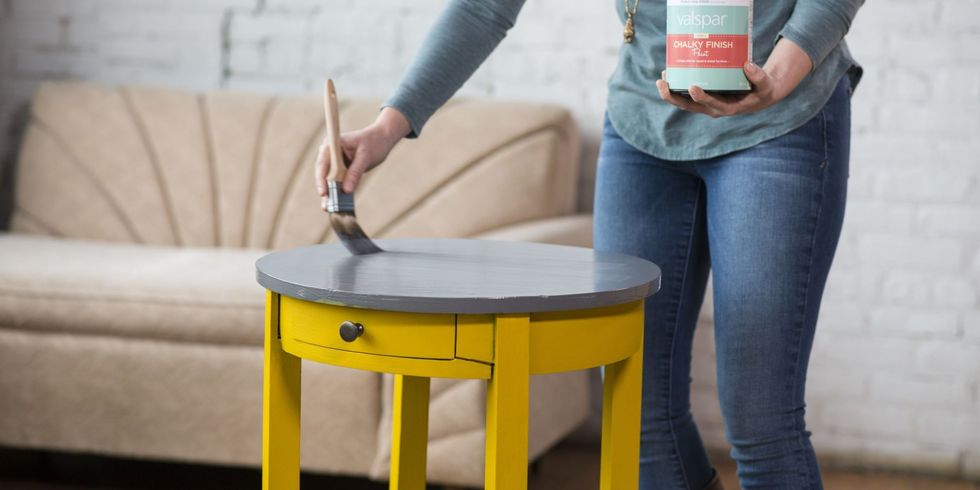
13. Magic of chalk paint
Chalk paint is a great way to upgrade carved surfaces. It’s easy to use and can give any furniture a new look. Or, you can use it to add an extra pop of color in any room. It’s essential that you work on a clean surface, so make sure to wipe away any dirt before you get started.
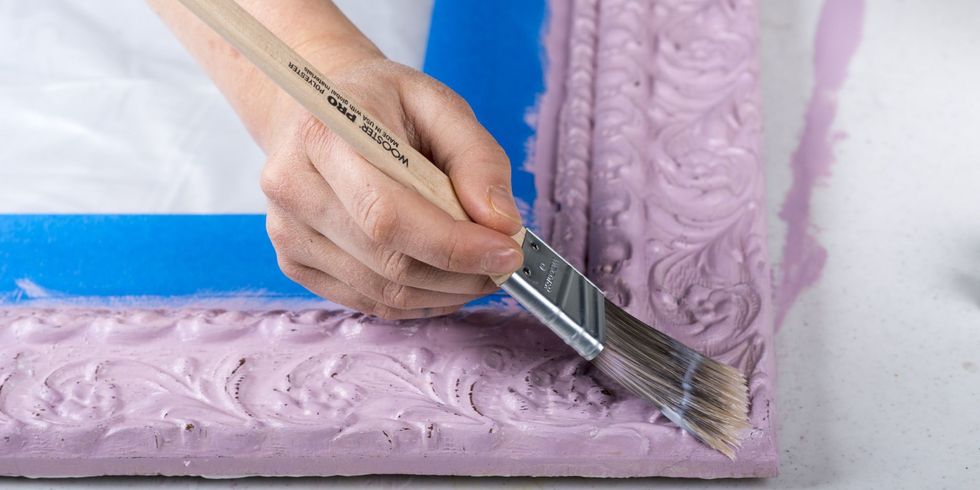
Apply a primer to ensure the chalk paint adheres to the surface better. Paint in thin coats rather than glopping it all on in one go. This prevents dripping or pooling. Once the paint is all dry, you’ll want to seal it with a clear sealer to protect the paint.
14. Fan decor
Wooden fans are a great way to add a touch of elegance to your home decor. They may be used to accentuate a wall or to provide a focal point in a room. Wooden fans come in various sizes and styles, so you can find the perfect one to fit your space.
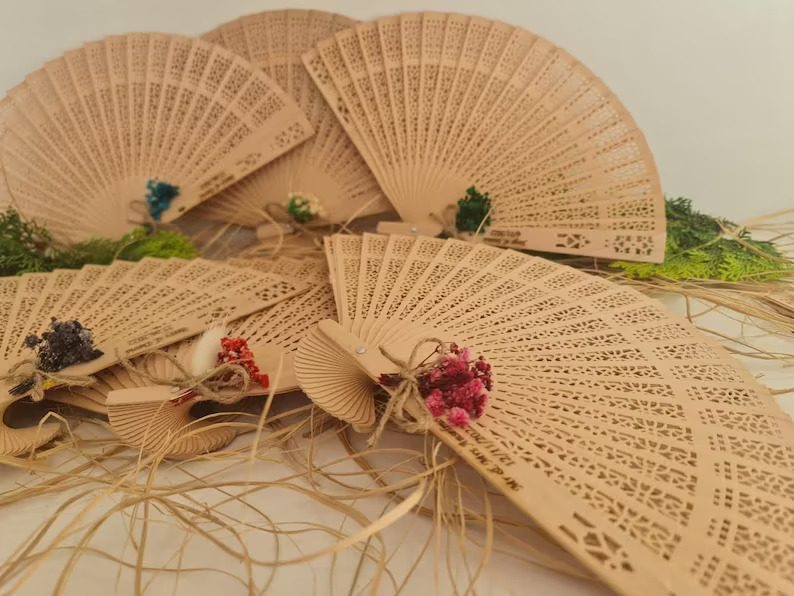
Consider mixing small and large wooden fans as wall decor. You can make these using thin plywood and some beginner-level handyman skills. You can also paint the wood with dark tones or stick some embellishments or feathers on the fans for more flair.
15. Decoupaging kitchen art
Try decoupaging dollar store candle holders and a plate to make a classy fruit platter! Grab some dollar store candle holders, a few plates, Mod Podge, stencils, and metallic craft paint. Start by thoroughly cleaning your candle holders and plate.
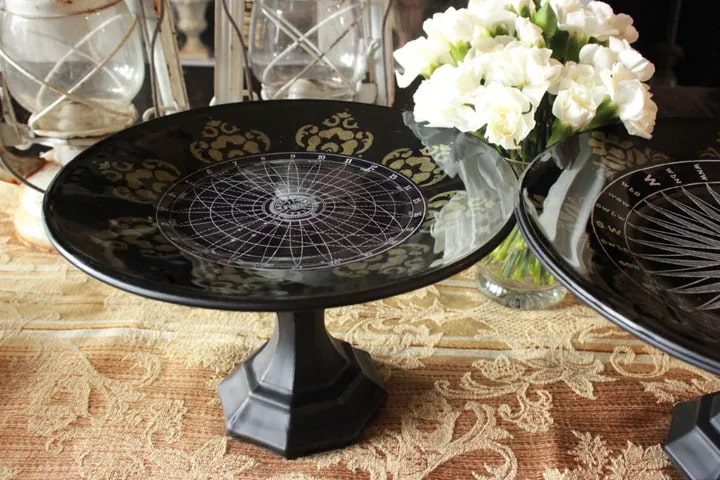
Apply a Mod Podge layer to each piece’s back, and then adhere to the candle holder and plate. You may apply another layer of Mod Podge over the top. Allow drying completely. Use the stencils and metallic craft paint to add more dimension to the plate.
16. Blend different paints
When it’s about breathing new life into old furniture, one of the best things you can do is play with different colors and textures. This can help to add some new movement and interest to any piece. Blend different paints to create a whole new look that is both unique and eye-catching.
It’s also a great way to add new depth and dimension to any piece of furniture. You may be shocked at how much of a difference this blending technique can make. Use different shades while blending them with the natural stain of the wood.
17. Flower container lids
This is a cheap and enjoyable way to add decoration to your home. Dip dollar store flowers in plaster of Paris and then stick them to container lids! This is an enjoyable and easy project for adults and kids. You’ll need dollar store flowers, plaster of Paris, glass containers, and some strong glue.
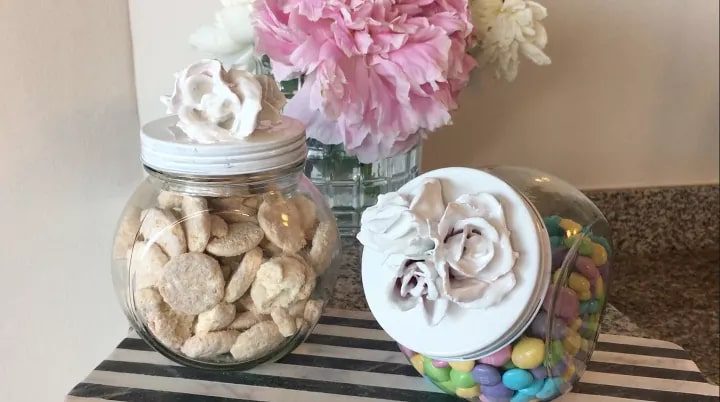
Begin by preparing your container lids. You may sand them down a bit so that the plaster of Paris will adhere properly. Next, mix up your plaster of Paris. Dip each flower in the plaster of Paris and then stick it to a container lid. Allow the plaster of Paris to harden completely.
18. Colorful pillowcases
Designer pillow covers can be expensive, but if you want to change up your house goods, you can save money and make your own. Plus, it’s a great medium to upcycle old fabrics. Apart from this, if you have a special event coming up, you can make these the theme or décor.
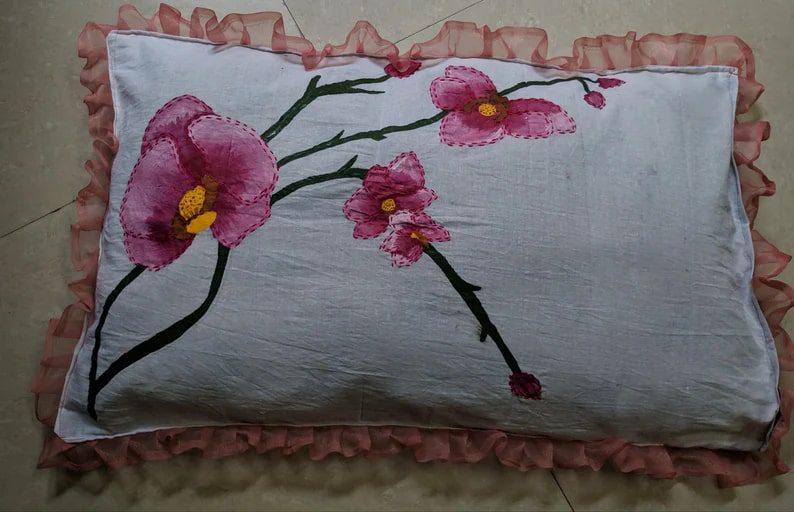
Among the easy ways to add interest to a pillowcase is to use glue as a stencil for patterns. You may create all sorts of designs with glue and then paint them for a unique look. This is a great weekend project that can be done in only a few hours.
19. Herringbone design wall
There’s no denying that accent walls can add visual interest to a room. But if you get too ambitious, they can look overdone and busy. Try the herringbone design technique if you’re looking for a more subtle way to add an accent wall to your space. Paint your wall in a base color.
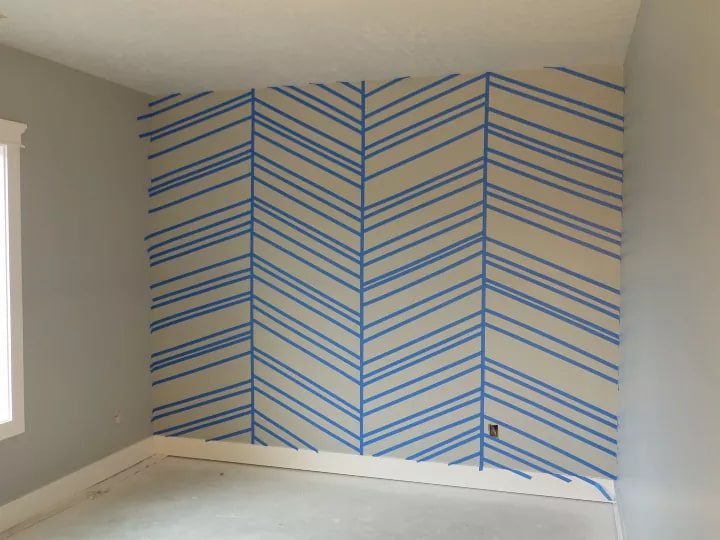
Then, create a herringbone pattern on your wall using painter’s tape. Paint over it with your accent color. You’ll be left with a chic, eye-catching accent wall when you remove the tape. This technique is effective with two colors of the same family, such as light blue and your base color in navy.
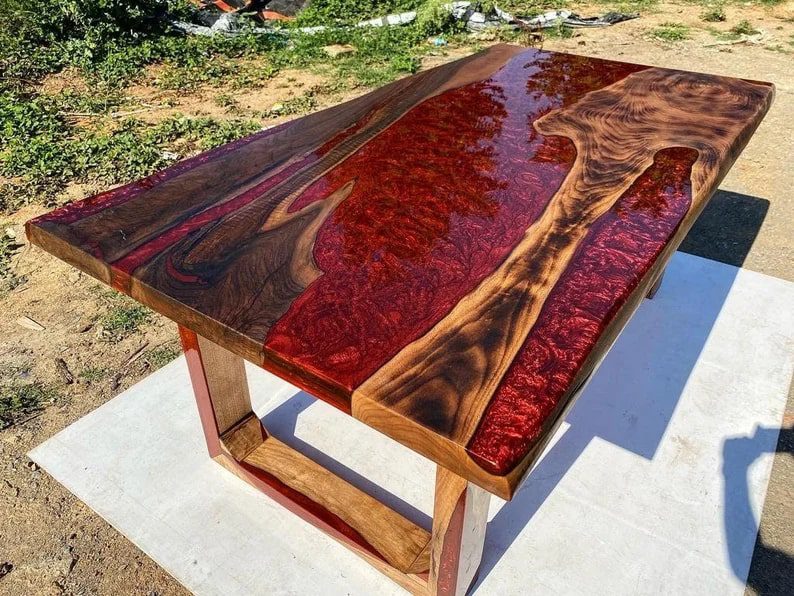
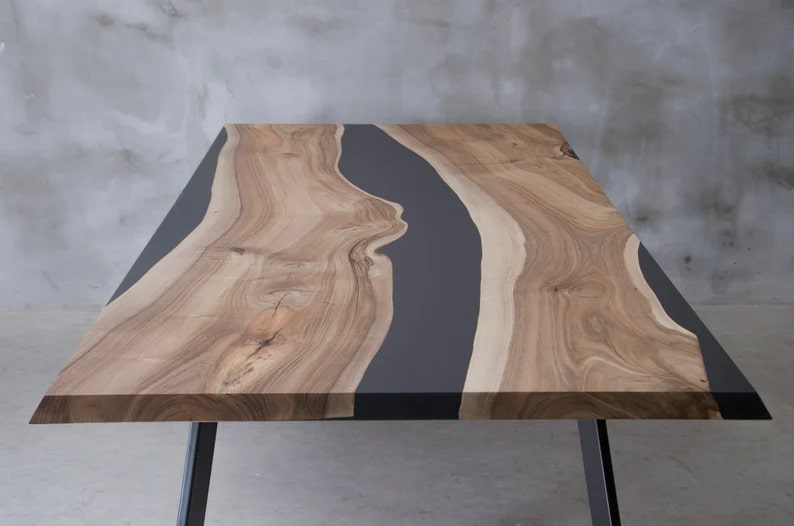
20. Wood grain effect
Enjoy a touch of elegance to your furniture without spending a fortune. Try to incorporate a faux wood grain tool while painting wooden furniture to give it a rich, wood grain look. With a little paint and this handy tool, you can easily add depth and dimension to your furniture.
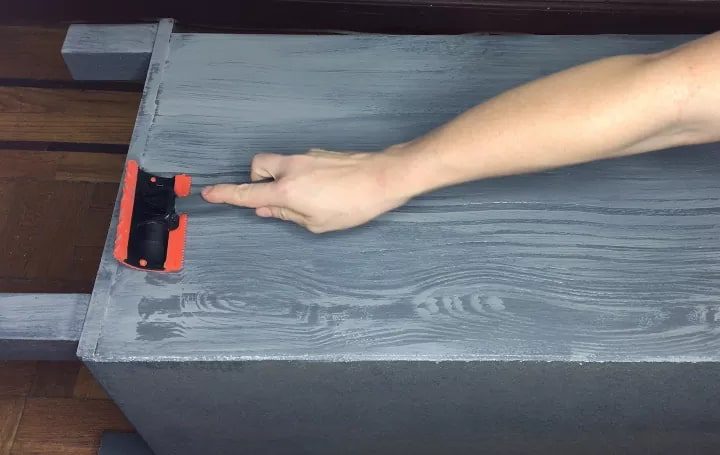
Sand down your furniture piece to create a smooth surface. Apply a base coat of paint to the furniture. Once the base coat is dry, add the wood grain. Begin by dipping the wood grain tool into the paint. Start at one end of the furniture and use the tool to create sweeping strokes.
21. Stenciled accent wall
With a little effort, you may turn a plain wall into a work of art using wall stencils and premixed joint compound. This technique is called “pouncing,” and it’s a great way to add interest to any room. Pouncing is easy to do and doesn’t require any special skills.
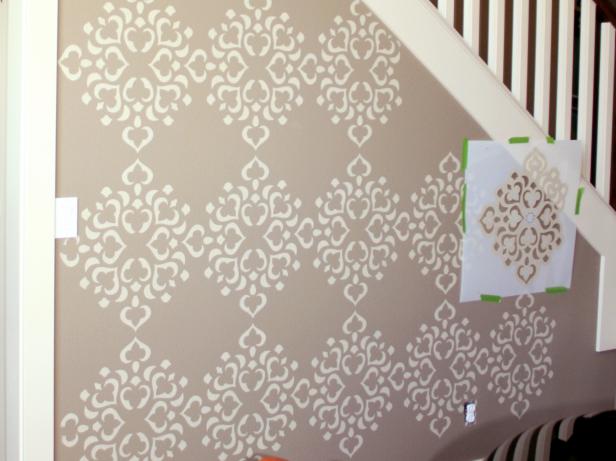
Simply tape your stencil to the wall and use a pouncer to apply joint compound through the openings. As you work, lift the stencil occasionally to check your progress. When you’re finished, remove the stencil and repeat the same process until the whole wall is covered. Enjoy your new wall decor.
22. Eggshell finish on steel wood
Steel wool is a great tool if you want to remove shine from painted furniture. Steel wool will remove the glossy finish from the paint, giving you a more matte look. This is an easy task if you want less bright furniture.
The steel wool will scrub away any shine, varnish, or glossy paint to leave behind an eggshell finish. You may also do this for new furniture to add a worn-out look. Vintage furniture is in right now, and this is relatively cheaper than buying old furniture pieces.
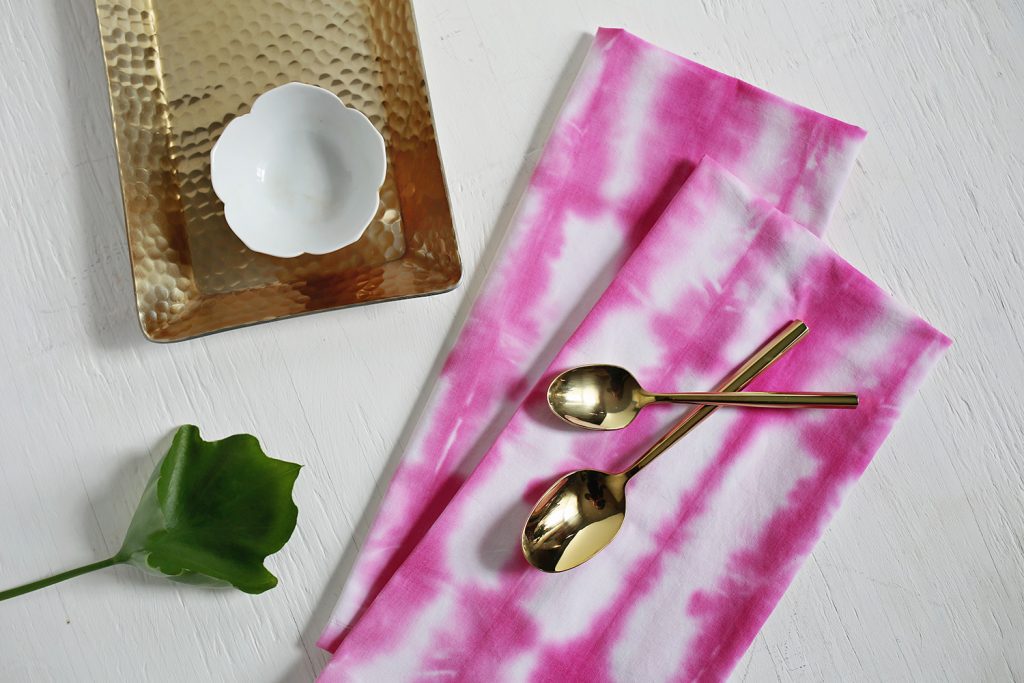
23. Icy linen dye
Try using ice cubes to create a one-of-a-kind dye effect. This fun technique is surprisingly easy to do and gives your fabric a cool, textured look. Simply add your desired dye to the ice cubes placed on the tied fabric. Let it stay for a few minutes.
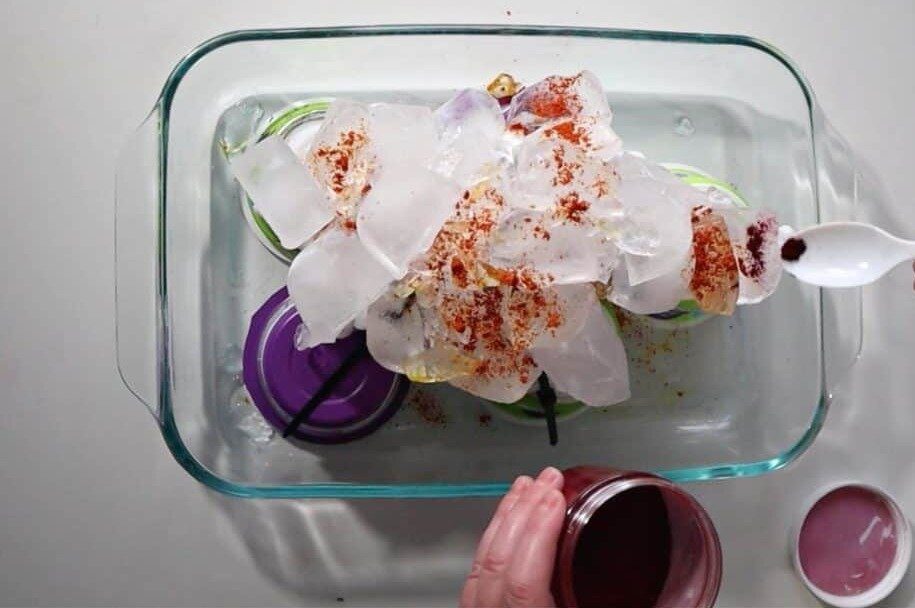
Once the die has left a desirable color, wash the fabric and let it dry. The best part about this method may be that it’s easy to experiment with different colors and shades. So have fun and see what amazing effects you can create. You may use this technique on different fabrics.
24. Lace texture furniture
Whether you’re aiming to bring a touch of elegance to your home décor or furniture or simply wish to give an old piece a new lease on life, adding a lace design with Textura Paste is a unique option. Using a lace design on wood pieces is relatively easy.
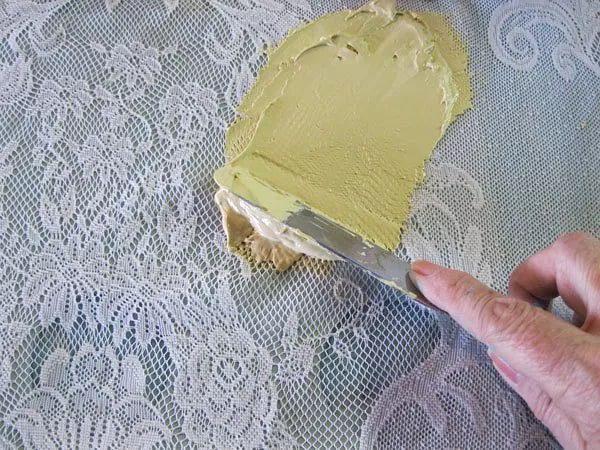
You’ll need to cut your lace to the desired size and shape. Next, spread a thin layer of Textura Paste over the lace, making sure to smooth it out as best as possible. Once the paste is dry, you may paint or stain your wood piece as desired.
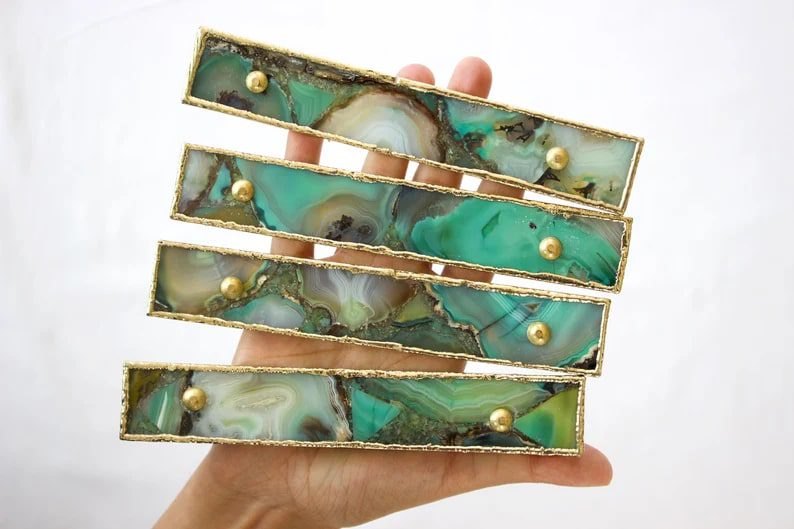
25. Stones on the shelf
Place some stones as a decoration piece for a unique and stylish vibe. Round stones are a versatile decoration option that can add a touch of whimsy to any space. You may use them to create a tableau on a shelf or even create a piece of art by arranging them in a certain way.
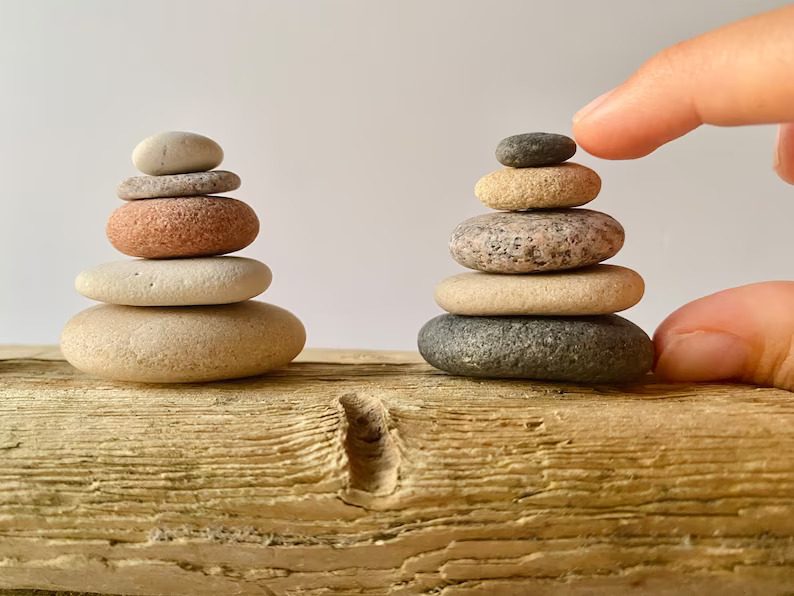
These river rocks are easy to find at stores or just look around in nature. If the natural color doesn’t fit your room’s theme, add a bit of paint. With this minimal upgrade, your shelves will brighten up without changing too much of the surroundings.
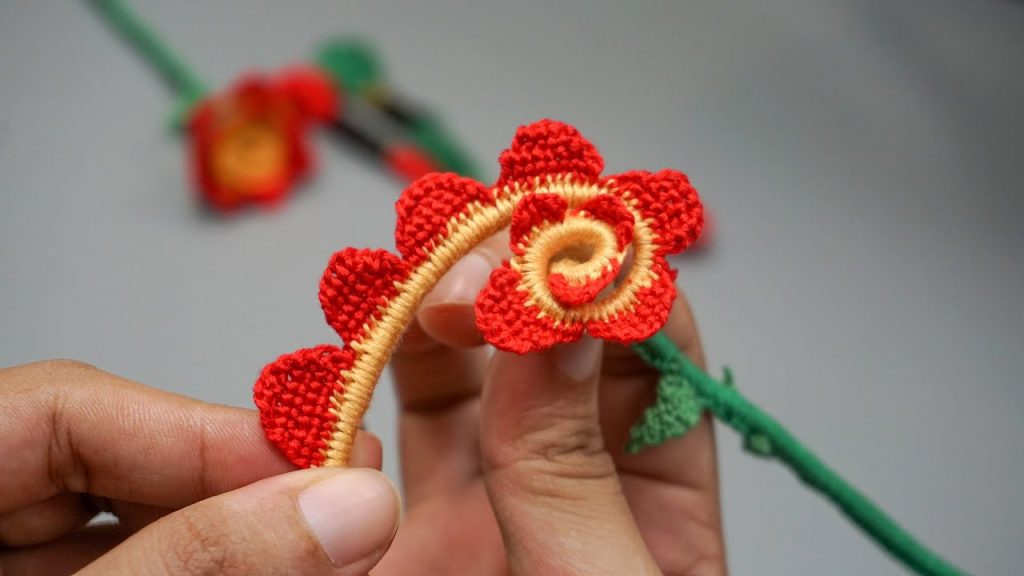
26. Crocheted fruits
Why not try crocheting some fruits for funky decor? This is a unique take on fruit decoration. To get started, you’ll need some basic crocheting supplies. Yarn in different colors, a crochet hook, and some stuffing. If you’re unsure how to crochet, there are plenty of online tutorials.
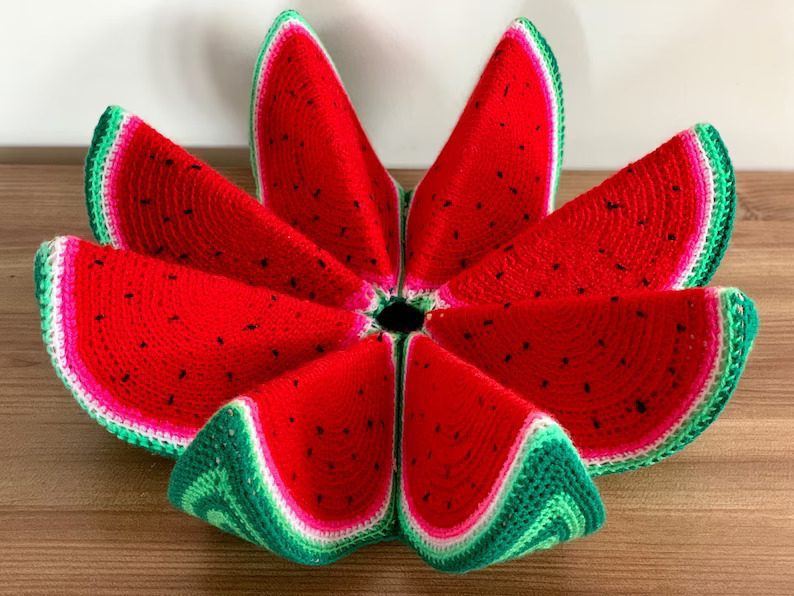
After learning the basics, you’ll be able to make all sorts of different fruits. Crochet some lemons for a sour touch, watermelon for a red punch, and oranges for a juicy pop of color. Crocheted fruits are perfect for home decor, and they also make thoughtful presents.
27. Mushroom wall art
DIY your own 3D mushroom wall art using wood and clay! This project is perfect for crafty people looking for a unique decoration to tackle. Start by creating a mushroom shape out of clay. Once you have the desired shape, use a knife or sharp object to score lines into the clay.
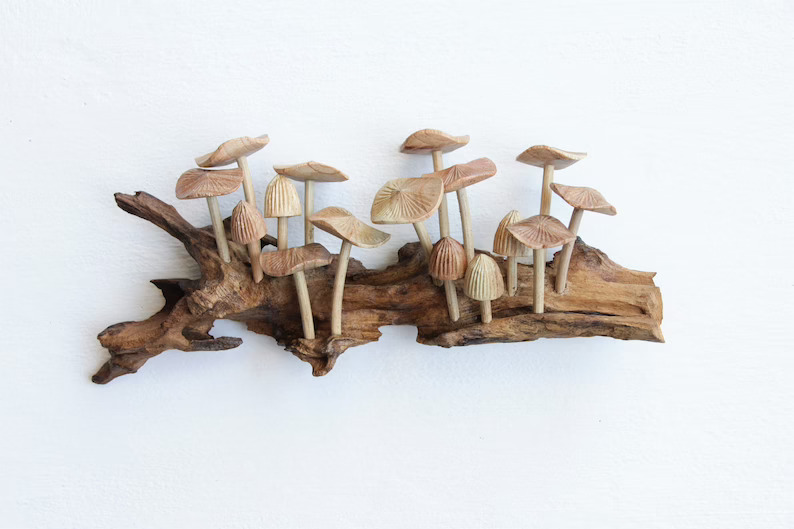
This will help the paint adhere to the clay later on. You may use any color paint you like, but we suggest choosing a light color, like brown or cream. Once the paint is dry, attach the mushroom to a piece of wood.
28. Boho pom pom pillow
Pom poms offer a touch of whimsy to any project and are ideal for pillows! If you’re looking for a boho-chic look, try making some pom poms and stitching them onto a plain pillow. To make pom poms, you’ll need some yarn and a pair of scissors. Begin by wrapping the wool yarn around your fingers.
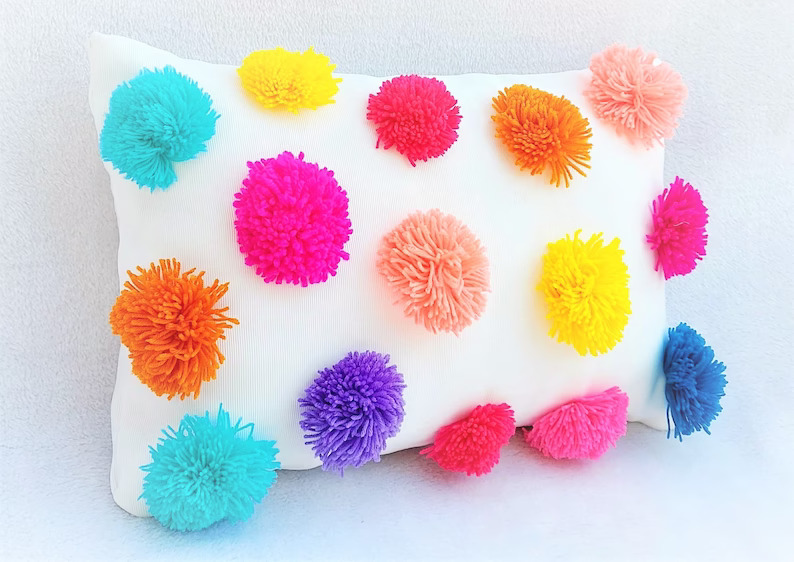
When you have a decent amount looped around, carefully slide the wad off your fingers and tie it all in the middle with another piece of yarn. Cut the loops at the end and trim the pom pom to shape it. Once you’ve made your pom poms, simply stitch them onto a pillow cover using a needle and thread.
29. Metal foil technique
You can make wall signs and hangings using metal foils often used for home ductwork. Stop by the hardware store for this project to get some metal foils, chipboard letters, and strong glue. Begin by gluing the letters on the foil and letting them dry.
Use a bone folder to file the letters and the metal sheet. You may have to cut the metal sheet, so the letters have even spacing on the sides. After this, you may color the letters or use glitter on them. Make it a wall hanging piece by sticking it to cardboard and a ribbon.
30. Shibori-styled picnic blanket or napkin
Why not try your hand at a Shibori-inspired picnic blanket or napkin as a fun summer project? You may read an easy tutorial to learn how to create a beautiful and unique blanket perfect for a summer picnic. You’ll need a blanket, fabric dye, rubber bands, a bucket, and wooden blocks.
Divide your fabric into small sections using rubber bands while placing it between the rectangular wooden blocks. Wet the fabric by submerging it in a bucket or basin filled with water mixed with dye. Give the fabric a few hours to soak, then unfold the blanket and leave it in the sun.
31. Bright chalk paint furniture
Chalk paint has become an easy go-to for many as it’s non-toxic and easy to use. This trending technique is a great way to add some personality to your old furniture pieces. Plus, it’s relatively cheaper to do! Grab some bright chalk paint and a few simple supplies (e.g., paintbrushes).
Once you have everything you need, simply start painting with different colors! Smooth, even strokes will give you the best results. If you’re unsure what design to go for, there are plenty of online chalk painting tutorials. Just do quick research, and you’ll find tons of inspiration.
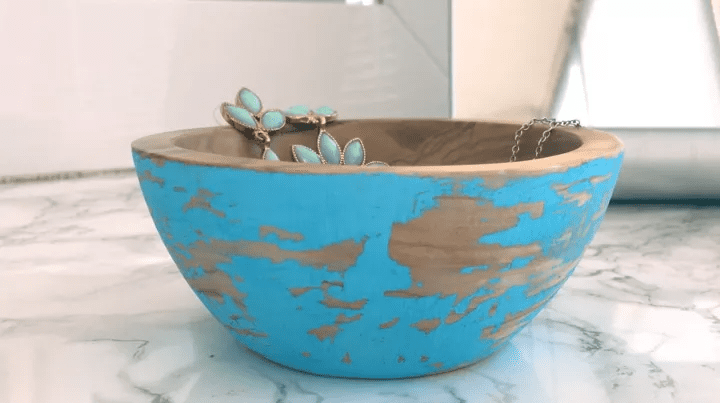
32. Painted mason jars
Mason jars are simple and inexpensive tools in any DIY décor project. These jars are the perfect blank canvas for creative projects! One way to add your own touch is to paint and distress the jars. Or, add a design to the jars to make them look vintage.
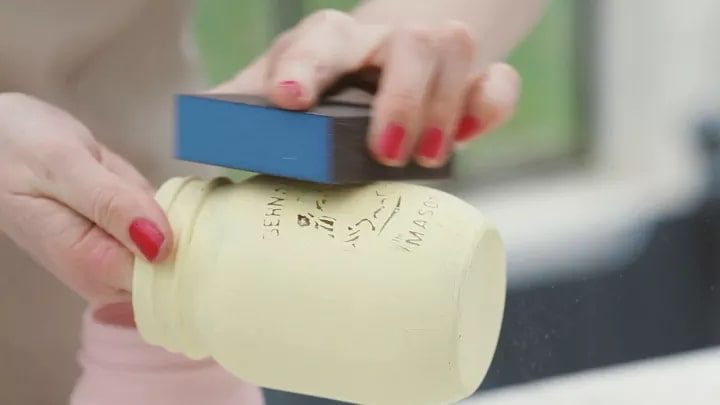
Begin by painting your jars with your desired colors. You may paint them all one color or get creative and paint them in various colors. Once the paint is dry, scrub with sandpaper to distress the jars. This will give them a beautiful, shabby chic look. Fill the jars with flowers or candles.
33. Fancy gold furniture upgrade
Gilding furniture is a great way to add a touch of luxury to any piece. Gold leaf sheets are quick and easy to use, offering furniture an ornate look. Furniture upgraded with these will give your home a royal look without breaking the bank to buy such pieces.
Start by sanding the furniture piece to create a smooth surface. Apply a layer of gold foil to the furniture. Cut the gold leaf sheets into small pieces and apply them, starting at the edges and working your way in. Once all the gold sheets are in place, brush on a layer of sealer.
34. Book wall art
If you have old books that are falling apart, time to turn those into something artistic. Choose several books that you don’t mind sacrificing for this DIY. Decide on the design for your wall art. Roll the pages of the books tightly. This will create a uniform pattern to go on the wall.
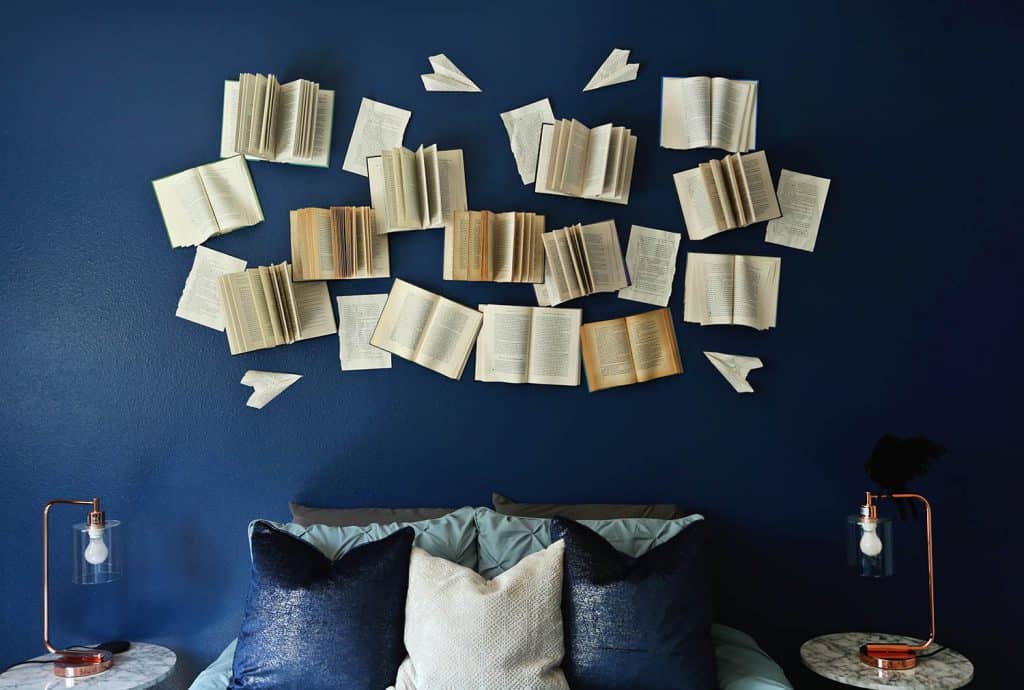
Use a strong adhesive to attach the pages to a piece of cardboard. You may also stick these directly to the wall. Another way to use books as decor is to make a giant canvas of open books and paint something abstract on them.
35. Fun styrofoam vases
Do you have any extra styrofoam cups lying around? If so, put them to good use and transform them into funky flower vases of different shapes. Then, use some fresh flowers to brighten your space. You can start by cutting the cups into different shapes.
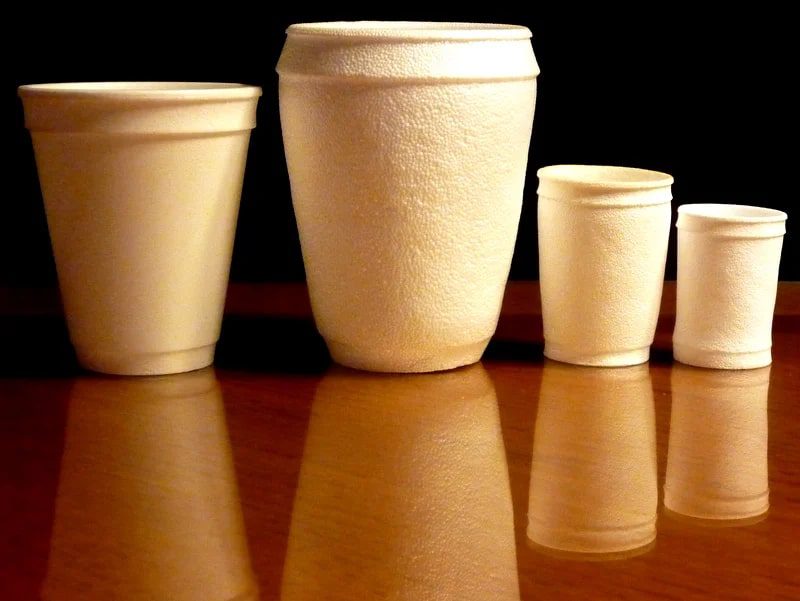
Once your shapes are designed, attach them together with a hot glue gun. Now it’s time to add the flowers. Pick your favorite blooms and arrange them however you like in the vases. You may even add some greenery for a touch of color. Display your vases on a windowsill or coffee table.
36. Lattice light fixture with greenery
If you need to change the light fixtures in your house, we have an idea that might be appealing to you if you don’t mind a little DIY project. You can increase the light in your house using lattice string lights, commercial cable ties (pick extra strong ones), ceiling hooks, and some faux greenery.
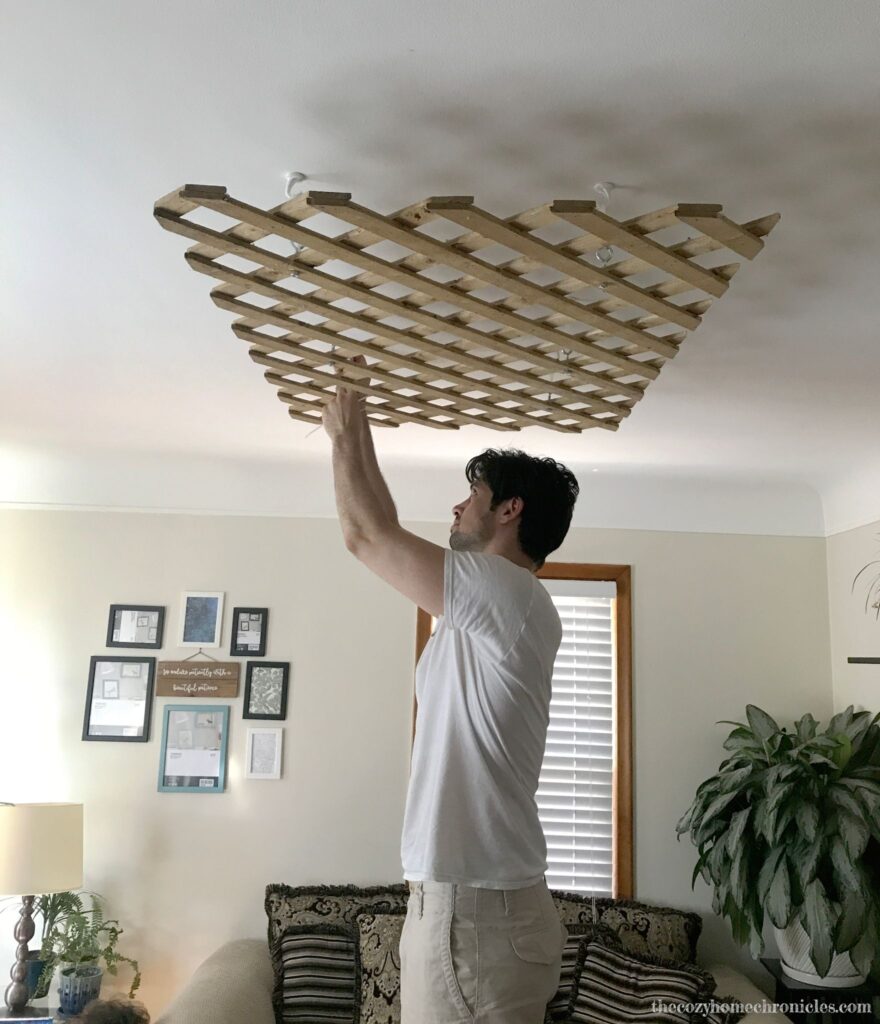
Start by drilling symmetrical holes in the lattice and drill corresponding holes in the ceiling. Next is to set up the ceiling hooks. Ensure this is done perfectly so the lattice is secure. Weave your lights and the cable ties through the lattice. Add the foliage, then hang the lattice using the cable ties.