
Creative Crates: 40+ Ways To Turn Old Crates Into Stylish Storage
One of the best to add a touch of rustic or vintage charm to your home is by repurposing old wooden crates. There are plenty of creative ideas out there, and you can let your creativity shine. The true magic of wooden crates is in their ability to create storage options that are cheap but stylish. Who doesn’t like affordable chic decor?
There are heaps of other great uses for old crates. For example, you can use them as planters and line them with burlap or other fabric for a more finished look. Truly, the possibilities are endless when it comes to repurposing old wooden crates. So, get creative with the following wooden crate ideas and see what you can come up with!
1. Shoe storage cubbies
Old wooden crates can make for excellent shoe storage, and they can be easily repurposed into something new with a little bit of paint. Firstly, you’ll need to find some supplies. You’ll need wood crates, sandpaper, primer, paint, and hooks. Start by sanding down the crate surface.
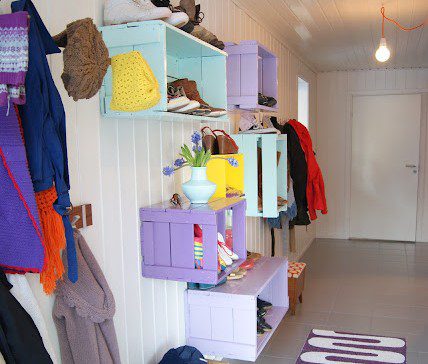
This may help the primer and paint adhere better. Apply a coat of primer to each crate. Once the primer is dry, paint the crates in your desired color. Allow the paint to dry before hanging the crates on the wall. Use Command strips or screws and nails.
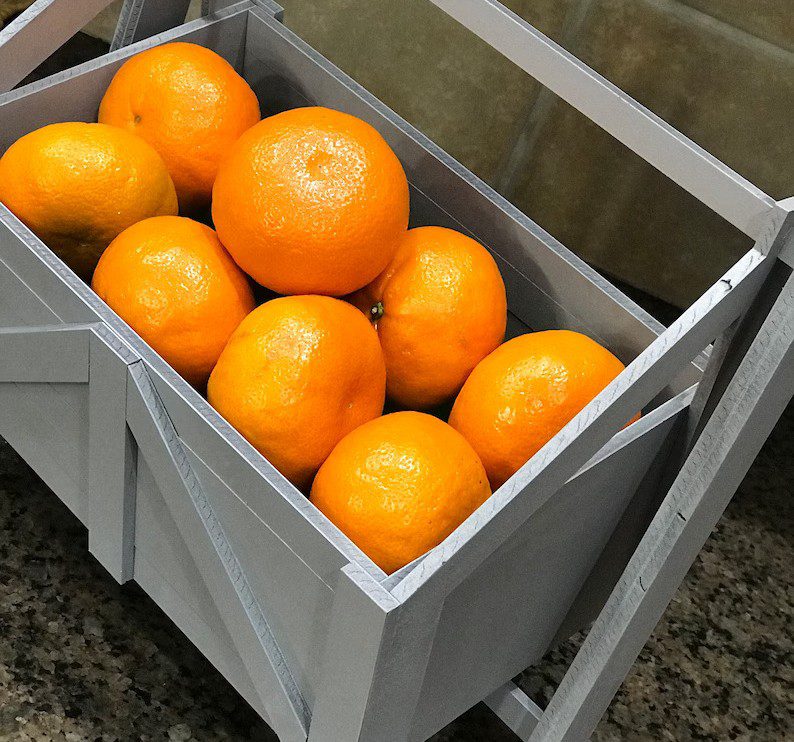
2. Farmhouse fruit display basket
If you have an old wooden crate, put it to good use by repurposing it into a farmhouse-style fruit display basket. This is a great way to add a rustic touch to your kitchen decor, and it’s a practical way to store and display fruit. Start by giving your crate a good cleaning.
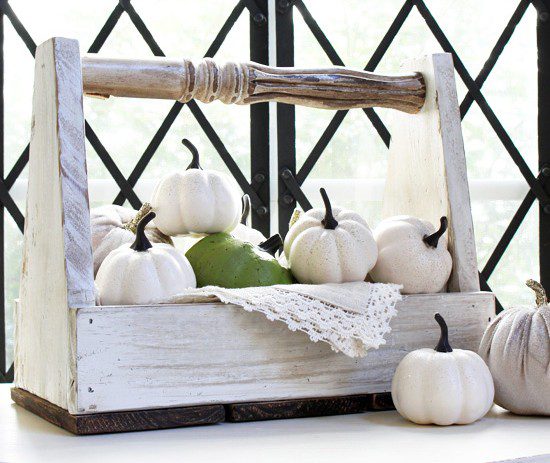
If the wood is looking tired, give it a light sanding. Once the crate is clean and prepped, paint it in your desired color. White paint was used to achieve this classic farmhouse look. After the paint is dry, line the inside of the crate with sheet moss to protect your fruit from getting scratched.
3. Upcycled storage ottoman
One of the great things about old wooden crates is that they can be repurposed into different pieces of furniture. For example, you can create a storage ottoman. This is perfect if you want to add extra storage to your home without breaking the bank.
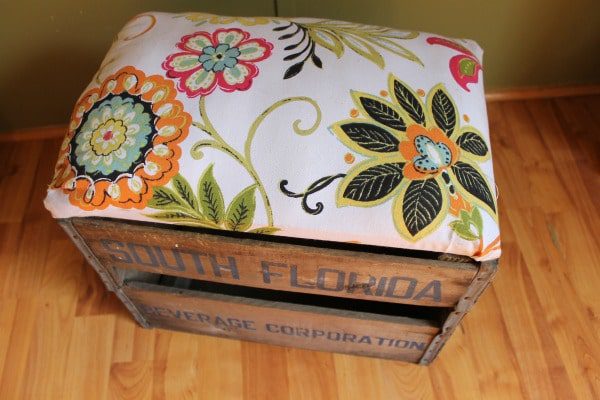
To make a storage ottoman out of an old crate, you will need one old wooden crate, plywood, foam padding, fabric, a staple gun, and scissors. Cut the plywood to fit the bottom of the crate. Add the foam padding and cover it with fabric. Secure the fabric using the staple gun.
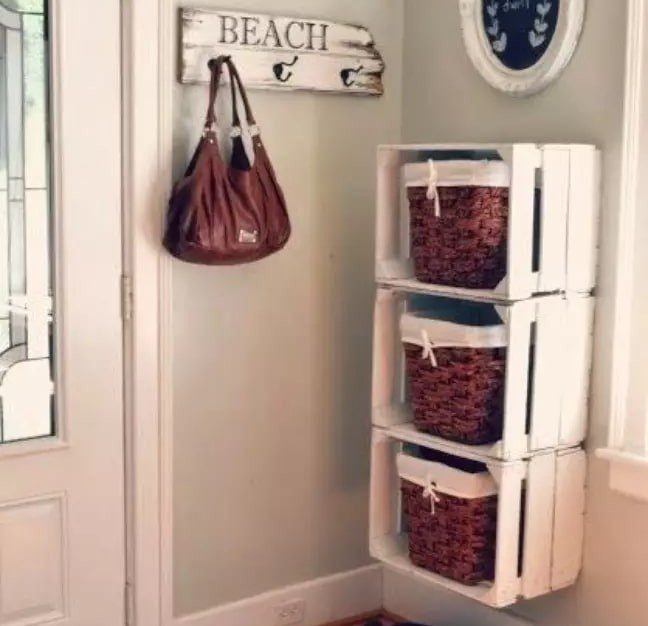
4. Crate lockers
Another creative way to use old wooden crates is to turn them into vertical storage lockers. This is a great storage solution for small spaces or if you have children who like to keep their belongings separated. This project is pretty effortless, too.
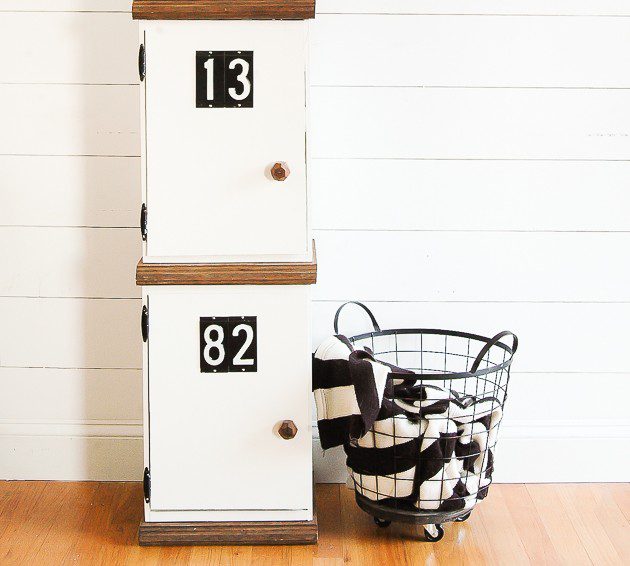
Once your frames are assembled, you can add pizazz with some paint or stain. Then, screw the crates into place. And you’re done! You now have a set of vertical storage lockers that you can use to store just about anything.
5. Crate ottoman
If you have old wooden crates, put them to good use with this easy DIY project. Turn them into a stylish and functional ottoman. This is a fantastic option to repurpose those crates and add extra seating or storage to your space. Stack the crates if you’re using more than one.
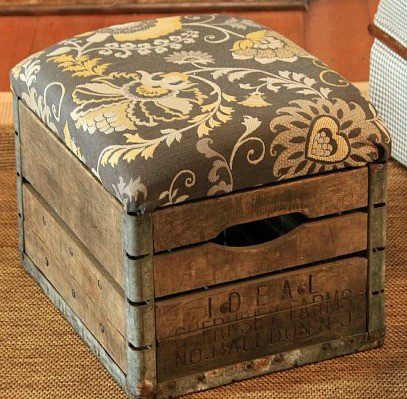
Cut a piece of plywood that is big enough to fit on top of the crate. Secure the plywood to the crates with screws and washers. Next, add some foam padding to the top of the plywood. Cut the fabric to fit over the foam and staple it in place. Et Voila!
6. Wooden pet bed
Your furry friend will love snuggling up in their new crate bed, and you’ll love the rustic charm it adds to your home. To make your pet bed, measure the interior of the crate. Cut a piece of plywood or foam to fit snugly inside the crate, then cover it with fabric.
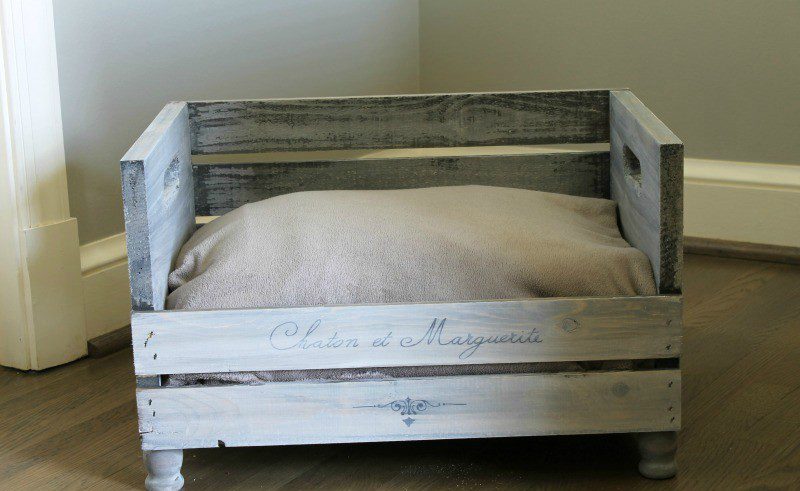
You can use an old pillowcase or sheet or buy some cute fabric from the store. Make sure whatever you use is machine-washable to keep it clean. Once your fabric is in place, stuff the crate with blankets or pillows to make it cozy.
7. Toy storage crates
One great way to declutter your kids’ room is to repurpose old wooden crates into toy storage. This is a super easy project that you can do in the afternoon, and it will help keep your kids’ room tidy and organized. To start, gather up any old wooden crates you have around the house.
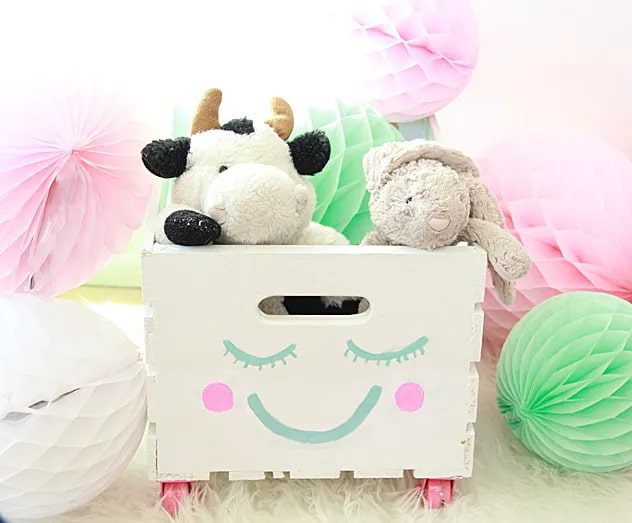
You can also find crates for cheap at yard sales or thrift stores. Once you have your crates, decide how to arrange them in the room. You can stack them, line them up against a wall, or even create a custom storage unit by attaching them to each other.
8. Books wall storage
One of the most creative ways to use crates is to turn them into wall-mounted bookshelves. This is great for storing books in a small space and makes a unique and exciting design. Start by selecting a few sturdy crates to support the weight of your books.
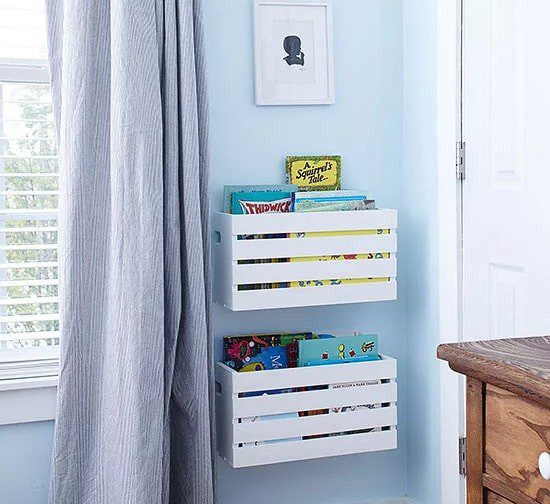
Once you have your crates, use screws or nails to attach them securely to the wall. Depending on your preference, you can stack them vertically or arrange them horizontally. If you want, paint or stain your crates before hanging them.
9. Fabric lines shelves
If you have old crates lying around, don’t throw them out! With a little DIY magic, you can turn them into wall shelves that are both stylish and functional. Begin by lining the inside of the crates with fun fabric. This will add a pop of color and personality to your shelves.
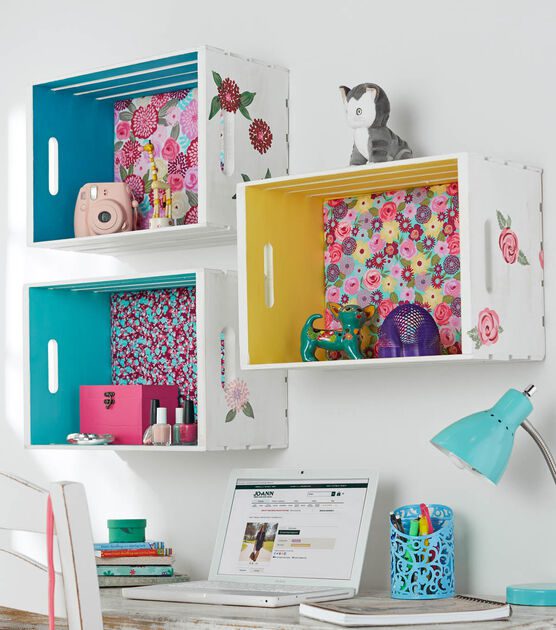
Once the fabric is in place, use screws or nails to attach the crates to the wall. Ensure that the crates are evenly spaced and level before fixing them together. Now it’s time to fill your new shelves with whatever you want! Books, knick-knacks, plants; the sky’s the limit. Enjoy your new DIY project!
10. Coffee table
This next hack will not only help you save money, but you’ll also get a unique piece of furniture that no one else has. To turn old crates into a coffee table, you’ll need 4-6 old wooden crates and 1 sheet of plywood, along with some tools.
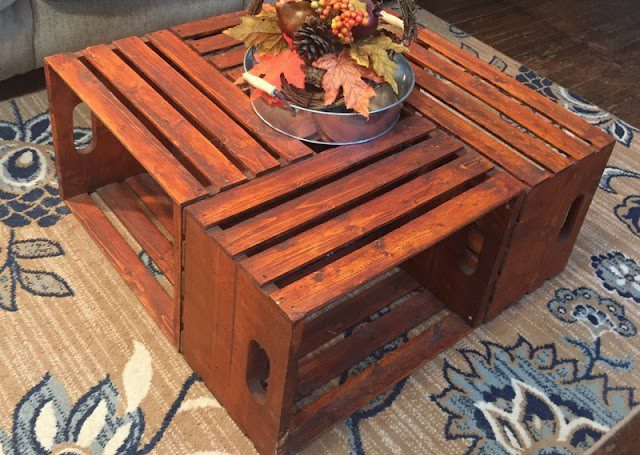
You can also get a stain or paint to jazz up the table or leave it raw for a vintage look. Cut the plywood to fit on top of the crates. Sand down the edges so they’re smooth. Apply a layer of polyurethane to protect the wood.
11. Crate bookcase
Put old crates to good use by turning them into a bookcase! This is a creative way to upcycle forgotten crates and add much-needed storage to your home. To make a crate bookcase, start by measuring the crates and deciding how you want to arrange them.
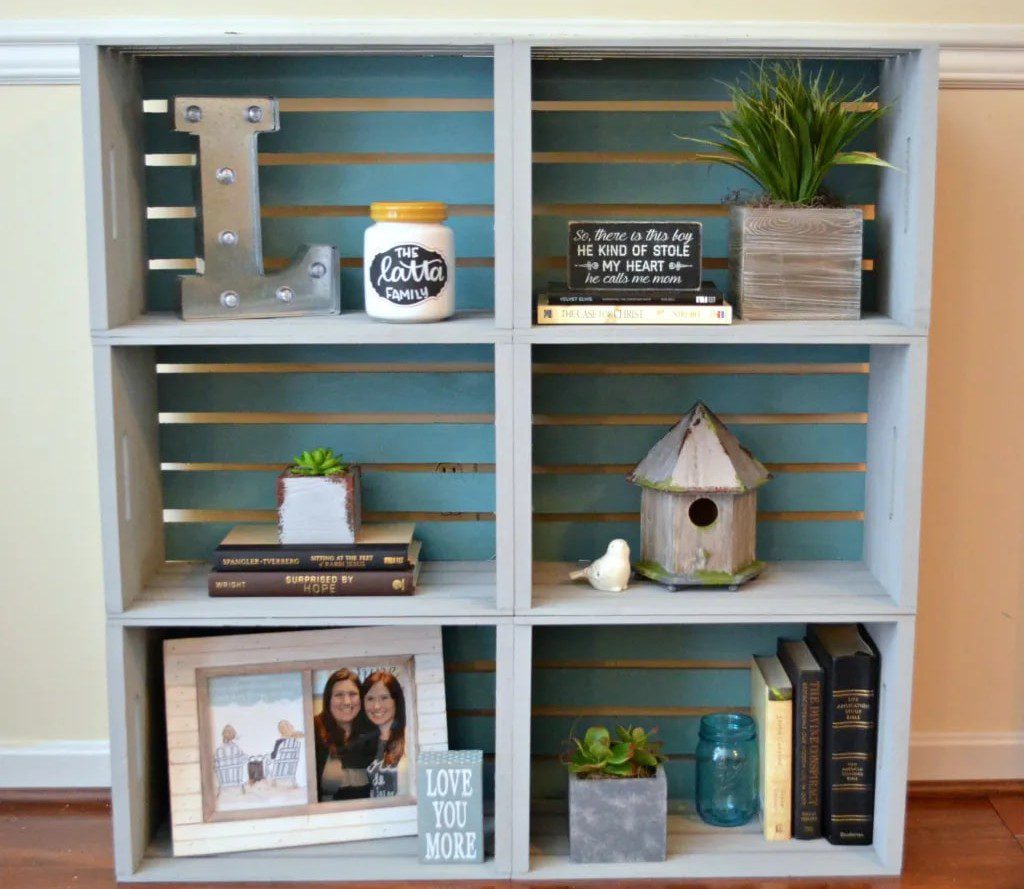
Mark where you’ll need to drill holes for attaching the shelves. Once the holes are drilled, screw in some L-brackets or shelf brackets (one for each corner of each crate). Next, cut some pieces of plywood/MDF to use as shelves. These should be slightly smaller than the inside dimensions of the crates.
12. Wall art
Turning old crates into wall art and shelving is a great way to repurpose them. There are many ways to do this, but one easy way is to simply screw the crates together and hang them on the wall. Add small planters, decor items, frames, and books to these shelves.
You can also use them as shelves by screwing them into the wall or attaching them to brackets. Either way, they make great storage solutions and add a bit of character to your home. You can also add screws to the wood and hang decorations from them.
13. Wine rack
If you’re looking for a unique wine rack that has a bit of rustic charm, consider making one out of old crates. This is a relatively easy project that can be completed in a weekend, and it’s a great way to upcycle some old crates into something both functional and stylish.
To make your own crate wine rack, start by measuring the dimensions of your crates and cutting some wooden boards to fit snugly inside them. Next, pre-drill some holes in the boards and screw them into the crates. Finally, arrange your wine bottles on the racks and enjoy!
14. Crate storage table
With this next fun hack, you can upcycle old wooden crates that you might have lying around and give them new life. Start by painting/staining the plywood to your taste. Then, screw the caster wheels to the bottom of the plywood.
Ensure the screws are long enough to go through the plywood and into the crates. Stack the crates neatly on top of each other and slide them over the plywood so that they fit snugly. You may need to trim the boards on the sides of the crates so that they fit perfectly.
15. Antique image transfer to crates
With a bit of creativity, you can turn something old and forgotten into beautiful pieces of art. Here’s a super easy way to transfer images to crates. Begin by sanding down the crate until it’s smooth. This will help the image transfer better.
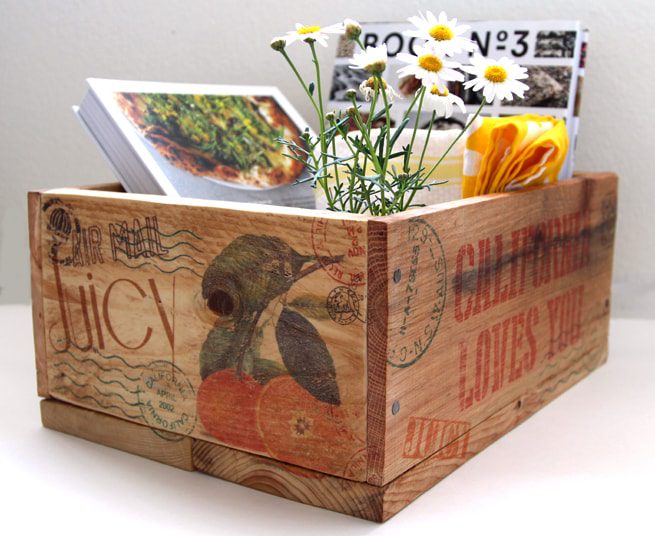
Choose the image you want to transfer. Then, print the image and place it onto the crate. Apply a tiny layer of Mod Podge onto the traced image. Brush on another layer of Mod Podge and allow it to dry completely.
16. Succulent garden
If you have a giant soda crate that you’re looking to repurpose, why not turn it into a succulent garden? This hack is perfect for keeping your planters organized and looking chic. To turn your soda crate into a succulent garden, start by staining the wood and lining the bottom with some rocks or pebbles.

Keep planters over a plate to ensure the muddy water doesn’t flow all over the crate. Add a few hooks to hang some planters. Be sure to water them regularly and provide them with plenty of sunshine, and you’ll be on your way to becoming a bona fide plant parent!
17. Kitchen Storage
Want kitchen storage? Grab old crates, a drill, screws, and paint or stain. To start, measure the space in your kitchen where you want to put the racks. Find some old crates that are appropriately sized. If you can’t find any crates, you can also use old milk crates or fruit crates.
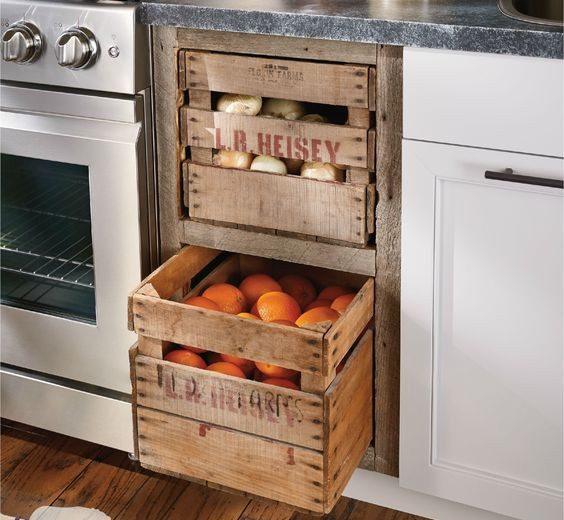
Once you have your crates, drill four holes in each crate. Two holes should be drilled into the side of the crate, and two holes should be drilled into the bottom of the crate. These will be used to screw the crates together. Lastly, paint or stain the crates.
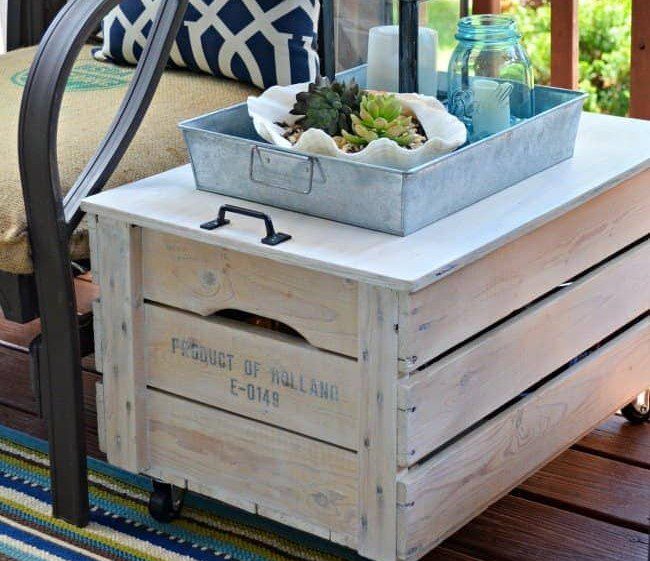
18. Fun porch decor
Old crates can be upcycled into charming rustic porch decor. This is a great DIY project for those who enjoy upcycling and repurposing old items. Crates can be found at flea markets, garage sales, or thrift stores. Once you have your crates, you can get creative with how you paint or stain them.
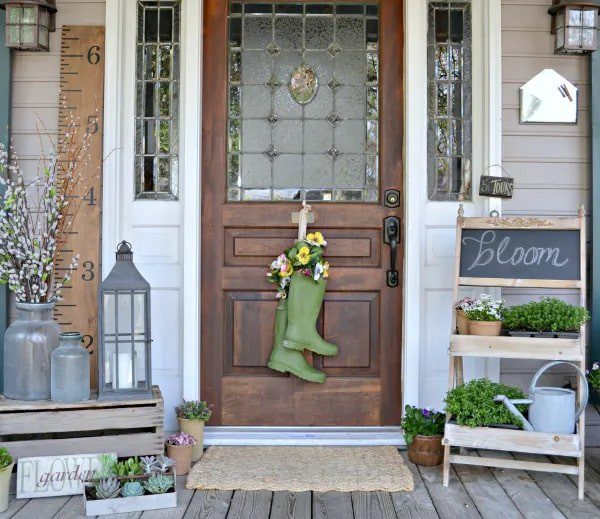
You can also add other rustic touches like burlap or jute rope. Old crates make great planters for herbs or small flowers. They can also be used to store gardening tools, pool toys, or other outdoor items. Remember to think up some fun quotes to write on the crates!
19. Bathroom organizer
Make a bathroom organizer shelf using old crates. You’ll need a few supplies, including old crates, screws, and nails. Once you have everything gathered, the fun can start. Measure the space where the organizer shelf will be placed. Place the first crate upside down on a stable surface.
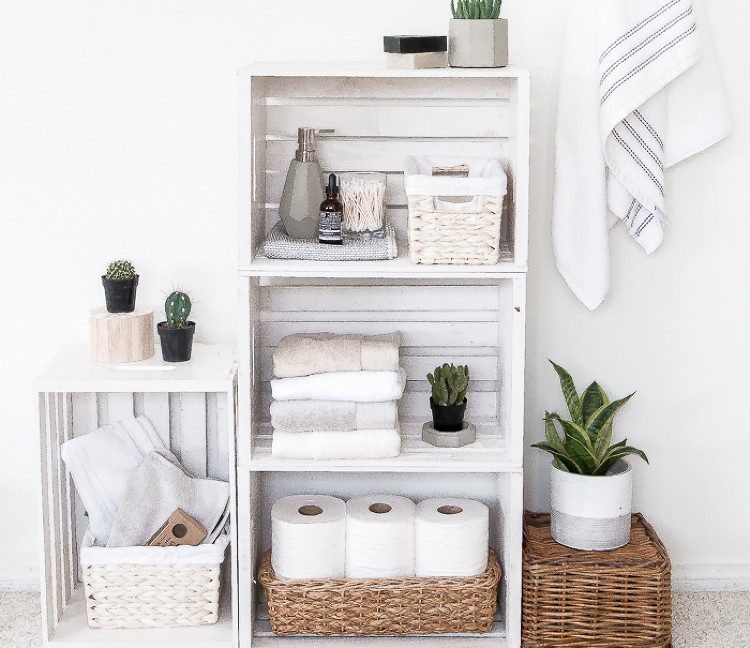
Screw or nail the first piece of wood onto the crate, ensuring its level with the top edge of the crate. Repeat this step with the second crate and second piece of wood. Fill your new organizer shelf with whatever bathroom essentials you need quick access to!
20. Toy car storage
Put crates to good use by turning them into toy car storage! It’s easy to do—just add some pipes inside the crate, and voila, you have a great place to store your child’s toy cars. This storage will look super cute in your kid’s room while also being functional.
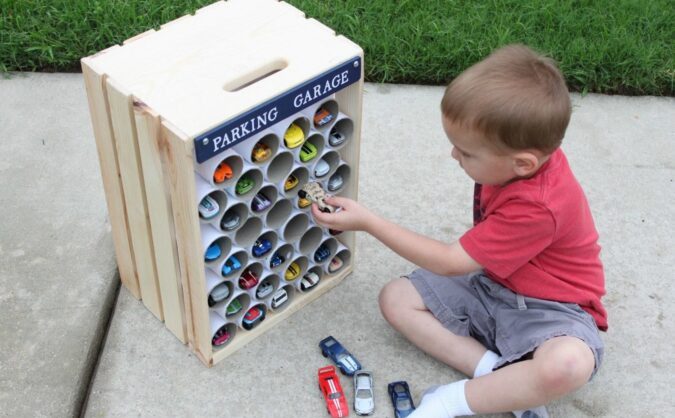
You can hot glue some empty toilet paper rolls or some plastic pipes to fit the cars. Choose the size of the rolls as per the toy cars. Paint the pipes in vibrant colors. It’s a great DIY project that is also a fun activity to do with your children.
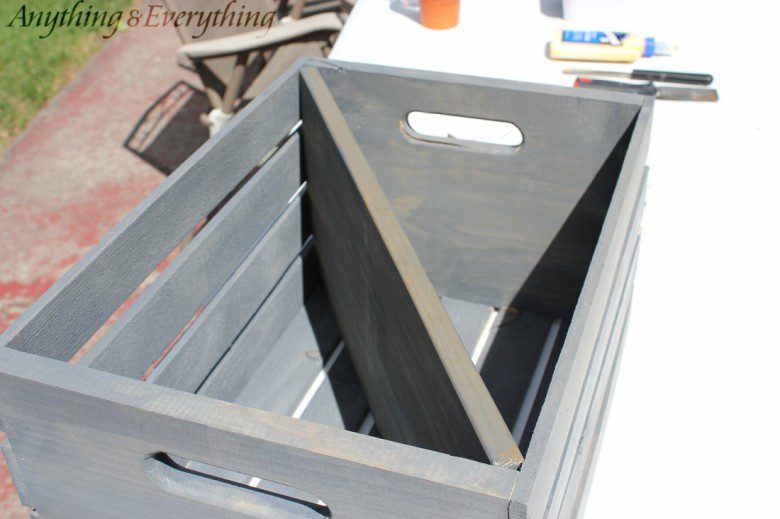
21. Crate cabinet with sliding drawers
This is a great way to upcycle old crates and turn them into functional and stylish pieces of furniture. This vertical cabinet with sliding crate drawers is perfect for storing things like books, toys, or even clothes. It’s easy to construct and only requires a few materials.
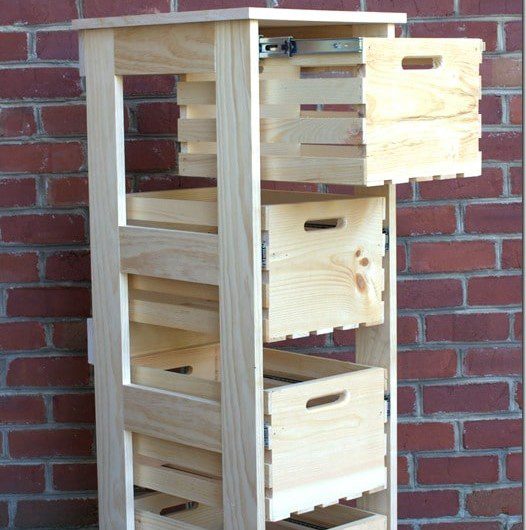
To make this cabinet, you’ll need 4 crates, 1 piece of plywood, paint or stain, sandpaper, 2 handles, and 4 caster wheels. Sand down the crates and the plywood so that they’re smooth. Then, paint or stain them. Lastly, screw the plywood to the back of the crates.
22. TV stand
To make this TV stand, you will need four crates of the same size. If you can’t find four matching crates, you can always paint them to look like they match. Once you have your crates, stack them two by two and secure them together with screws or nails. Now it’s time to add the shelves!
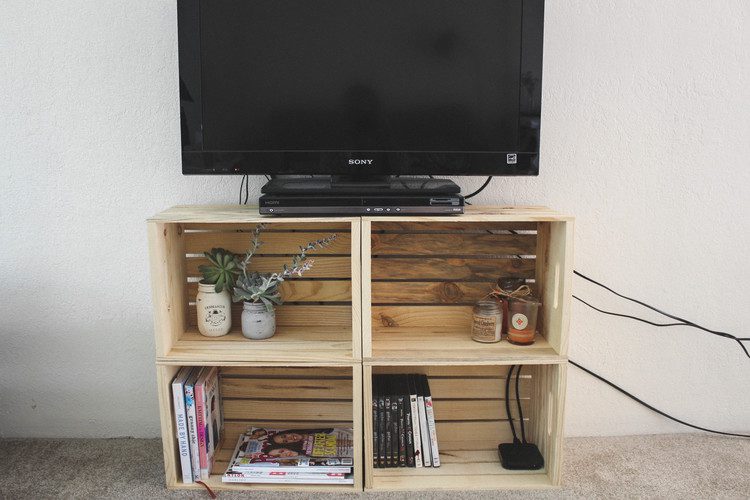
Cut some pieces of wood to fit inside the crates and screw or nail them into place. You can add as many shelves as you like, depending on how much storage space you need. Finally, staining or painting your TV stand has an excellent finish. You now have a unique TV stand.
23. Vintage decor
What better way to upcycle crates than to use them to create vintage decor for your home? If you love the shabby chic aesthetic, then you’ll love this next hack. To start, you will need some supplies. You will need some old crates or boxes, paint, and some distressed wood.
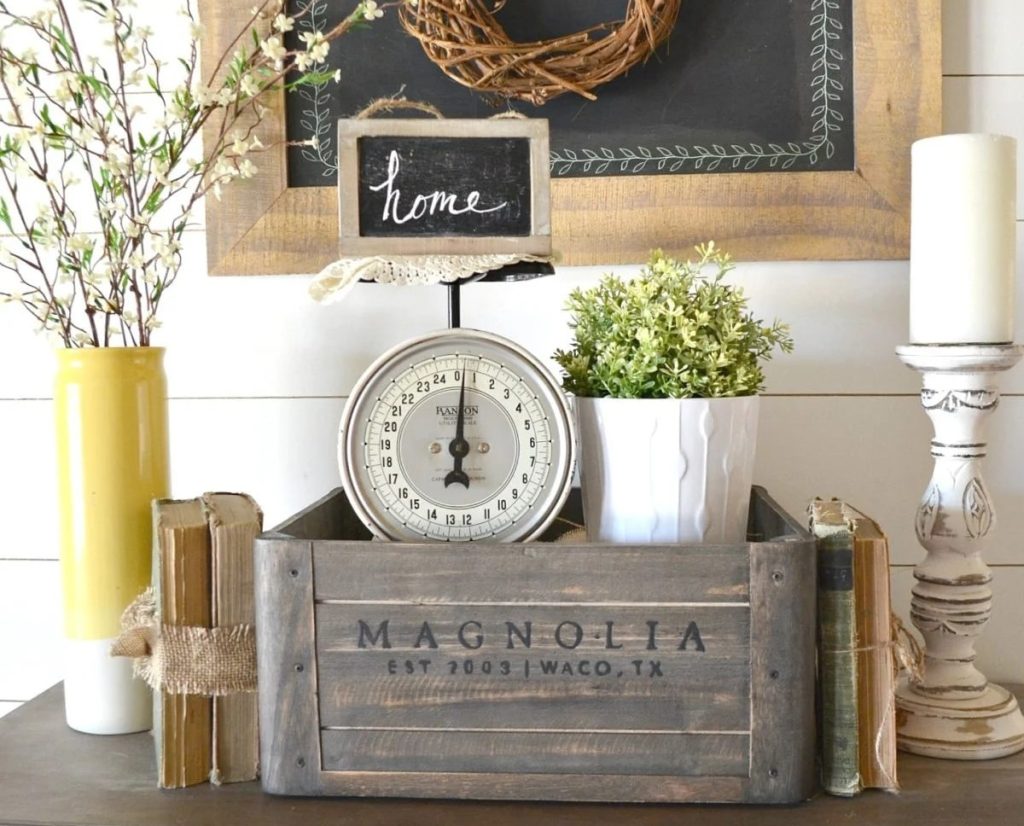
Paint your crates or boxes in a distressed style. Either use chalk paint or regular paint, but make sure to distress the edges and sides for that authentic vintage look. Once your paint is dry, add some distressed wood to the top of each crate or box. Now you have the perfect vintage decor.
24. Entryway shelves
There’s something so charming and rustic about using old crates as shelves. And the best part is that it’s a relatively easy DIY project that won’t break the bank. Once you have your crates, give them a good cleaning and decide how you want to arrange them on your wall.
For a more rustic look, leave the crates in their natural state. If you want a bit more polish, you can paint them or even distress them with sandpaper for a more aged look. Once you have your crates arranged the way you want, it’s time to start filling them with all your lovely things!
25. Industrial iron pipe table
This is a fantastic DIY project that repurposes old materials and gives them new life. To make this table, you’ll need wooden crates, iron pipes, pipe fittings, a pipe cutter, a welding machine, and paint. Cut the iron pipes to the desired length using the pipe cutter.
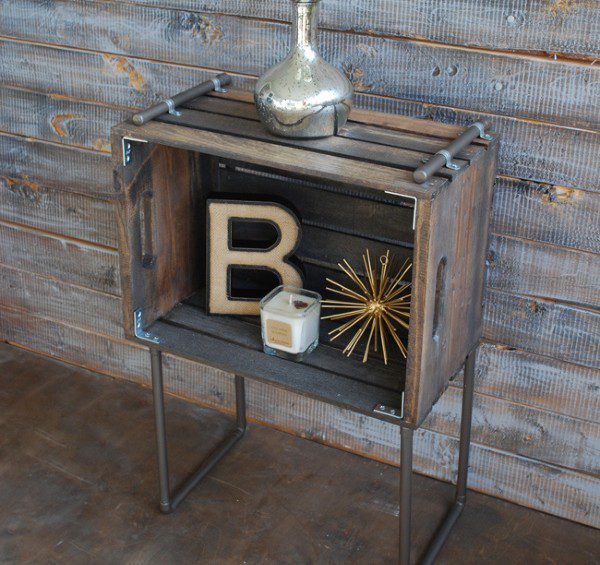
Use the welding machine to attach the pipe fittings to the ends of the pipes. If you’re uncomfortable with welding, use strong epoxy glue to attach the fittings. Place two of the crates upside down on a flat surface. Place the iron pipes on top of them in a criss-cross pattern to assemble.
26. Rustic nightstand
If you’re looking for a rustic nightstand that’s easy to make and doesn’t cost a lot, try stacking two crates together. Once you have your crates, simply stack them one on top of the other, and voila! You’ve got yourself a rustic nightstand.

For an extra touch of personality, stain or paint the crates. This is a great way to customize your furniture and make it your own. You can also experiment with different ways of stacking the crates—try offsetting them or using one crate as a shelf.
27. Dog bed with wheels
If you have a dog, then you may be aware of how vital it is to have a comfortable and safe place for them to sleep. A crate is a perfect solution for this; you can even make a crate bed with wheels so it can be effortlessly moved around.
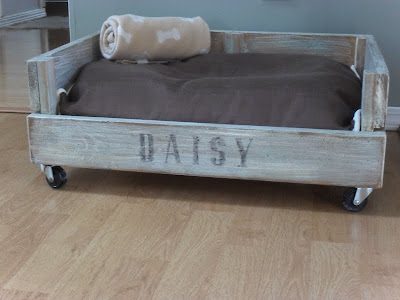
Measure the size of your dog and the crate you will use. You’ll need to ensure that the bed fits inside the crate comfortably. The mattress cannot be too big, or else there’ll be no room inside the crate. Attach caster wheels to the 4 corners of the plywood base.
28. Toy box with casters
This is a great DIY project for the kids’ room. They can help with decorating the crates and then enjoy having their very own toy box on wheels to store all their favorite toys. Grab one or two old wooden crates, paint, or other decorations for the crates. Get sturdy 4 caster wheels.
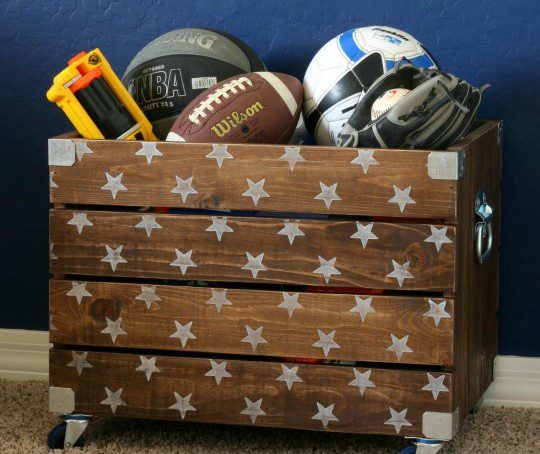
You’ll also need a piece of plywood cut to fit inside the bottom crate. Decorate the outside of the crates as desired. Paint it, add stickers or decals, whatever you like! Screw the caster wheels to the bottom of each crate. Cut a piece of plywood to fit snugly.
29. Shabby chic side table
If you’re looking to add a bit of shabby chic to your home, why not try DIYing a crate side table? To make your crate side table, you’ll need 2 wooden crates, the paint/stain of your choice, and furniture legs. Use screws and drill to attach these legs to the crate.
Start by painting or staining your crates. If you’re using paint, you may want to lightly sand the crates first to create a distressed look. Once the crates are dry, attach the furniture legs with screws. It might work better to pre-drill the holes for the screws.
30. Wood crate centerpiece
Make a country-chich centerpiece by gathering some old crates from around your home or picking some up from a local thrift store. Once you have your crates, sand them down and stain or paint them to your desired color. To make the centerpiece, start by screwing the crates together to form a rectangle or square shape.
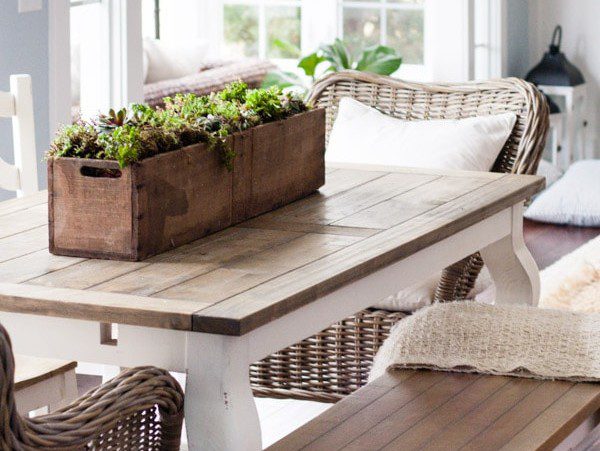
Fill the crate with floral foam, and then insert your favorite flowers or plants. Place the wood crate centerpiece on your dining room table or in another central location in your home. You can also add some scented candles, votive holders, and dried flowers to complete the centerpiece.
31. Crate planters
If you’re looking for an exciting and unique way to spruce up your home or garden, why not try making planters out of old wooden crates? You can decorate them with jute or any other material you like, and they make for great DIY projects.
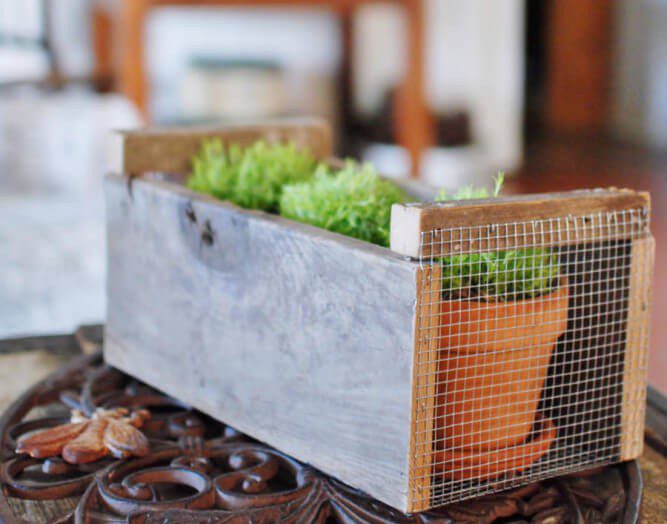
You’ll need to start by finding old crates that are the right size. Once you have your crates, sand them down and paint or stain them if you like. Next, drill some drainage holes in the bottom of each crate. Then, fill the crates with potting soil and your favorite plants.
32. Bar storage
Repurposed crates can be turned into all sorts of different pieces of furniture. In this case, we’re going to turn an old wooden crate into bar storage. To do this, you’ll need an old wooden crate and some rope. First, cut two pieces of rope, each long enough to tie around the crate.
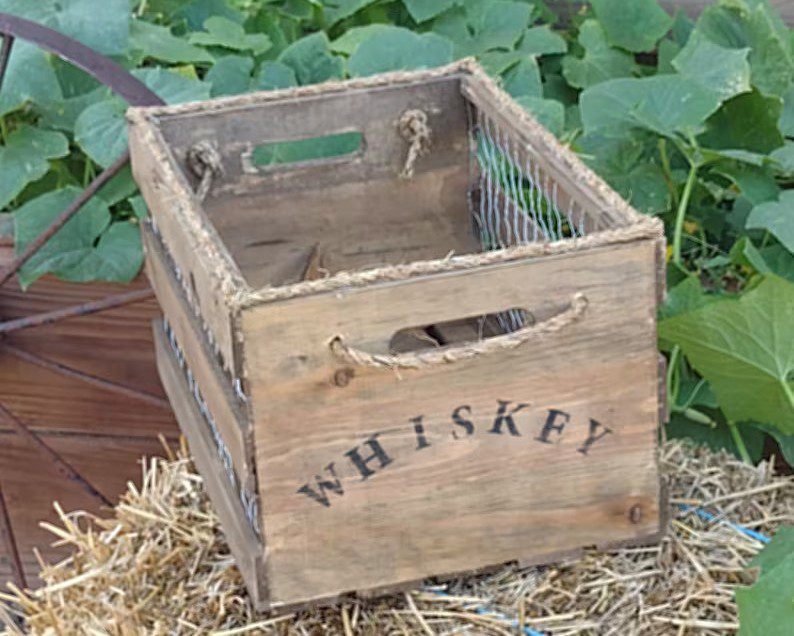
Then, tie the rope around the crate. Add some handles with rope on the sides. Now you’ve got a cute and rustic way to store your bar supplies. This is the perfect project for anyone who loves upcycling and repurposing old furniture.
33. Make breakfast trays
If you have an old wooden crate lying around, put it to good use by turning it into a breakfast tray! This is a great DIY project that is both simple and practical. To start, sand down the crate to smooth out any rough edges. Then, paint or stain the crate to your desired finish.
Once the paint is dry, add some handles to the sides of the crate so you can easily carry it from place to place. Now you can place all sorts of things into your new breakfast tray! Add a few items like cereal or fruit. It also works as a serving tray for guests.
34. Desk organizer
Look no further than this painted wooden crate tutorial if you’re looking for a chic desk organizer that’s also a great DIY project. This project is simple enough for even the most novice crafter, and the result is a stylish and functional desk organizer. You’ll need a wooden crate, some paint, and some patience.
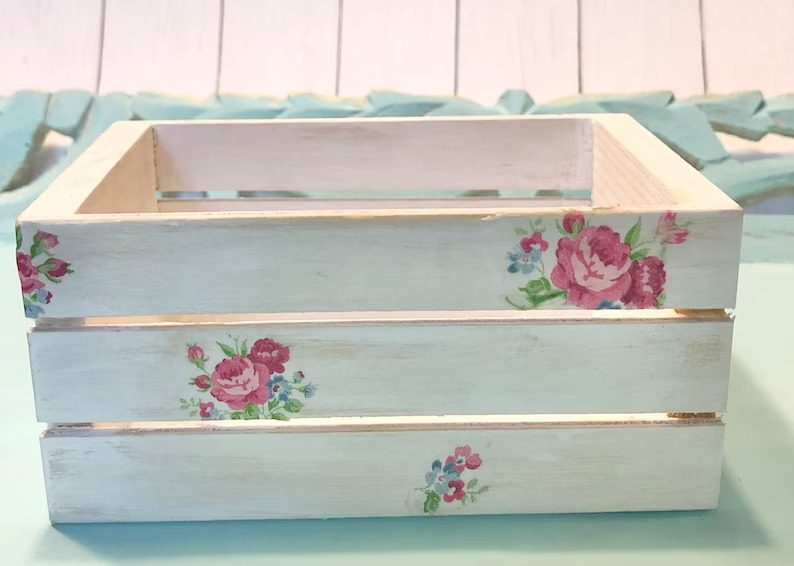
Begin by painting your crate in a light color of your choice. Once the paint is dry, use a stencil or freehand to paint roses onto the front of the crate. Allow the paint to dry completely. Now it’s time to put your new desk organizer to use!
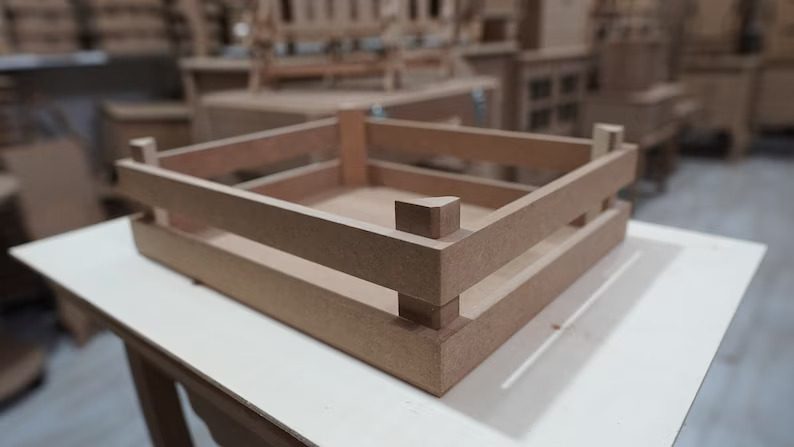
35. Record Storage
This one is for record collectors who wish to have a sturdy yet elegant storage solution for their precious music records. Decide on the size of your crate. You’ll need to measure the records you want to store to determine how big your crate should be.
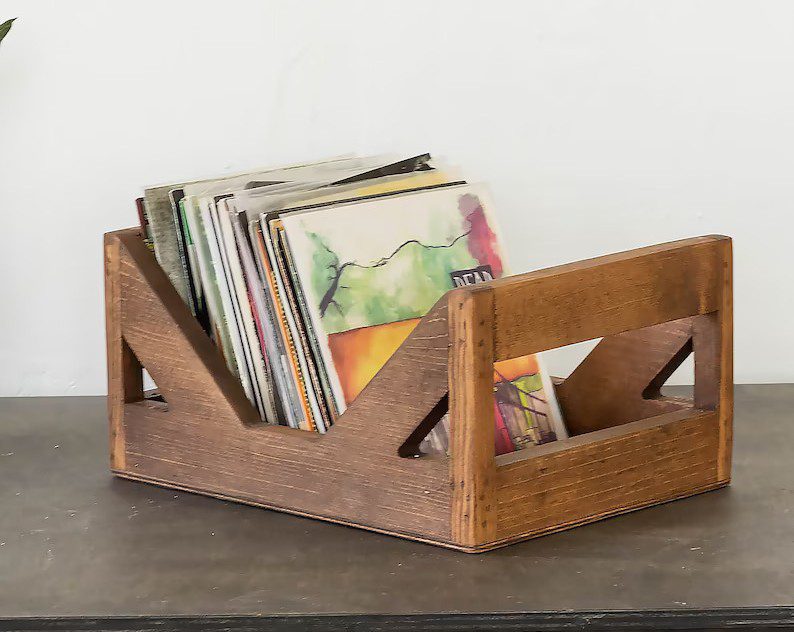
Assemble the sides of the crate using wood glue and a few nails or screws. Attach the front and back panels to the sides using wood glue and nails or screws. Finish your crate by smoothing out any rough edges with sandpaper and staining or painting it to your liking.
36. Fruit and vegetable storage
To make cute storage for fruit and vegetables, decide on the size of your wooden crates. They should be big enough to fit all the fruit and vegetables you want to store but not too big that they take up too much space in your home.
If you can’t get hold of any crates, ask friends and family if they have any that they can spare. Clean the crates well with soapy water and a scrub brush. Allow them to dry completely before proceeding. Line the bottom of each crate with absorbent material to help keep your produce fresh.
37. Firewood storage
Among the best ways to store firewood is by using old wooden crates. This is a no-fuss but fun DIY project, and it will help keep your firewood dry. Start by finding some old wooden crates that are appropriately sized.
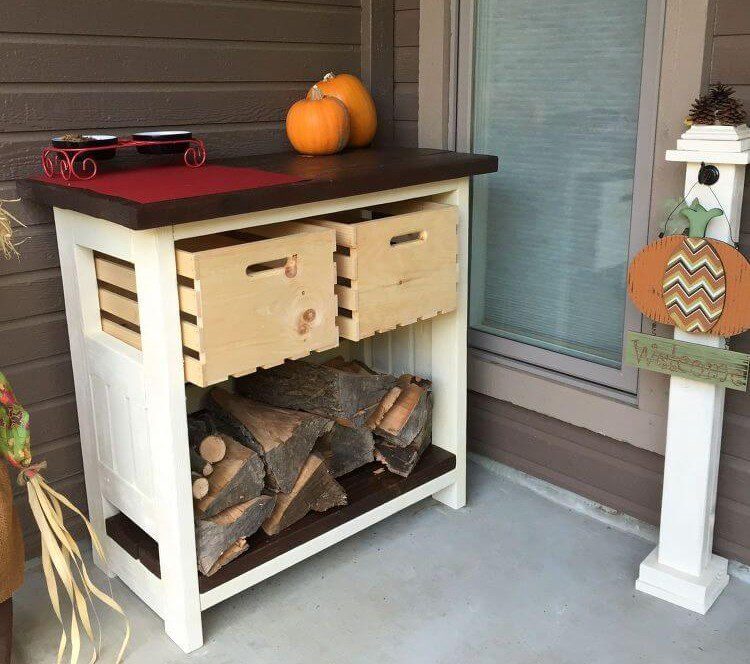
Once you have your crates, clean them out and sand down any rough edges. It’s time to assemble your firewood storage unit. Simply stack the crates with the holes facing down, and bolt them together with some screws or nails.
38. Creative lighting
If you’re on the hunt for a creative option to add some light to your home, go for industrial-type lighting! You only need a crate and a lightbulb. First, use the crate to make a shelf. Then, drill a small hole for the lightbulb cord to go through. Lastly, sting through the lightbulb.
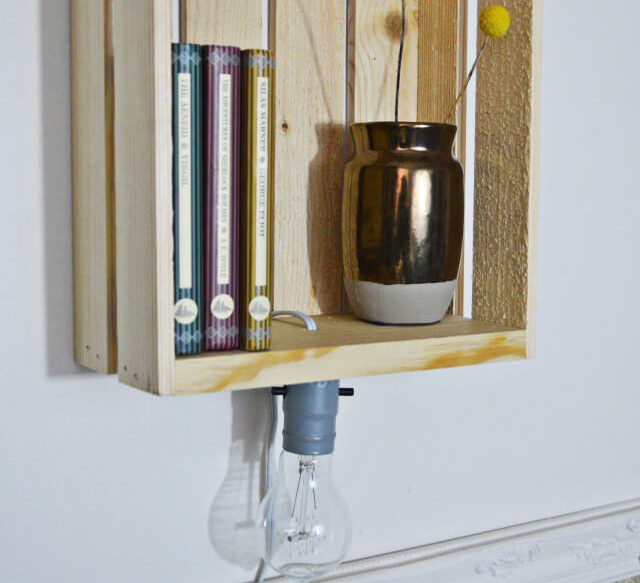
This will create a unique and stylish lighting effect. Add more details, such as a small vase with dried flowers over the shelf. You can leave the crate in its original form or paint it a vibrant color to add more to the lighting.
39. Gardening supply box
If you have an old crate lying around in the garden, put it to good use by turning it into a gardening supply box! This is an efficient yet stylish way to store any gardening essentials. To make your gardening supply box…
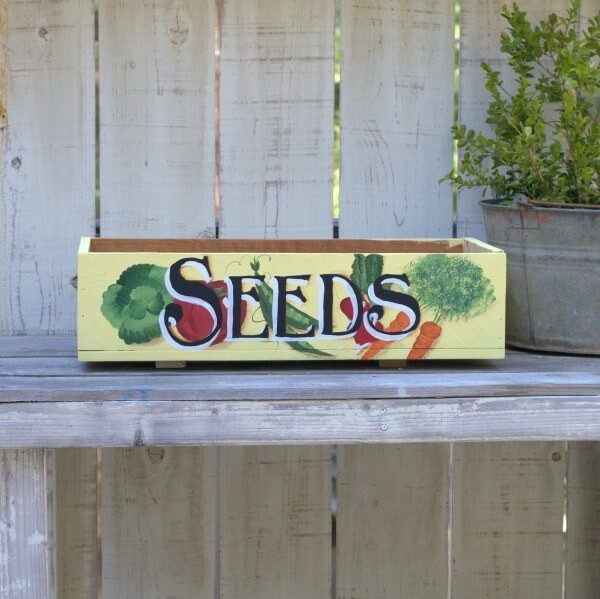
…start by painting the crate as desired. Then, fill the crate with your gardening essentials, like seeds, tools, and fertilizer. You can even add some cute decorations to personalize your box. Paint the box with a garden theme to make it look nicer.
40. Crate work desk
Transform some crates into a crate work desk that will add a touch of rustic charm to your space. To make this desk, simply stack the crates and secure them together. Then, add a piece of plywood or a door to the top to create a flat surface.
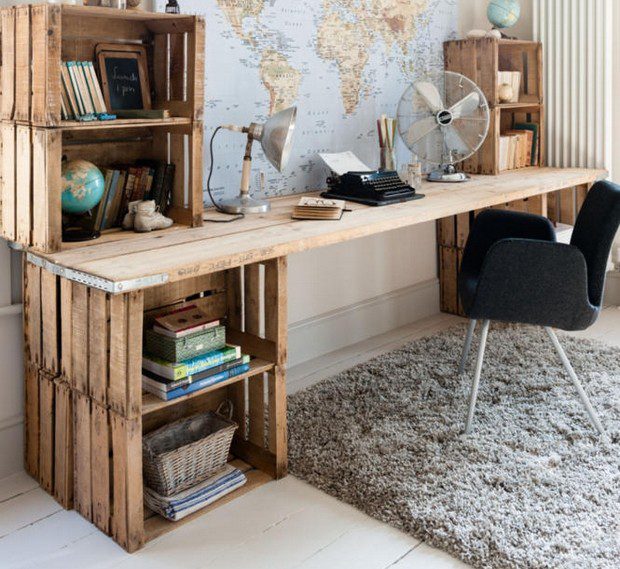
Paint or stain the crates in whatever color you like, and add some fun knick-knacks or storage containers to personalize your desk. This is a great way to upcycle old crates and create a unique piece of furniture for your home. Plus, it’s a budget-friendly way to decorate your space!
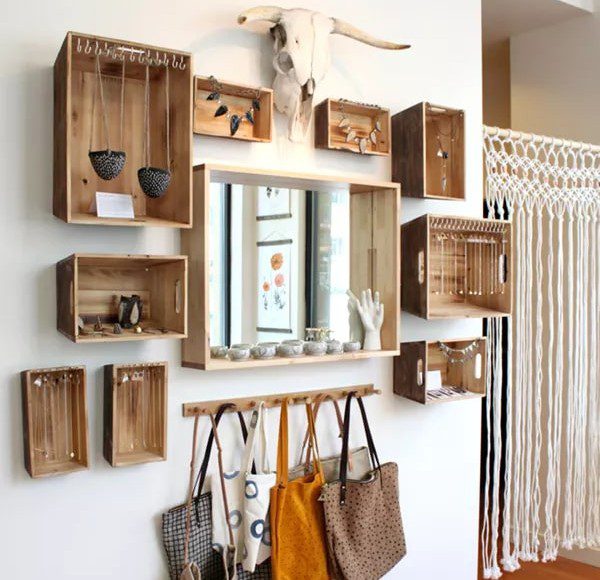
41. Salvaged jewelry display
Old crates are the perfect way to add a rustic touch to your home. And what better way to display your jewelry than in a beautiful salvaged jewelry display? This easy DIY project only requires a few materials and can be achieved with minimum fuss.
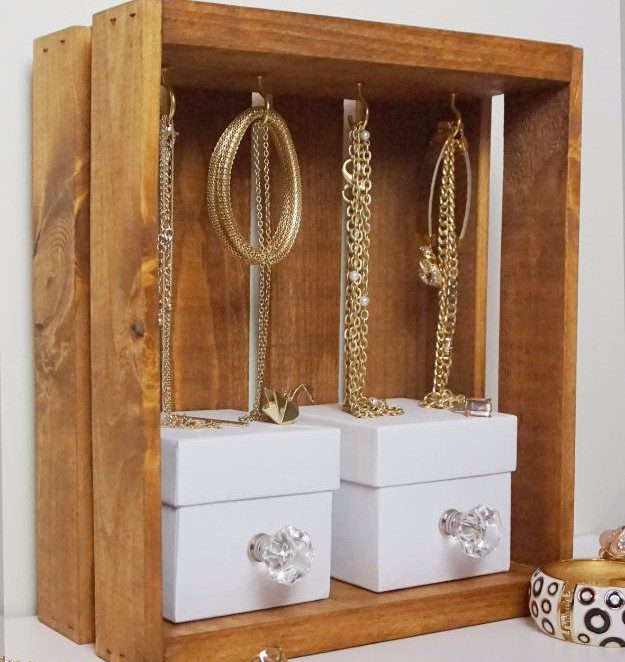
You’ll need to sand your crates down and paint them the color you choose. Then, it’s time to get creative! You can use old wire or knobs to create a unique jewelry display that is both beautiful and functional. Just make sure to secure the wire or string tightly.
42. Farmhouse storage bench
Consider using crates to DIY a farmhouse storage bench. Take four to six wooden crates, two boards for the sides of the bench, screws, nails, and wood glue. When you’ve gathered your materials, you’ll need to sand down the crates and boards.
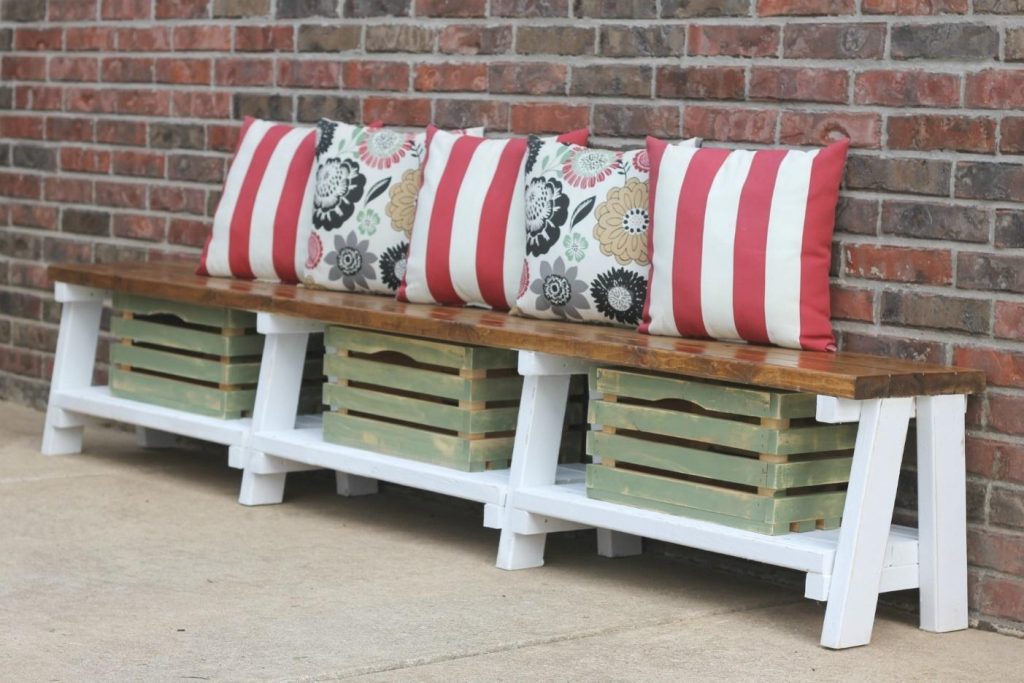
Begin by screwing the boards into the crates, ensuring they’re evenly spaced. Then, use nails or screws to attach the remaining crate on top. Ensure that all the pieces are level and secured before moving on. Finally, finish off your bench by adding a cushion or pillow for comfort.
43. Quirky mudroom storage
If you’re searching to add some storage to your mudroom without spending much money, this DIY project is for you! All you need are some crates and a few nails or screws, and you can have a charming and practical mudroom storage solution that will help keep your space organized.
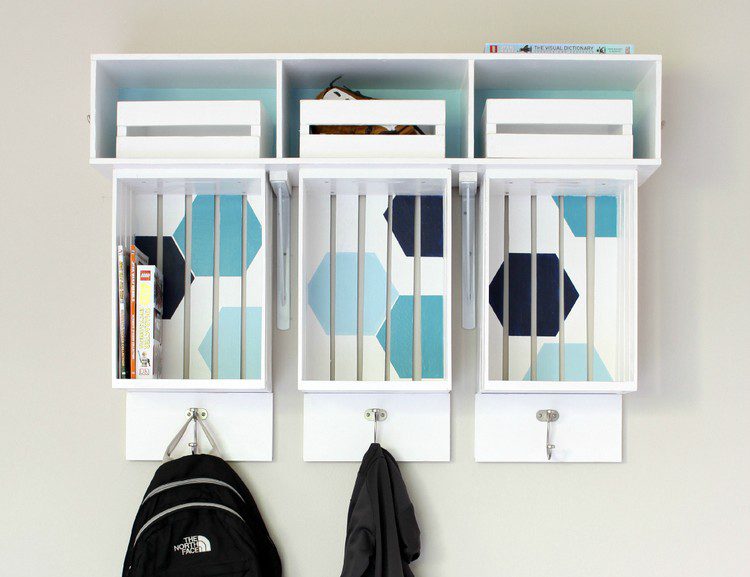
Stack your crates on top of each other and secure them together. Hang the stacked crates on the wall using hooks or screws. Decorate the crates however you like to add a personal touch to your new storage solution. Now all your gloves, hats, scarves, and other winter gear will have a place to reside.
44. Rustic wall key storage
DIY a rustic wall key storage unit to keep your keys organized and within reach. You’ll need a wooden crate, a piece of wood for the back, L brackets, nails, or screws. To start, decide on the arrangement of the crate. Once you have your arrangement figured out, attach the crates to the wood.
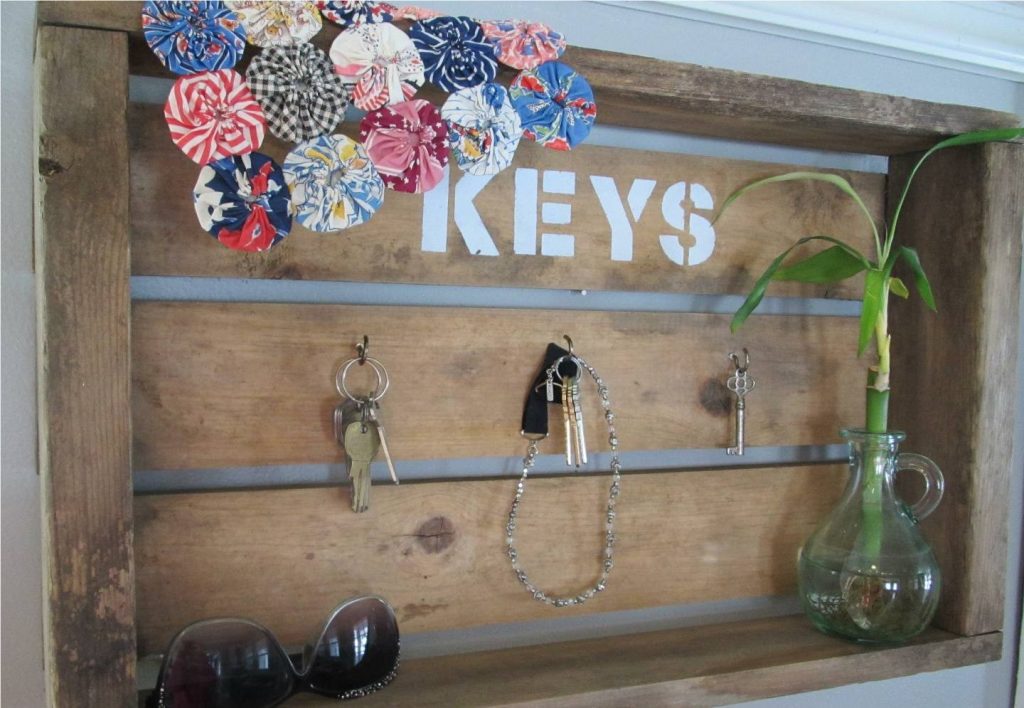
You can either screw or nail them in place. Then, hang your new key storage unit on the wall using nails or screws. If you want, you can paint or stain it to match your décor. And that’s it! A super easy way to keep your keys and knick-knacks organized.