
Drab To Fab: 35 Easy Ways To Upgrade A Kitchen Into A Charming Space
As much as cooking is a life skill, it can be a bit of an overwhelming exercise. That’s why many homeowners call their kitchen “the battlefield.” As such, it’s always a good idea to keep your kitchen looking its best. With some minor tweaks here and there, you can transform your kitchen into your favorite room and yourself into the hostess with the mostest !
Giving your kitchen an upgrade doesn’t have to be an expensive or taxing endeavor. It can be as easy as painting an appliance or changing the lights. In this article, we feature 35 kitchen tips and tricks to make your experience in the kitchen more pleasant than ever before. Read on, and be sure to give some of these ideas a go!
Goodbye Boring Walls
First and foremost, we obviously have to get rid of the boring old wallpapers in your home! Looking at the same old walls daily as you make your meals can be dull, and it sucks all the fun out of cooking.
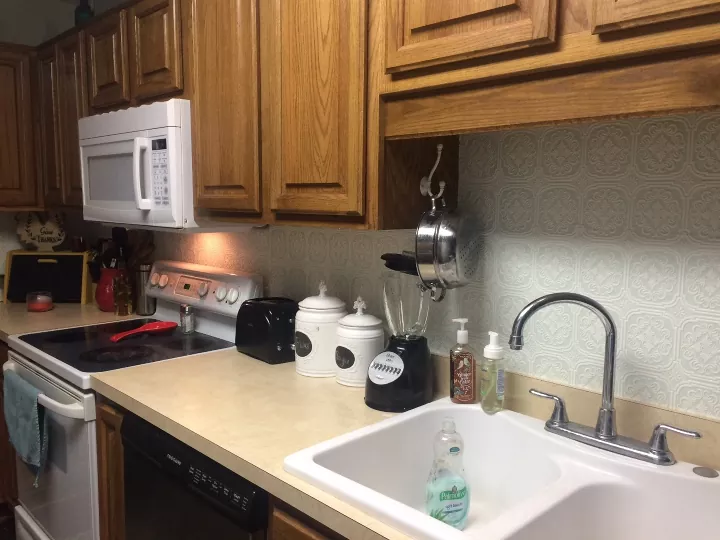
This can easily be fixed with textured wallpaper, which you can find at your nearest department store. First, clean the walls thoroughly and sand the surface down properly. After that, wait for the surface to dry before attaching textured wallpapers.
And Hello, Fun Wallpaper!
Wallpapers are a very convenient way to add style to a kitchen. Aside from being readily available and affordable, they also offer you a chance to pick from numerous designs. Additionally, instead of having professionals come to install them for you, you can install them yourself!
To install wallpapers, you’ll need to cut them up into strips and then use a roller to apply the wallpaper paste to your kitchen walls. After that, start at the top of the wall, paste your first wallpaper strip, and repeat this over the entire wall.
Subway Tiles
Some homeowners will get bored with the pattern and design of the textured wallpaper over time. If that happens, subway tiles can be considered as an alternative. The thin, rectangular tiles exude timeless style and sophistication and can add an air of professionalism to your kitchen decor.
You don’t need to knock down the entire wall to get this design in your kitchen. It’s expensive and, frankly, exhausting. Textured wallpaper in this style or painting the design onto contact paper will fool everyone into thinking it’s the real deal!
Faux Tile Backsplash
If subway tiles aren’t your thing, there are infinite tile options for you to choose from. Faux tile backsplashes, for example, are always more fun than your average tiles. Sometimes the illusion of something is even better than the thing itself!
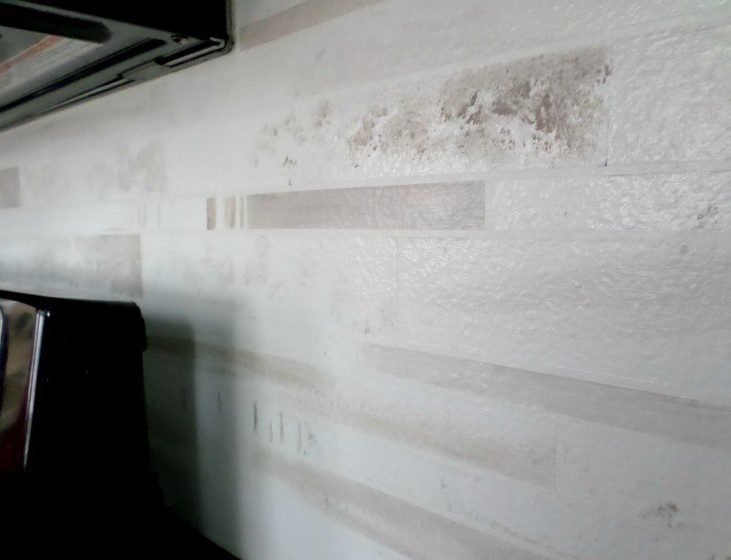
To create faux tile backsplash, apply painter’s tape in parallel and level lines. Then, randomly place vertical lines to define the tile length. For the illusion, use a high gloss finish. If you would like a stone tiles effect, use a gray-beige color.
Mason Jar Wall Art
Of course, textured wallpaper and subway tiles aren’t the only ways to decorate. Installing ing wall art is a great way to decorate your walls. The best part is the options available are limitless. You can buy a readymade piece or make something from scratch!

Who knew an old windowpane could be used in decor? For this example, we hung a rustic windowpane on the wall and placed empty mason jars where the panes used to be. For added ambiance, we put flowers inside each mason jar.
Funky Coasters
For the wall art idea above, we only needed the jars. For this next one, we need lids which we are sure you have plenty of in your kitchen drawers. A great way to repurpose these would be to turn them into DIY coasters.
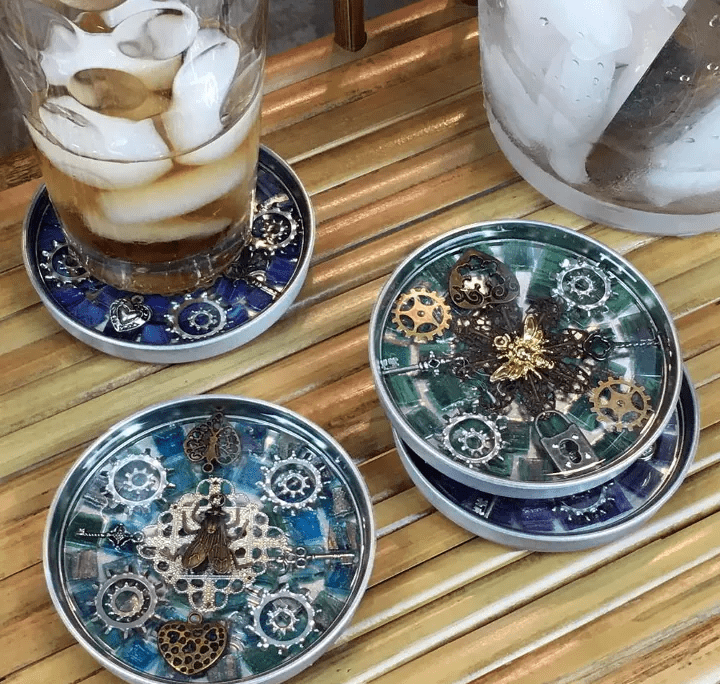
Start by spray painting the lids in silver so they can all match. Next, stick glass tiles, little metal gears, and other fun little things onto the lids to create a mosaic design. Finally, seal with a pour-on finish and leave the tops out to dry.
Rope Lights
Moving on from coasters, you can easily give your kitchen a facelift by adding light fixtures. This is a fairly easy DIY project that involves only two supplies: rope lights and rope lighting clips. Light does a great job of uplifting a room.
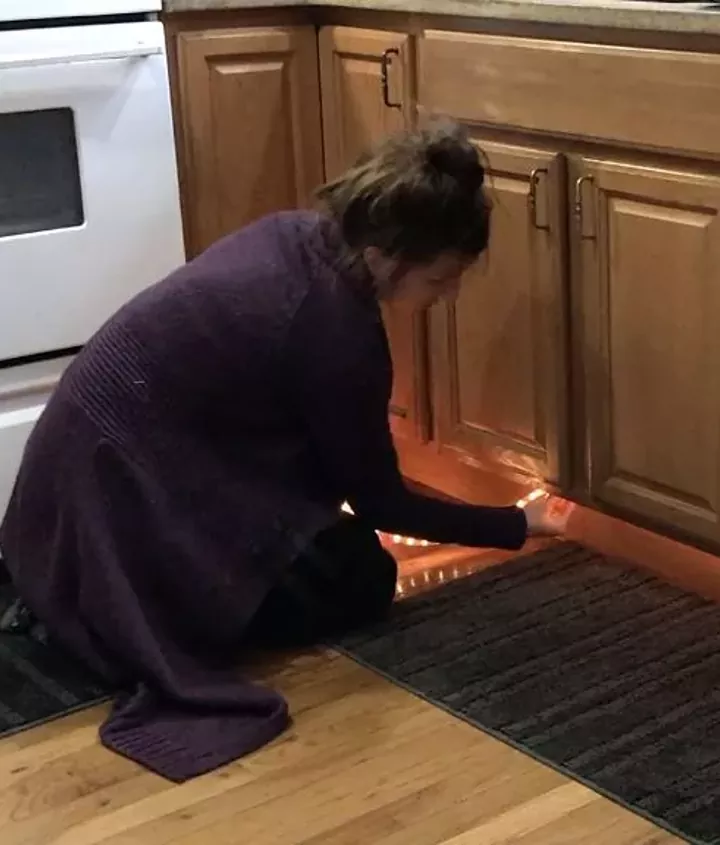
First, you need to decide where you want the lights to go, then attach the command rope lighting clips along the “route” where the rope lights will pass. Next, attach the rope lights and use invisible tape to keep it all in place.
Rustic Wall Art
Aside from the mason jar wall art, you can also put your artistic skills to the test by creating this rustic wall art sign. First, cut a large wooden board into your desired length. Then, surf the web for a design that catches your eye.

Once you’ve found the design, stencil it onto the middle of the wooden board. The choice of whether to add a topcoat or not is entirely up to you. Finally, hang it on your kitchen wall. Now, doesn’t that just scream rustic chic?
Pocket-friendly Art
Hanging a piece of art is a great way to decorate a wall. However, it’s also a bit expensive, so this method may not be too friendly to homeowners on a budget. In such cases, creating pieces on your own is usually more economical.
You’d be surprised by what a quick online search can yield as inspiration. On a blank canvas, sketch out whatever struck you most and fill it with color. Once the drawing is complete, place it in a nice frame et voila!
Repaint Countertops
We all know that after a while, countertop paint usually starts to chip off or fade, making it look weathered and unsightly. This can be a bit of a drag because let’s be honest, food tastes better when it is served in a beautiful setting!

To remedy a chipped countertop, repaint it and make sure to laminate afterward. When repainting, keep in mind that all areas that do not need to be painted must be taped down. Finish by covering with three layers of topcoat.
Contact Papers
Repainting countertops can be a bit troublesome for some homeowners. Contact paper is usually an excellent alternative to a paint job as it is much easier to work with. Also, when it starts boring you, replacing it is simple, so win-win!
First, wipe down the countertops and leave them to dry. Then, measure the countertops and trim the contact paper down to size. Next, stick the contact paper onto the countertops and conclude by sealing with Mod Podge. Don’t forget to get rid of any wrinkles or bubbles before sealing.
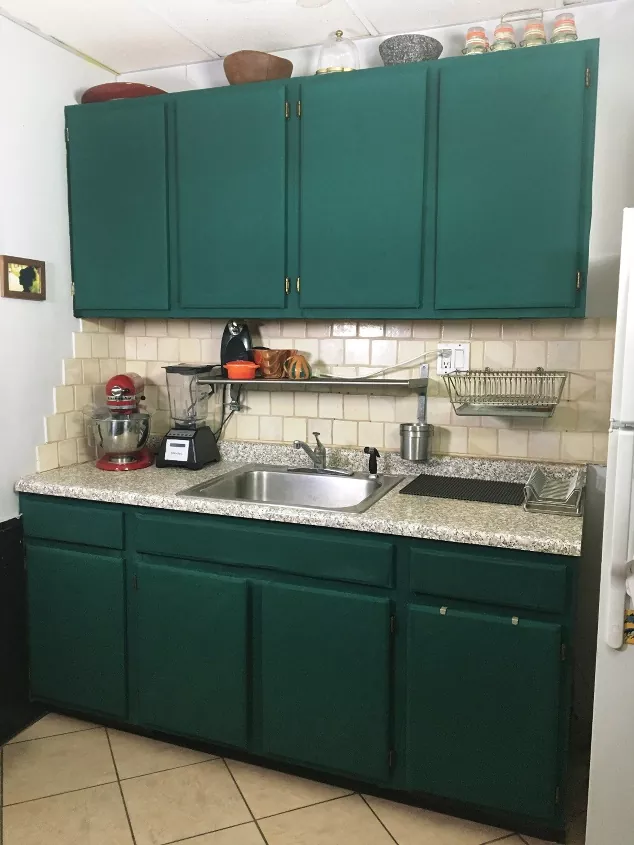
Release Your Inner Artist
In addition to countertops, homeowners can also give their kitchen cabinets a makeover. The simplest way of transforming kitchen cabinets is to paint over them in a design you’d enjoy looking at. When done tastefully, a unique hand-painted cabinet can be quite beautiful.
Of course, you can paint your kitchen cabinets in one single color. However, if you’re feeling adventurous, you can try stenciling or taping out a sketch and painting it afterward. Who knows? You just might discover a hidden talent or fun hobby!
Fabric Wrapped Cabinet
Now this one’s a bit more unexpected. Instead of painting cabinets which we all know will eventually need to be repainted down the line, some homeowners decide to forego the process entirely. Instead of paint, you can wrap your cabinets in fabric.
Just look at that added pop of color! Start by removing the cabinet doors and their hinges, then measure the fabric and cut accordingly. Next, wrap the cabinet with the material that has just been cut out. Finally, reattach the cabinet door to the cabinet.
Staining Cabinets
Although wrapping cabinet doors in fabric is simpler than painting them, it can still be quite tedious because you’ll need to disassemble each of the cabinet doors first before wrapping them. Luckily for you, we have another suggestion. Staining cabinets.
So, as an easier alternative, go over the cabinet doors with gel stains. This is a bit similar to painting but without the mess. All you have to do is simply “paint” the gel stains on the cabinet doors. You won’t even have to remove them.
Kitchen Floors
Apart from kitchen walls and cabinets, redoing your kitchen floors is another way to enhance your kitchen. However, this can be costly and labor-intensive, so for a budget-friendly option, you can try using contact paper. As we mentioned earlier, it is easier and cheaper.
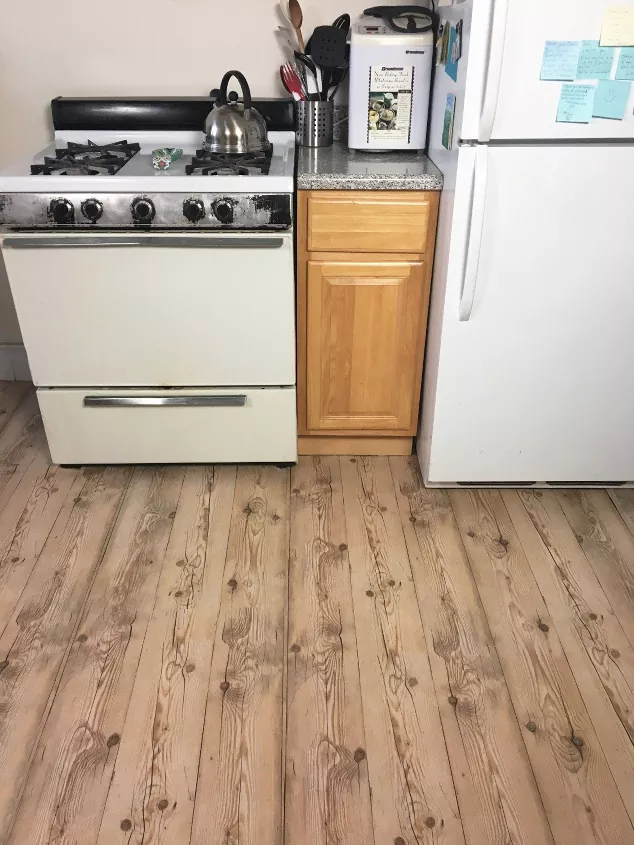
To do this, start by cleaning your floor thoroughly and proceed to choose your desired contact paper design. Then, purchase as many rolls as you need to cover your kitchen floor. Finally, stick the contact paper on the clean kitchen floors. It’s that simple!
Kitchen Rags and Mats
Homeowners who choose to redo their kitchen floors with simple contact papers can add rugs or floor mats for color so that nothing looks too ordinary or bland. Rugs and mats can be a great way to add some intrigue to your decor.
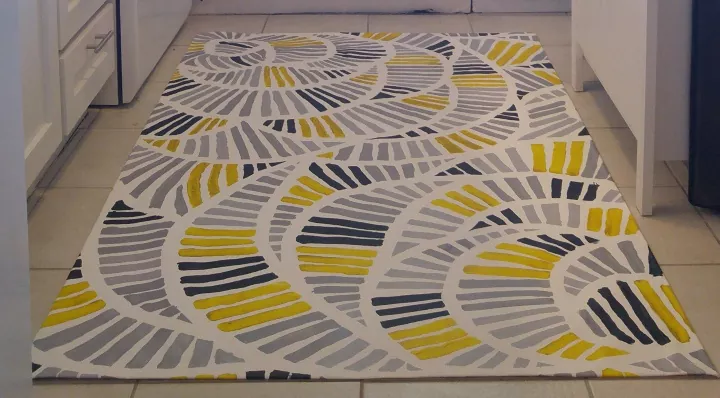
Sometimes rugs and floor mats can be expensive, but don’t worry; you can substitute them with this simple DIY idea. On a blank canvas, recreate the design of the rug that caught your eye and place it in your kitchen when you’re done.
Repurposed Placemats and Utensils
If you have unused placemats or kitchen utensils, you can repurpose them by turning them into beautiful kitchen decorations! The most exciting part of this idea is that it’s both environmentally and financially friendly. The planet and your wallet will thank you.
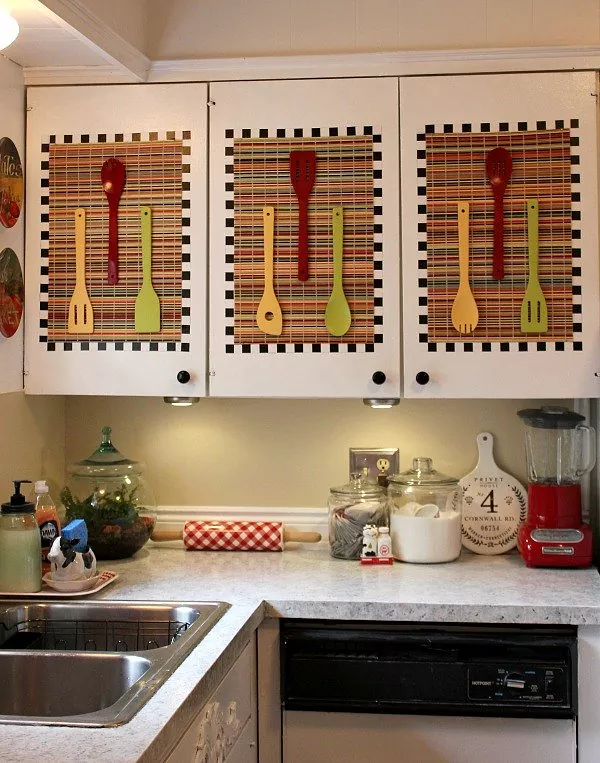
As you can see in the picture, hanging placemats attached to simple spatulas is a truly ingenious decor idea. Additionally, if you don’t like the color of your spatulas, you can always paint them in another color to fit your preference.
Colorful Utensils
Speaking of painting spatulas, it’s rare to find kitchen tools in your favorite colors. If you like things that match your house, this becomes even harder. A great hack to ensure you get matching utensils is to paint them to suit your preference.
To do this, tape down the parts of the appliance you do not want to paint and clean the non-taped areas. Then, wait for everything to dry before spray painting the desired color or colors. Finally, finish with a top coat for longevity.
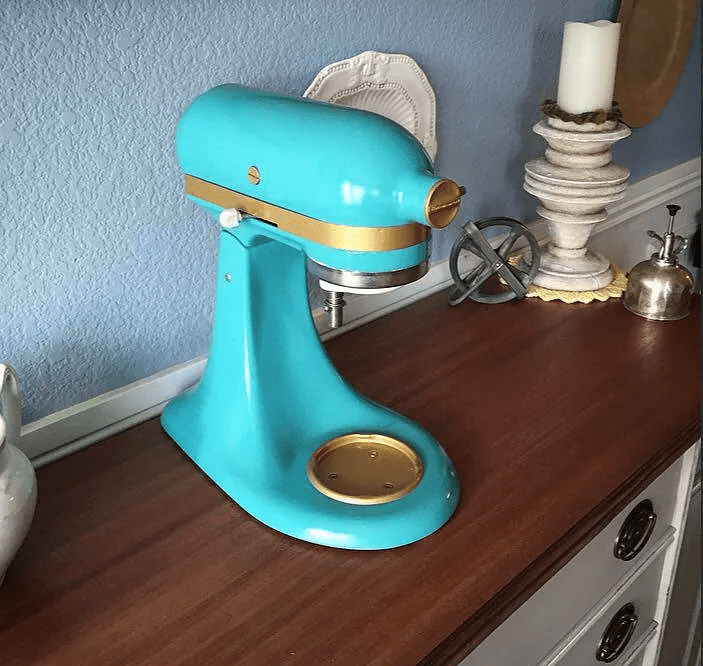
Painting Kitchen Appliances
Painting doesn’t have to end with utensils. You can also paint appliances. Dishwashers, refrigerators, and microwaves are great candidates for this. As long as you are not doing this on a lot of machines, this shouldn’t be a demanding project.
First, use plastics or painter’s tape to cover the surrounding areas you don’t want to paint. Once you’ve done that, you can start to spray paint your desired appliance in any color that you prefer. After that, let the paint dry before tearing off the plastic and tape.
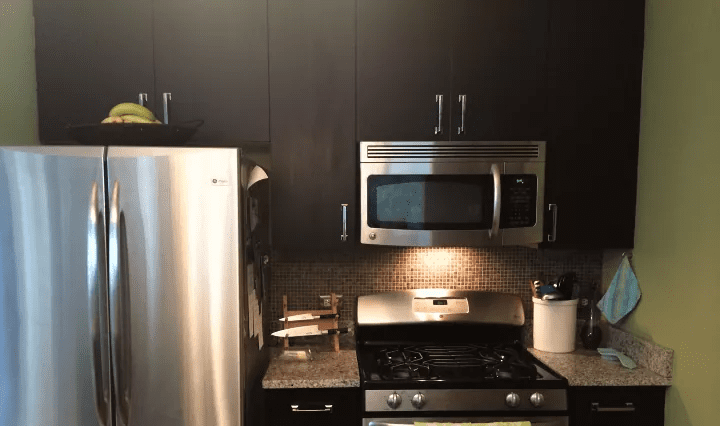
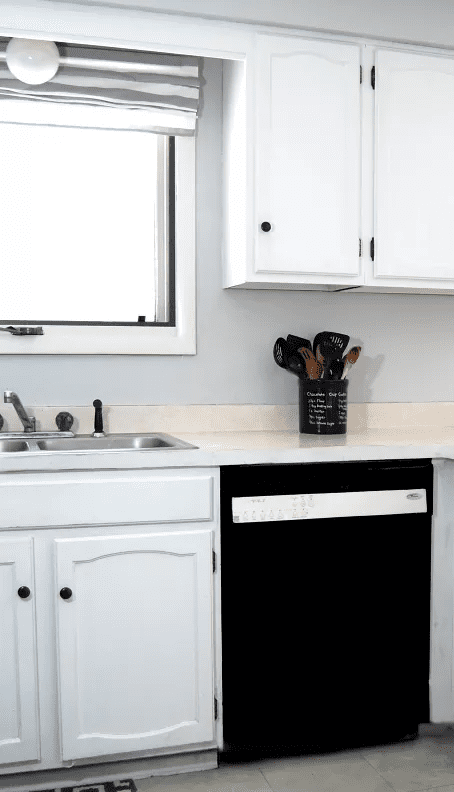
More Painting!
If this list is anything to go by, paint is your friend. The color your furniture originally came in may have gone out of style over the years, but you can easily make your kitchen trendy by painting it.
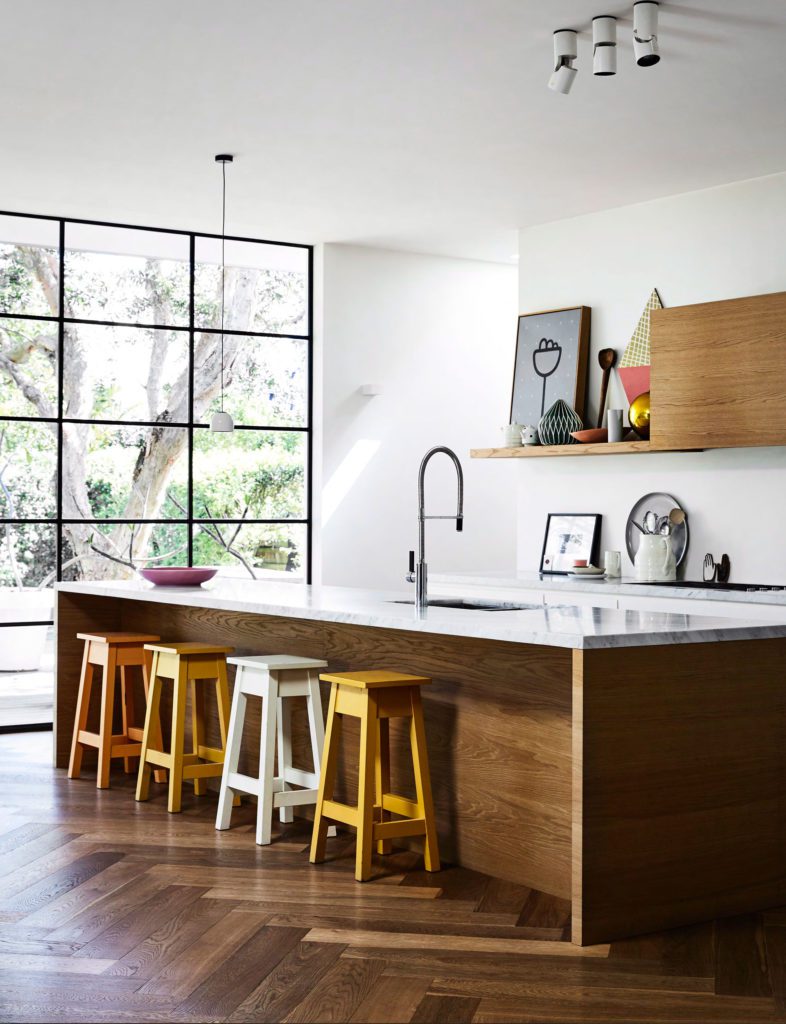
Black, white, and yellow are especially in style these days, so bring your furniture outdoors and start spray painting them in these colors! To avoid making a mess, remember to lay a tarpaulin sheet on the ground before working on your furniture.
Eye-catching Doorknobs
Aside from furniture, you can also change the colors of the doorknobs in your kitchen if you don’t like them. As a fun project, you can either spray paint the doorknobs or wrap them in wrapping paper. Just look at the ones pictured below.
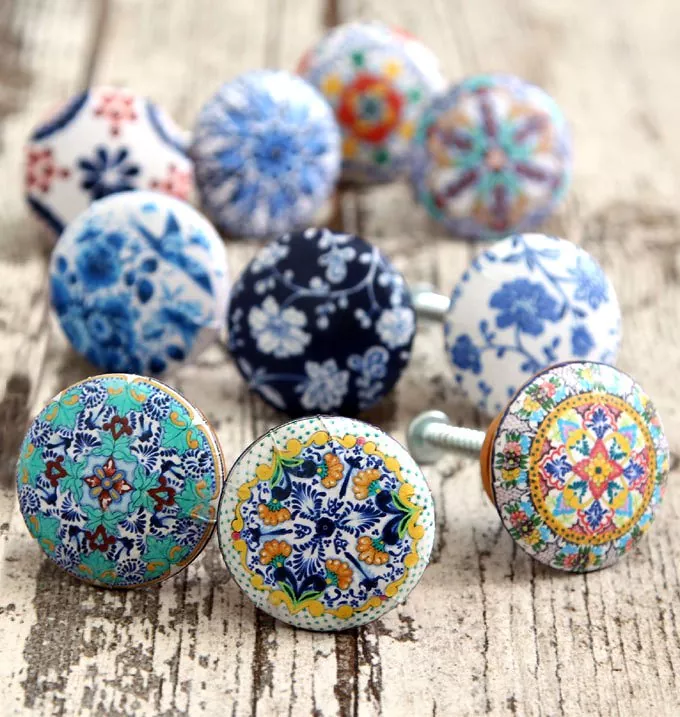
Either way, start by removing the knobs from the doors or drawers. Then, depending on how you want to change the color, spray paint or wrap the knobs with colorful wrapping paper. Lastly, finish with a top coat and reattach.
Gems On Knobs
Sometimes it can be difficult to find wrapping paper or paint that suits your doorknobs. When this happens, it requires you to think a bit outside the box, like this next one. For this project, you’ll need cabochons, knobs, and a lot of patience.
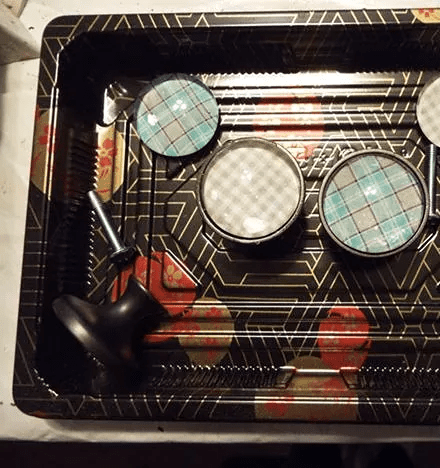
Begin by surfing the web for eye-catching designs and print them once you’re done. Then, trace the shape of the cabochons around the printed design. Next, apply some Mod Podge to the design and stick on the cabochons. Finally, attach the cabochons to the knobs, and you’re done!
See-through Cabinets
Your kitchen shelves can get messy if you’re not a pro organizer. This can be embarrassing especially when you have company over. One cool trick for this is to cover up the cabinet windows. Out of sight, out of mind.
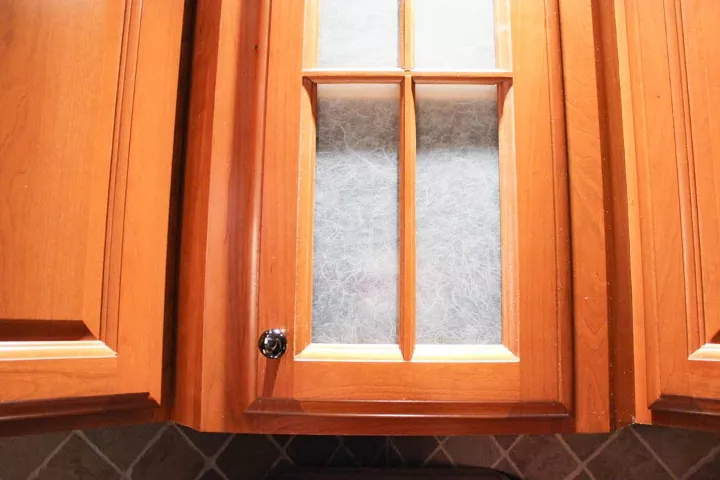
First, take the glass pane out of the cabinet and wipe it down. Next, attach some window film to the glass plane before fitting it back into the cabinet. You may not be able to show off your newest china, but you also never have to worry about being humiliated.
Mail Station
Unorganized mail is a homeowner’s worst nightmare. Not only does it make the house seem messy, but it can also be highly frustrating when you can’t find important mail because it’s scattered across the room. Fortunately, we have a solution for that!
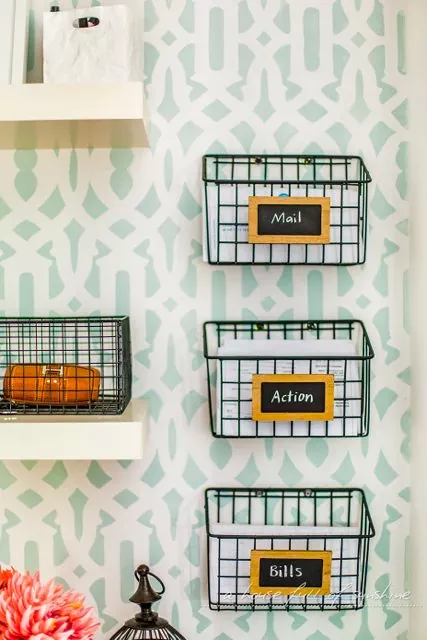
Wire-cleaning caddies are great for storing your mail. Like the example in the picture, you can have one caddie for important mail and another for regular mail. Alternatively, you can assign each family member a caddie if you have a big household.
DIY Shelf
While we’re on the topic of storing and organizing, homeowners looking to give their kitchen a total makeover should definitely consider adding in a shelf. A beautiful shelf can be great for storage and also act as a centerpiece or conversation starter.
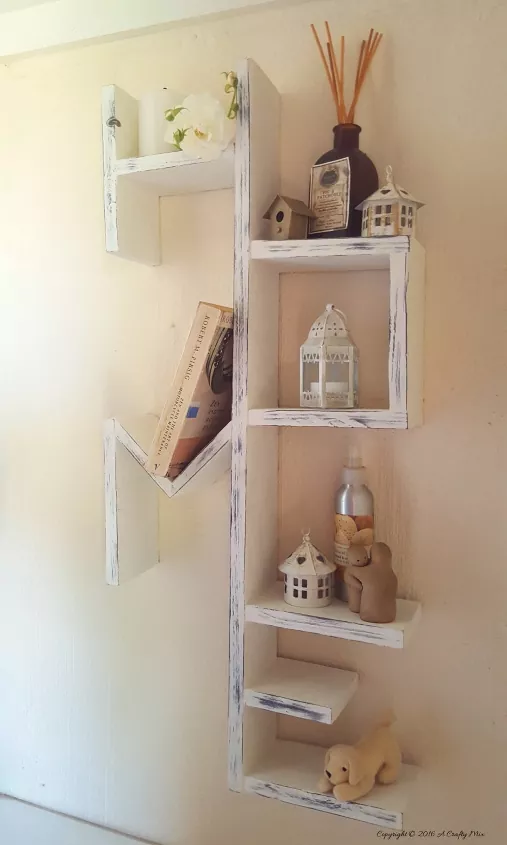
To build a shelf like this one here, you’ll need some wooden pallets. After cutting them up, use wood glue and staples to put the shelf together to form an “E.” Work your way upwards to form the letters “M,” “O,” and “H.” Let everything set, then paint it.
Open Shelves
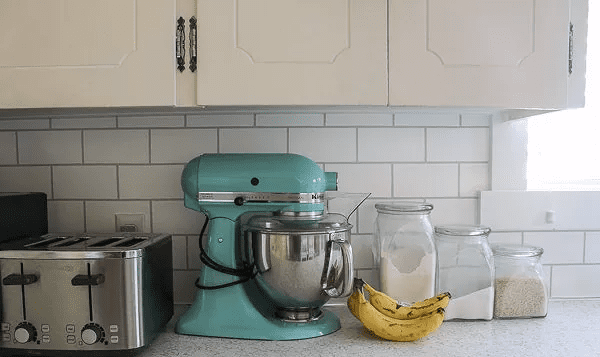
For homeowners with a relatively small kitchen, one effective way of making your kitchen look bigger is to use open shelving. This gives the impression of a larger kitchen because there aren’t any bulky cabinets or shelves taking up space.
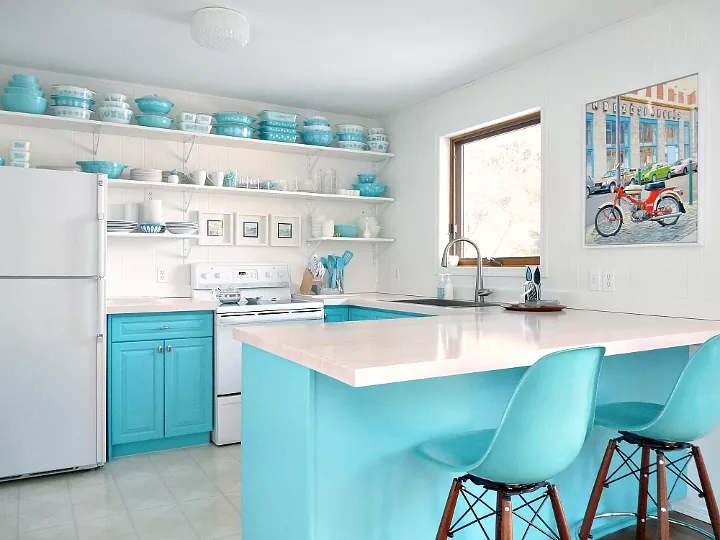
Fill the shelves with color-coordinated kitchen appliances so that the entire shelving area looks more aesthetically pleasing. Additionally, the shelves can also serve as a wall decoration for your kitchen. Now that’s how you kill two birds with one stone!
Increasing Storage in Small Kitchens
Speaking of small kitchens, we’re sure that homeowners with limited space in their kitchens have a hard time navigating them. Not to mention storing things in them. Increasing storage space is the first idea that comes to mind, but is that even possible?
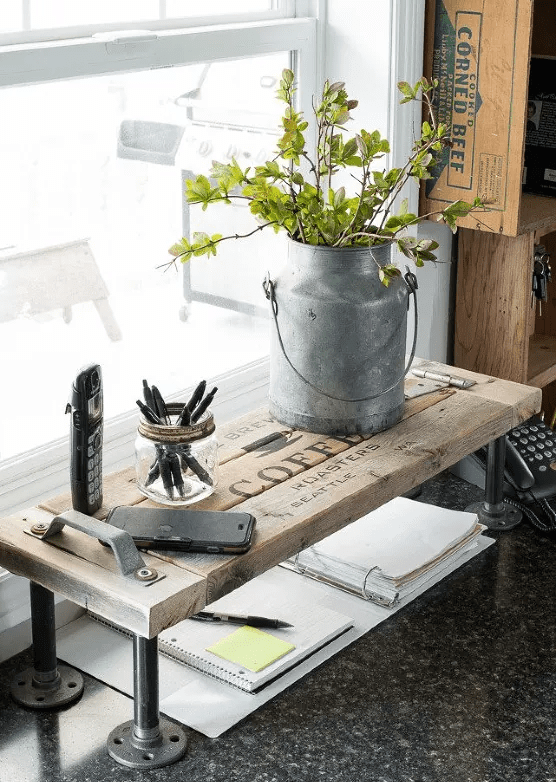
The answer is absolutely! Building a double-decker shelf can greatly increase storage space in the kitchen. Place this on your countertops, and you will be able to store twice as many things without taking up as much space as you would have.
Portable Kitchen Island
When you have a small kitchen, having a kitchen island in the middle of it is not realistic. However, worry not because we have an exciting idea for you to try out. Opt for a small portable kitchen island instead.
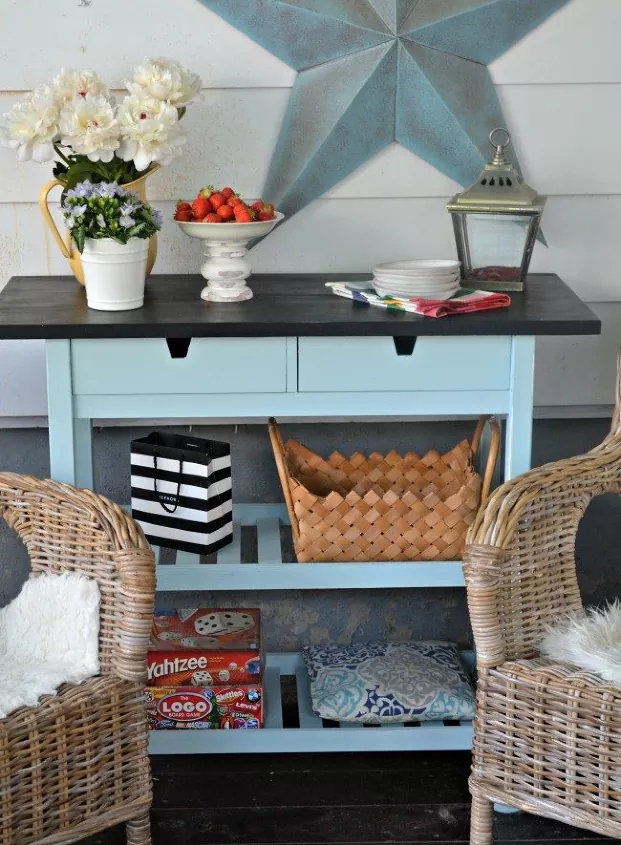
You can make a portable kitchen island out of a kitchen cart from Ikea. Customize it by painting it in any color you like. After that, use it as you would with an ordinary kitchen island and store it when you don’t need it.
Tiered Tray
You can also increase kitchen storage space with this sophisticated tiered tray. To create this, you’ll need some wooden frames. First, remove the glass from each of the frames and paint them separately. Feel free to use whatever color you want and have fun with it.
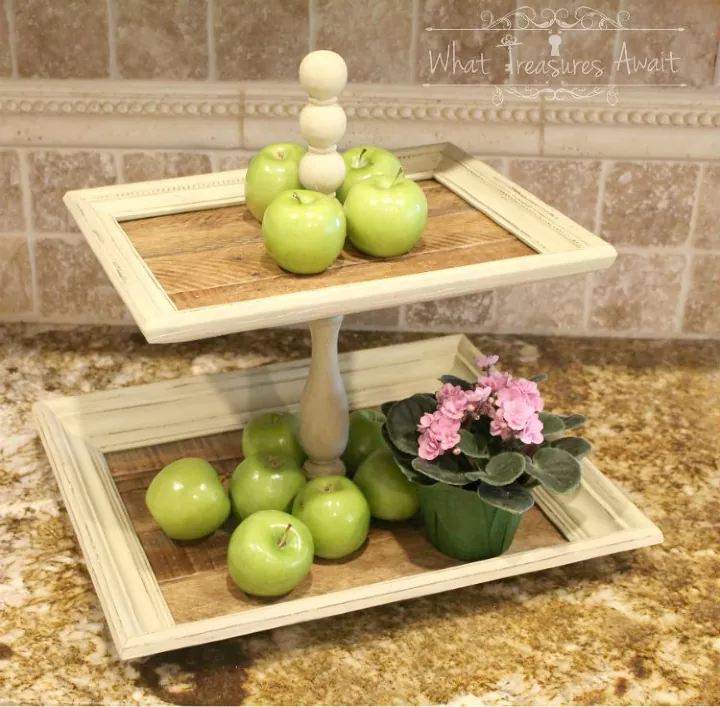
Next, you’ll need some wooden pallets. Once you’ve got yourself some, measure the size of the frame and cut the pallets down to size. After that, fit the pallets into the frames. Finally, use a carved wooden stand to assemble the tray.
Declutter!
With a small kitchen, clutter is your biggest enemy, so the most logical thing to do is to avoid it. A small kitchen filled with unnecessary stuff makes it look cramped, so it’s essential to learn how to utilize the space.
Keep only the things that you need, and be sure to put the kitchen utensils and cleaning products in proper storage areas. It’s also important to remember that being resourceful and creative really comes in handy when space is limited.
Stylish Fridge Shelves
Since you’re already working on kitchen shelves, why not give your fridge shelves a makeover too? They’re pretty boring, and each one looks exactly like the next one, so customizing them is a simple and fun project you can do over a lazy Saturday afternoon.
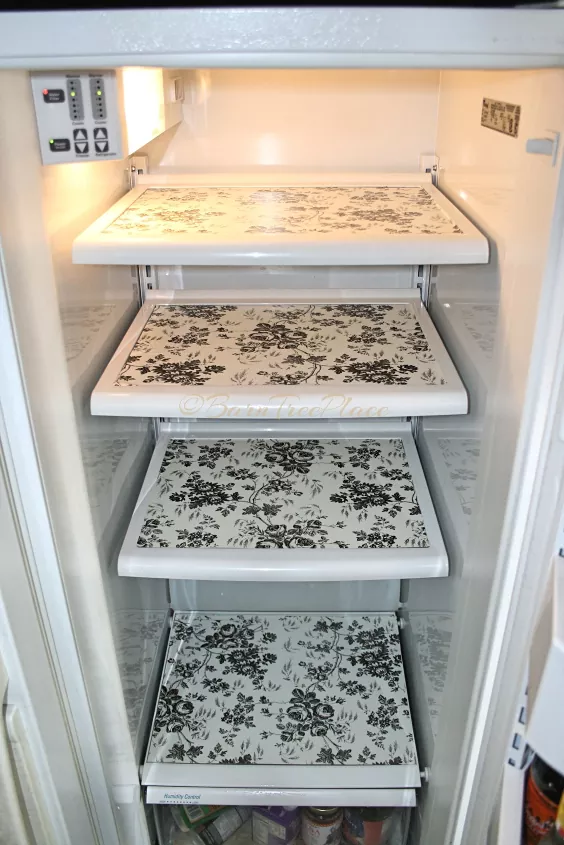
For this DIY project, first clean out your fridge and as it dries, head down to the nearest department store and purchase a roll of contact paper. Next, measure out the refrigerator shelves on the contact paper. Finally, fit your shelves with the contact paper, and that’s it.
Don’t Forget the Outside!
Once you are done with the inside, it’s only sensible to give the outside a makeover, too. Refrigerator doors are rather easy to decorate because they are basically blank canvases. It’s like they were made to be some kind of display (enter fridge magnets!)
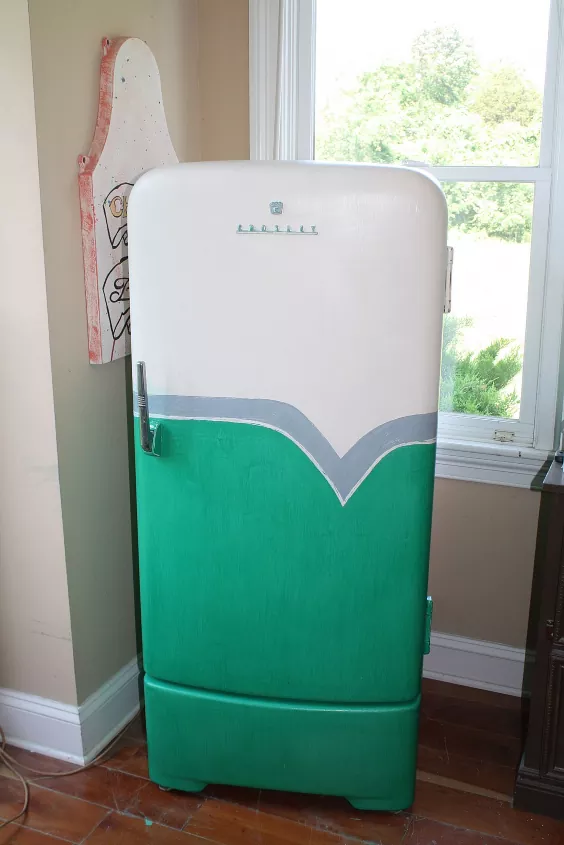
So, once inspiration hits you, get that paintbrush and paint until you’re satisfied with the result. Be sure to tape off any parts of the fridge that you don’t want to paint before you start on your refrigerator door and leave it to air dry before using it.
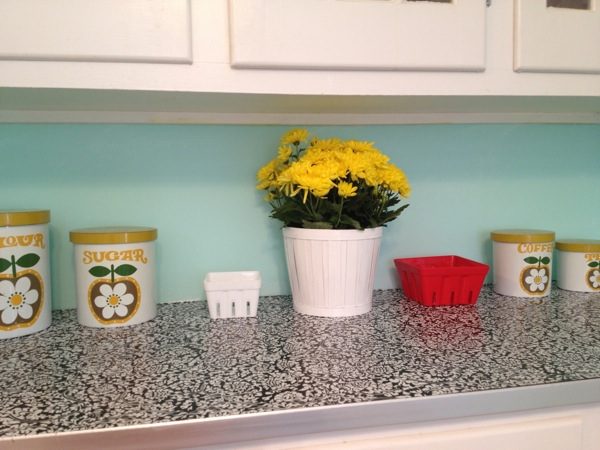
Display Shelves
Just like the display shelves you see at the mall, you can also use your shelves at home to hold beautiful decor pieces. Display shelves can also draw the attention of guests towards the odds and ends they contain and away from the dirty dishes in the sink!
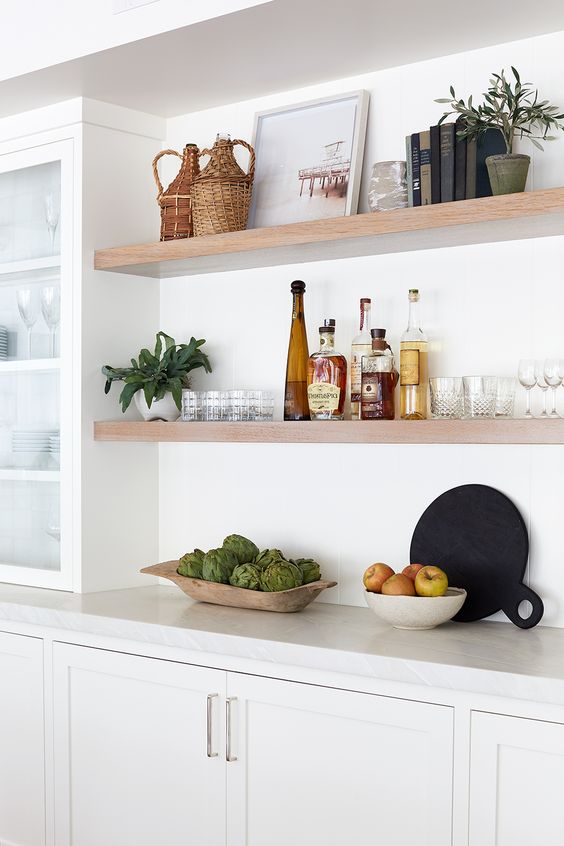
To put together a sleek and aesthetically pleasing display shelf, gather items with similar designs or complementary color tones and arrange them nicely on top of the shelf. You can also never go wrong with flowers, so we recommend adding some to your display.
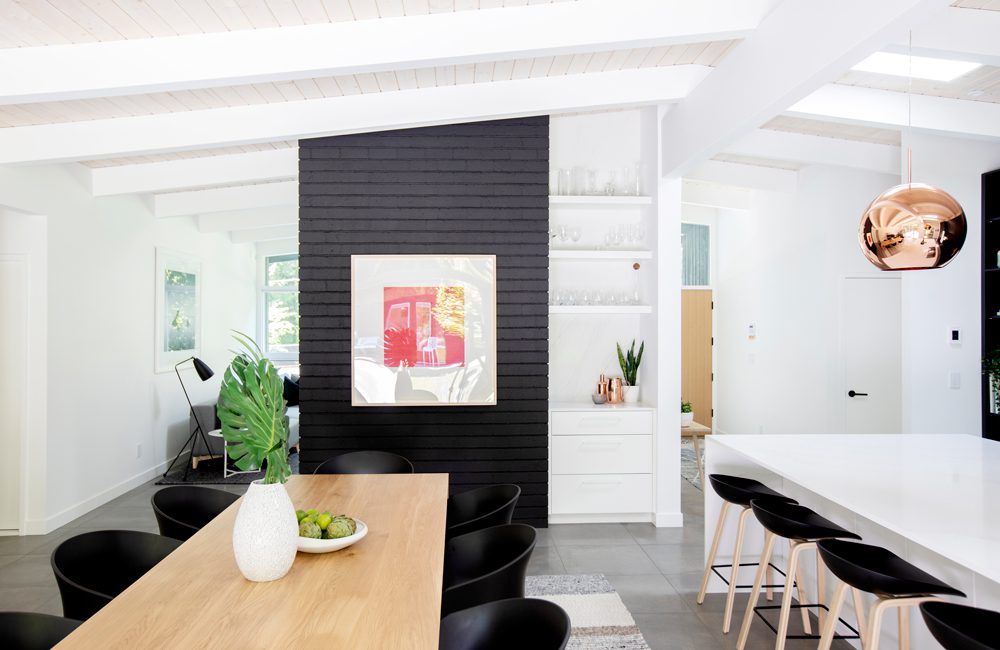
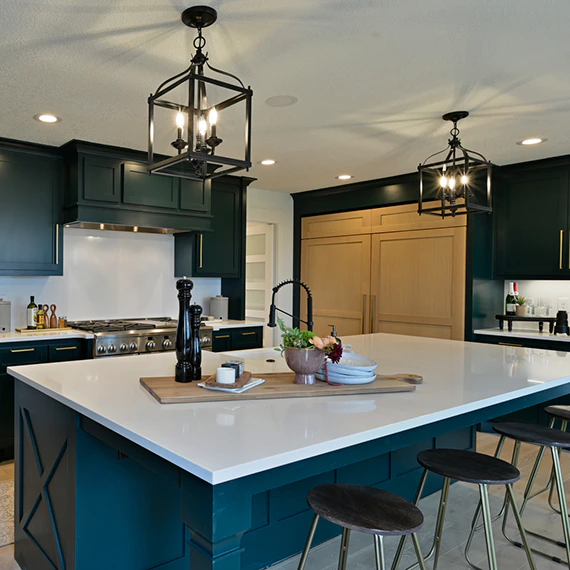
Let The Be Light!
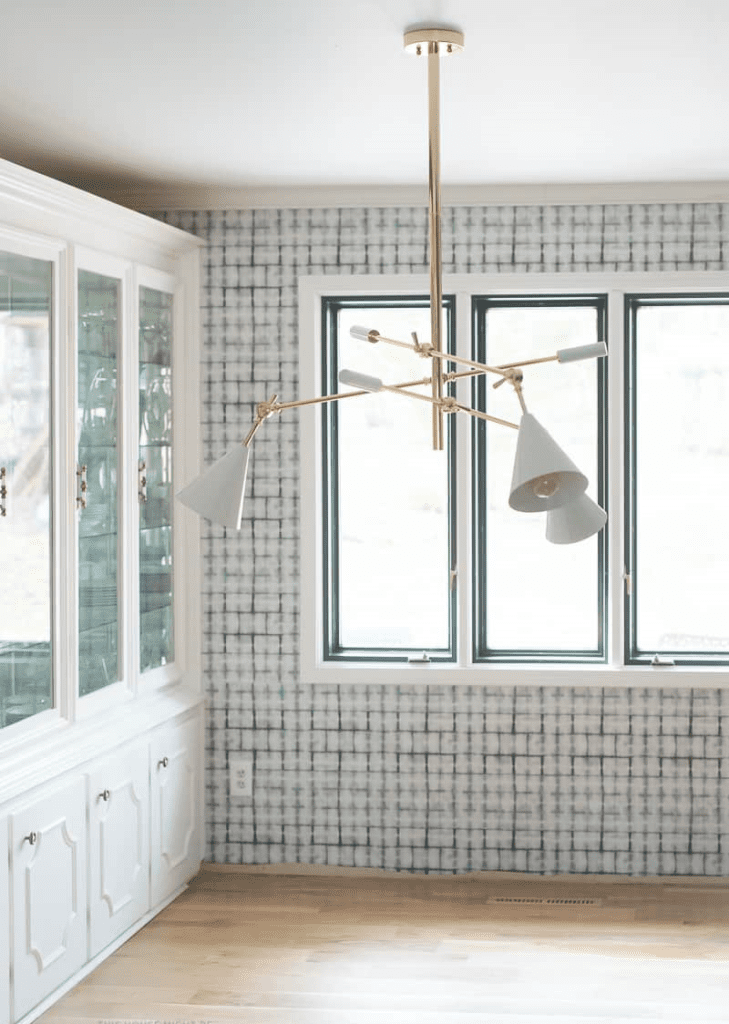
Lights can make or break a room. The right kind of lighting can make a space look spacious and luxurious, and the wrong kind will make it appear dull and dead. So, when it comes to lighting, homeowners need to select and plan carefully.
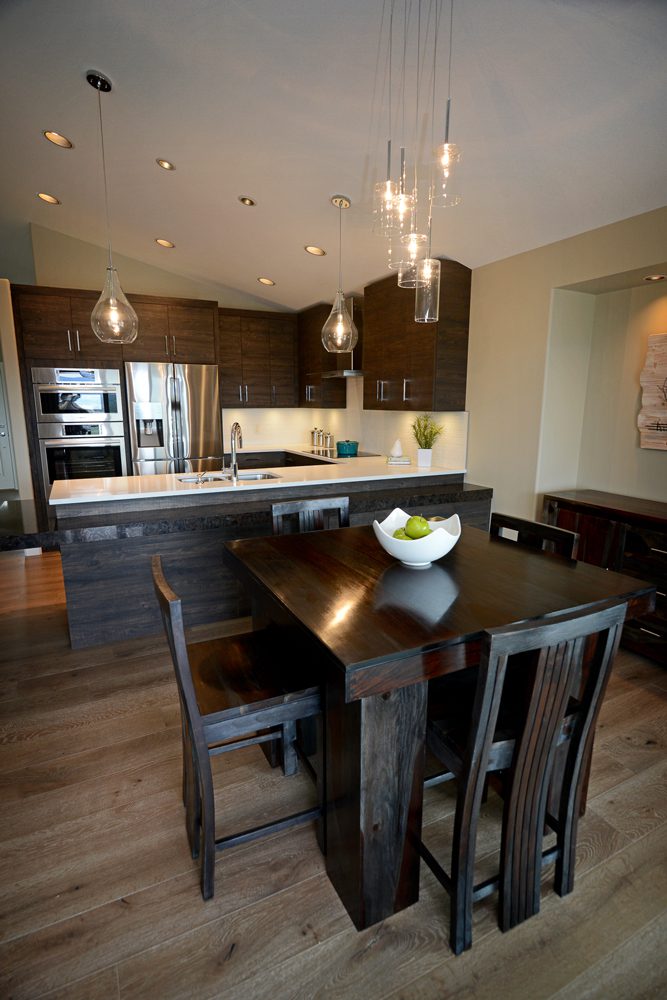
For darker places like sinks, prep areas, and walkways, it is absolutely crucial that homeowners choose bright lights so that they can illuminate shadowy corners. You can also add pendant lighting to bring focus to specific areas in your kitchen.
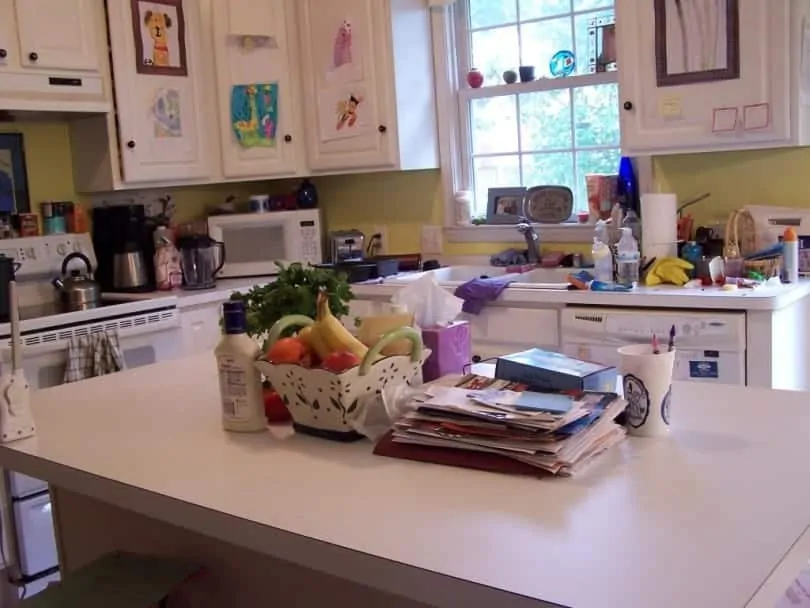
Visualizing
Last but not least, it is of the utmost importance that homeowners visualize the layout before they start remodeling or decorating anything. Visualizing helps to give you an idea of how the kitchen will look once all the renovation work is done.
Also, having a vision can help you avoid unnecessary costs brought on by excessive purchases. If you know what you want, it’s less likely that you will be swayed into including things you hadn’t planned to have in your dream kitchen.