
Getting Ready For The Holidays: 45 Easy Pine Cone DIY Ideas To Add A Festive Mood To Any Home
One of the great things about pine cones is that they can be used to create a variety of crafts. They’re perfect for adding a touch of nature-inspired beauty to your decor any time of the year, but especially during the holidays.
You can paint them, glue them together to make a wreath or garland, or even use them to make Christmas ornaments. If you’re feeling incredibly crafty, you can even turn them into fire starters by melting wax and pouring it over the top.
No matter how you decide to use them, pine cones are a great way to add some extra cheer and warmth to your home during the holiday season. From simple ornaments to gorgeous centerpieces, there are plenty of ways to get creative with this classic wintertime material.
Keep reading for some excellent and simple pine cone craft ideas!
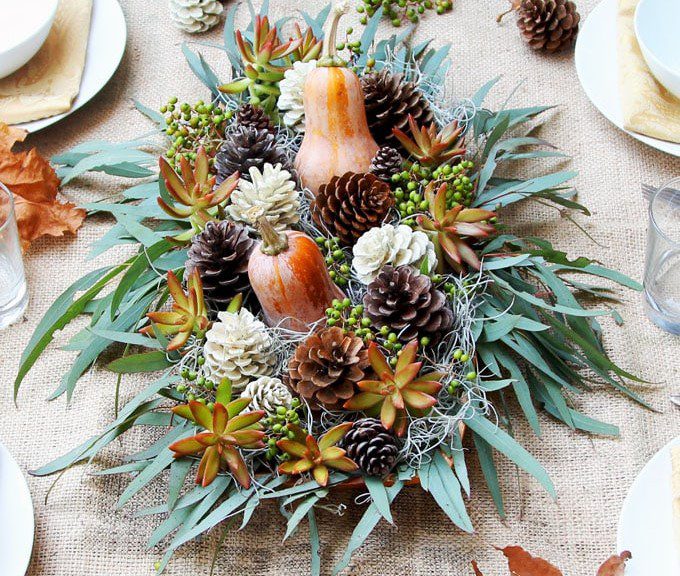
1. Floral centerpiece
You can make a beautiful and festive centerpiece with fresh flowers and pine cones. To make the centerpiece, collect a few pine cones. You’ll need about ten for a small arrangement. Then, select your flowers. For this arrangement, you’ll need approximately 15 flowers and you’ll have to cut the stem.
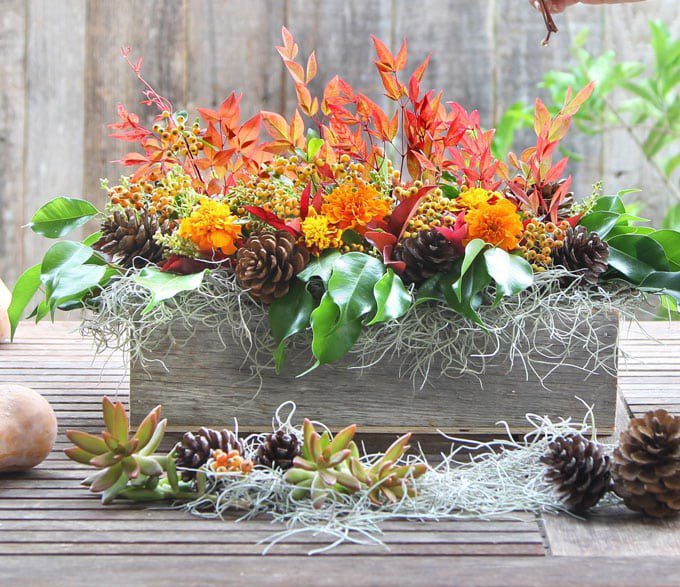
Next, arrange the pine cones in the center of your container. You can use hot glue or wire to attach them to the container. Once you have a base of pine cones, add the flowers around them. Alternate between large and small flowers so that it’s visually appealing.
2. DIY photo frames
Christmas is perfect for getting crafty and making photo frames! All you need is some pine cones, a glue gun, and pretty ribbon or fabric. Start by gluing the pine cones together in a rectangular shape. Either make them all the same size or vary the sizes for a more eclectic look.
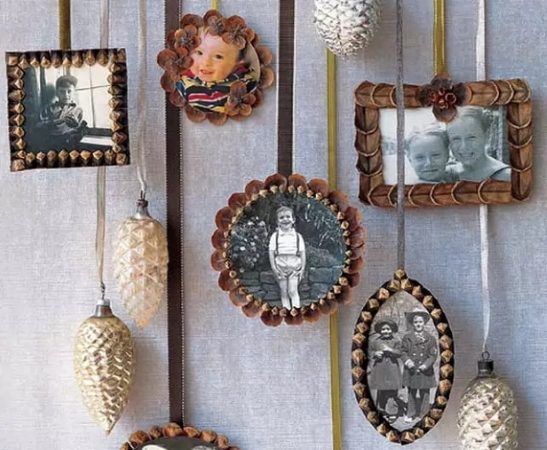
Once the glue has dried, use a hot glue gun to attach your ribbon or fabric around the edges of the frame. Hold it for a few seconds before you hang your new frame, and pop in your favorite family photos!
3. Frosted mason jars
For this craft project, you’ll need some pine cones, pine leaves, and berries. You can find all of these items at your local craft store, or you can go for a nature walk and collect them yourself. To start, take a small pine cone and hot glue it to the mason jar.
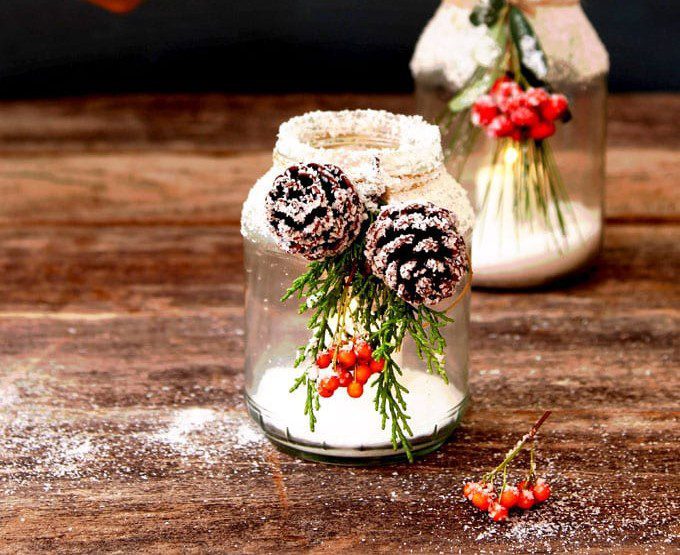
Hold the cone until the glue dries. Next, add some pine leaves to the top of the jar. You can either hot glue them in place or use wire to twist them around the jar’s mouth. Finally, add some berries to the top of the leaves. Put a candle inside the mason jars.
4. Christmas decorations
Add a little bit of effortless rustic charm to your home’s Christmas decor. To get started, you’ll need pine cones, pine leaves, and a galvanized bucket. Arrange the pine cones and leaves in the galvanized bucket according to your liking, and then fill in any empty spaces with artificial snow.

Then add some pine leaves on top of the pine cones. Finally, tie a piece of twine or ribbon around the top of the decoration to hold everything in place. You could also use spray paint to give the galvanized bucket a festive color or leave it as is.
5. Christmas trees for kids
You can turn pine cones into small Christmas trees for kids. It’s a fun, festive craft project that will get them ready for the holidays! Grab some pine cones, a hot glue gun and glue sticks, brown or green paint, or twine, and small green beads or leaves.
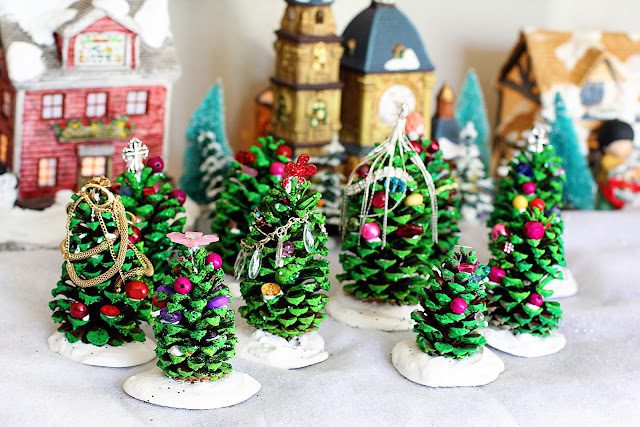
Paint the pine cones green or wrap them to give them a natural look. Attach small green beads or leaves to the top of each cone. Use a display stand to hold the trees upright. Your little ones will love having their own miniature Christmas tree to decorate.
6. Hanging animals
This easy project can be adapted in lots of ways. For example, you could make different animals by using different colors or types of felt or by varying the size of the pine cones. You’ll need pine cones, felt scraps in various colors, scissors, thread in colors that match the felt, and a sewing needle.

Cut out two identical shapes using felt scraps to make a hedgehog. These will be the basic shapes of your animal’s body. Create a face with eyes and a nose using felt and glue it to the pine cone with other body parts.
7. Tree from pine cone scales
Christmas trees are a popular way to celebrate the holiday season, but they can be expensive to buy. Why not make your own Christmas tree using pine cone scales? It’s easy and fun, and it will save you money. Remove the scales from the cone.
Glue them onto a thin piece of tree-shaped wood or cardboard. Another way is to leave the scales on the cone and then use wire to create the branches and pine needles. You can also paint or decorate your tree however you like.
8. Winter decor
Why not go all out and make your place feel like winter has come earlier? Create a festive display of pine cones covered in faux snow with a few materials. To get started, gather some fake snow (either store-bought or made from cornstarch and cold water), white paint, and a small paintbrush.
Paint the tips of the pine cones white. You may need to do multiple coats to get the perfect look. Once the paint is dry, sprinkle on some fake snow. Don’t forget to pack it properly so it looks realistic. Place the cones in strategic spots around your front door.
9. Make Christmas tree ornaments
There are lots of ways to make Christmas tree ornaments using pine cones. One easy way is to paint the pine cones in different colors and let them dry. You can also add glitter, sequins, or other decorations to make them look more festive.
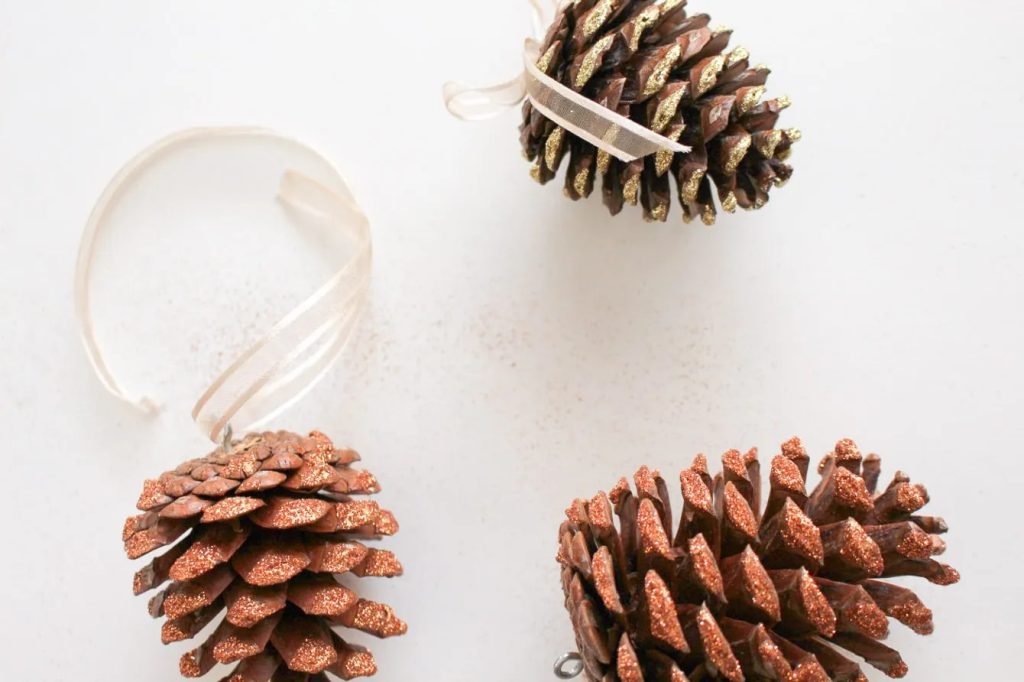
Another option is to glue small magnets to the back of the pine cones so that they can be attached to the metal branches of a Christmas tree. Or you could use a hot glue gun to attach ribbon, lace, or other materials around the edges of the pine cone for a fancier look.
10. Earthy centerpiece
An earthy Christmas centerpiece can be made using pine cones, leaves, and a candle in a wooden box. To make the centerpiece, start by gathering some pine cones. You’ll need enough to fill your box, plus a few extras for decoration. If you can’t find any fresh pine cones, you can also use artificial ones.
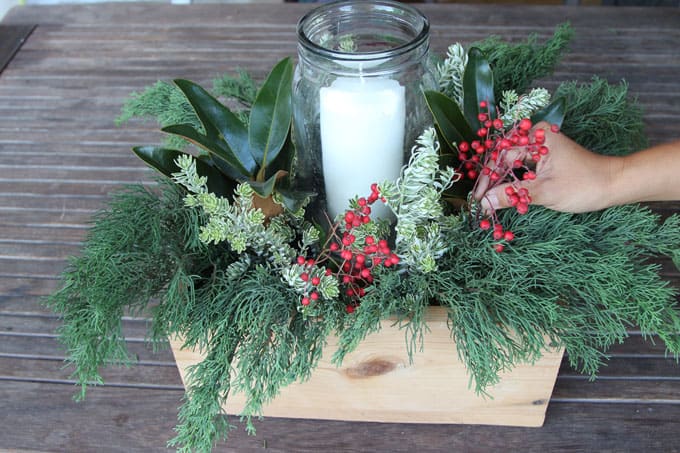
Next, gather some leaves. You can use any type of leaves you like, but we recommend choosing something that’s festive and Christmassy. Assemble your leaves into a small bunch and fasten them with a ribbon. Finally, place the candle in the middle of the leaves.
11. Pine cone flowers
Pine cone flowers are simple to craft, and they look lovely! Get some pine cones, dried leaves, and hot glue. First, attach the leaves to the pine’s top. You can use any leaves, but try to use different colors and sizes of leaves.
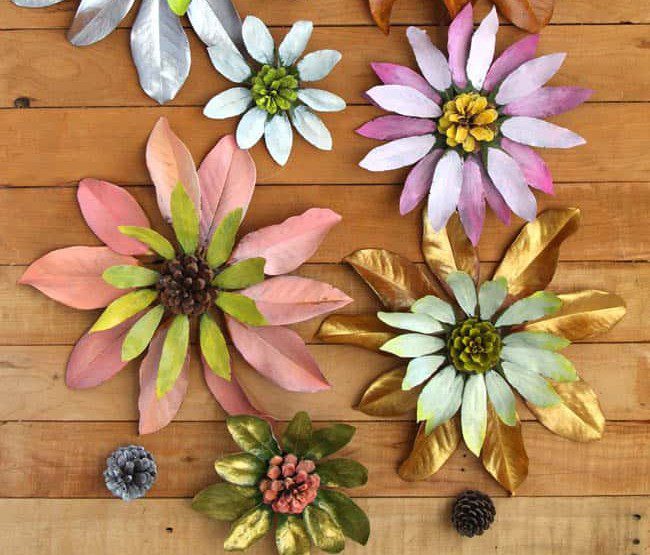
Next, glue a few small pine cones around the edge of the large pine cone. This will give your flower petals some extra detail. Work in shorter areas to ensure the glue dries evenly. It’s also less likely to smudge your work. Ensure you dry pine cones before starting your project, or they’ll warp.
12. Fancy natural gift packaging
It’s the time of year when many are starting to think about their holiday gift-giving. One great way to save money and show your creative side is to pack the gifts yourself using brown paper and some pine cones for decoration. You may also add red ribbons and berries.
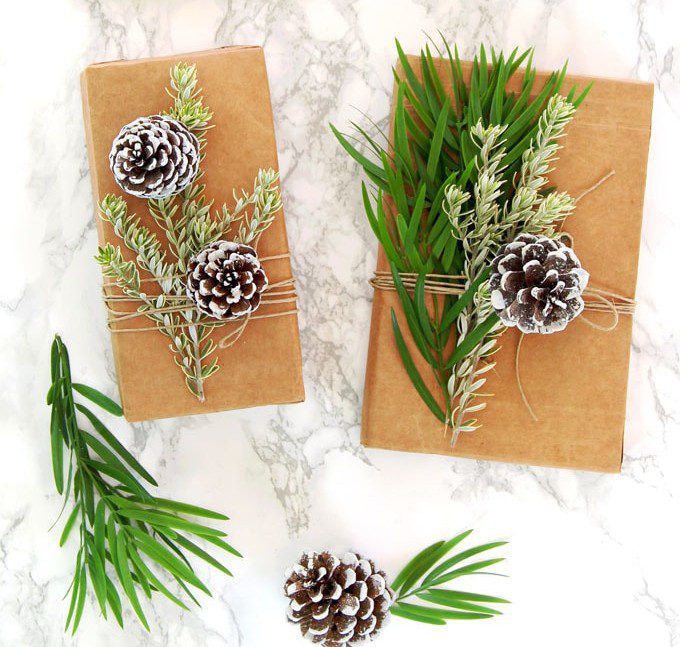
Not only will this save you good money on wrapping paper, but it will also add a touch of rustic charm to your presents. Plus, it’s a fabulous way to welcome the Christmas spirit! Wrap your gifts in brown paper and then use pine cones or other festive decorations to embellish.
13. Make a garland
If you’re in the mood to get crafty this Thanksgiving, why not give this simple project a try? It requires paint, pine cones, and string. Begin by painting your pine cones in any color you like. You can go for a traditional Thanksgiving look with autumnal colors like gold, red, and orange.
You may also select something more festive, like green and silver. Once the cones are dry, tie them together with some string to create a festive garland. Hang it up anywhere you like – on the mantelpiece, over the doorframe, or even around the Christmas tree!
14. Cute reindeer for the kids
If you want to make a cute reindeer for the kids, you need some pine cones and a few supplies from the craft store. Start by spray painting the pine cones brown or black. Once they’re dry, use a hot glue gun to attach googly eyes and cotton balls for the snowman’s hat.

Pick a red pom-pom for his nose. You can also add other embellishments like pipe cleaners for antlers and legs or a scarf made from fabric or ribbon. These little reindeer are sure to make your place feel Christmassy! Make these pinecone reindeer in different sizes.
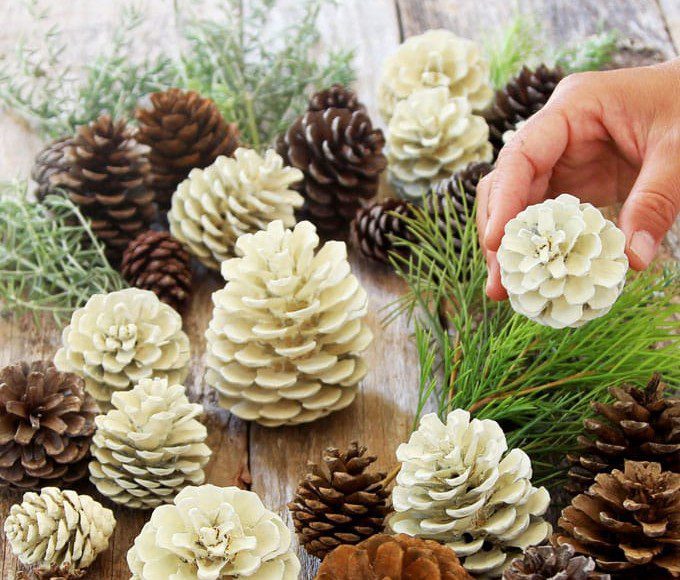
15. No-bleach pine cones
Pine cones are such a natural and beautiful decoration, but they can often be a bit bland. Painting them white makes them stand out and gives your home that “Winter Wonderland” feeling. Plus, it’s excellent to use up leftover paint from other projects.
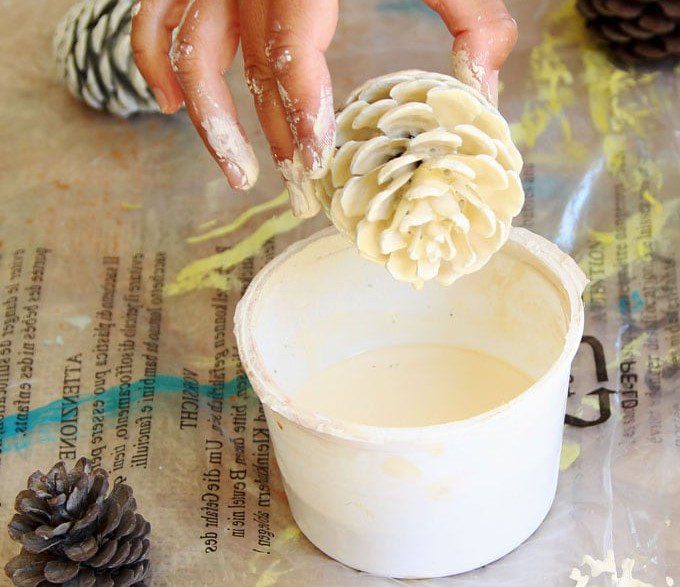
Before white-painting pine cones for decor, consider some things. First, remember that the paint will need to be regularly reapplied, especially if the cones are outside. Second, unless you’re going for a specific look, white-painted cones may need a coat of primer for good coverage.
16. Pine elf on the shelf
To make an elf paint the pine cone green. Once the pigment is parched, use a marker to draw the features of an elf – such as a pointed hat and ears. You can also add other details like shoes and a belt. Also, glue on some googly eyes.

Alternatively, you can cut some green felt for the elf’s body. Round one end of the felt like a head, then use a pencil to make two small marks for the arms. Glue on some beads for the eyes and nose. Cut the white felt for the teeth and eyebrows.
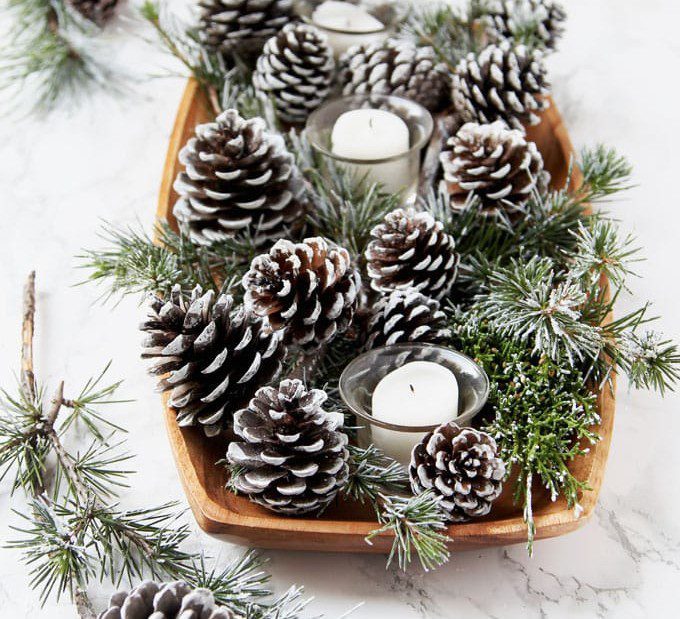
17. Candlelit white tray
Bring the white Christmas indoors with white decor. First, paint the tray white. While the paint is drying, gather some pine cones. You can purchase the cones or collect them outside. Make sure they’re all cleaned and dried off before you start decorating.
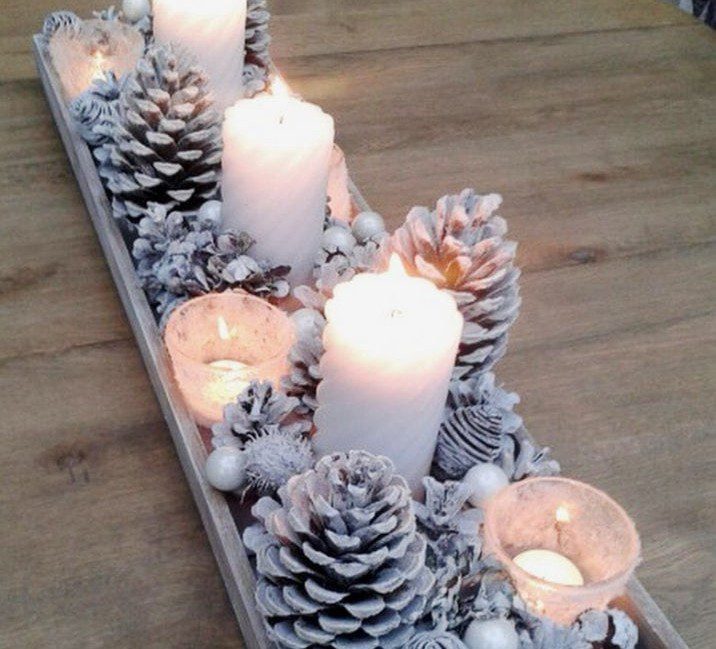
Once the paint has dried, add the pine cones to the tray in any pattern you like. Then, light some candles and place them in between the pine cones. This will give your tray a warm and festive glow! Enjoy using it on the coffee table or dining table for decorating during the holidays.
18. Colorful flowers
Paint pine cones in different colors to use as colorful flowers! You could either paint them with acrylic paint or spray them with an enamel spray. When you’re on the hunt for a quick and effortless way to dress up some plain pine cones, spray them with a bright color like pink, yellow, or blue.
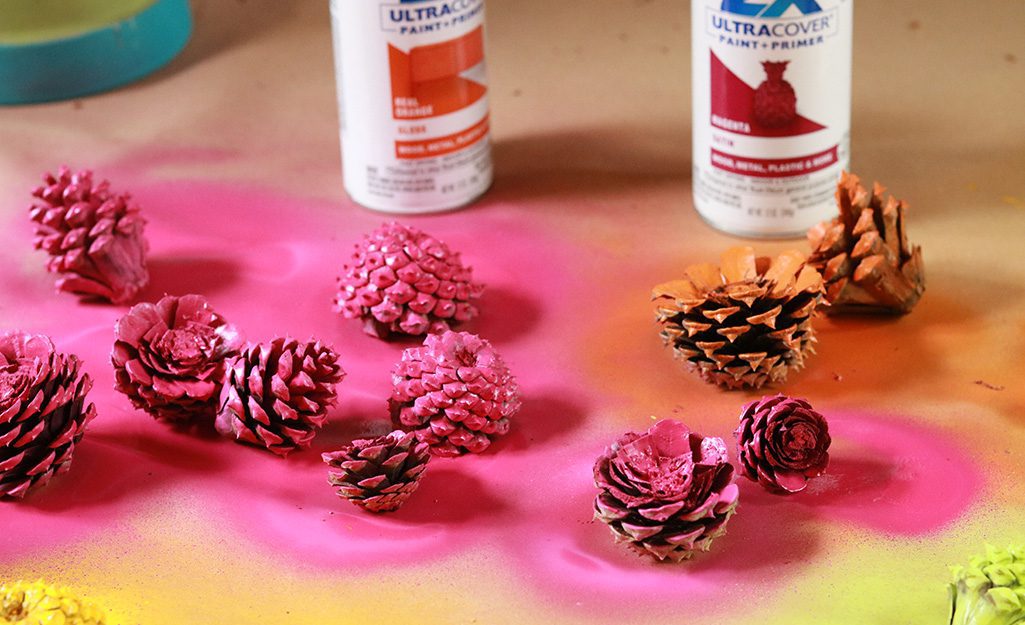
Paint them in fun patterns like stripes or polka dots. If you’re feeling inventive, you can paint them to look like flowers or something like that. You’ll need a paintbrush to add these details. Arrange the cones in different patterns for decor.
19. Scented pine cones
The great thing about assembling your potpourri is that you can adjust it to your likes. If you like the smell of pine, then adding a few drops of essential oils will give your potpourri a refreshing scent. Gather some fresh pine cones and remove any debris or insects.
Spread out the cones on a baking sheet and bake at 200 degrees Fahrenheit for about 30 minutes to dry them out. Place the dried pine cones in a jar or container, and add 5-10 drops of essential oil pine (or other desired essential oils). Place these cones on a tray and enjoy the scent.
20. Salt snow DIY
If you’re looking to create a fake snow effect but don’t want to buy or make fake snow, try sprinkling salt on pine cones! The salt will create a frosty look and will last for several days. Plus, it’s a great way to get your home ready for the winter season.
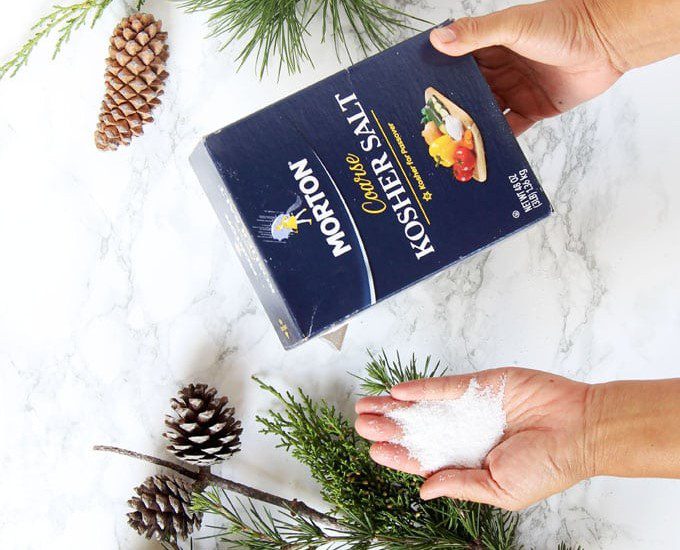
You may glue the thick salt flakes to add more dimension to the cones. Decorate these cones over a layer of salt. Add some Christmas lights, string some garland, and you’re all set! Your friends and family will be amazed at your winter decorating skills.
21. DIY Penguins
This project is a lot of fun and easy to do! To make a penguin, you’ll need a pine cone, black and white felt or construction paper, scissors, a glue gun or tacky glue, and googly eyes. Cut two black circles out of the felt for the penguin’s eyes.
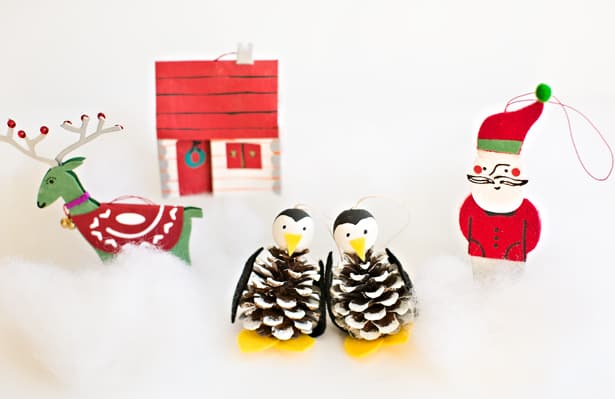
If you’re using construction paper, cut two circles out of black paper and then cut a smaller white circle out of the center of each one. Glue the googly eyes on if desired. Cut a triangular beak out of orange felt or construction paper and glue it to the front of the pine cone.
22. Decorative wreath
One of the best things about pine cones is their versatility. They may be used for various crafts, from wreaths to holiday ornaments. And they’re effortless to work with, too. For this project, you’ll need a wire wreath frame, glue, pine cones (both small and large), scissors, and ribbon or string.
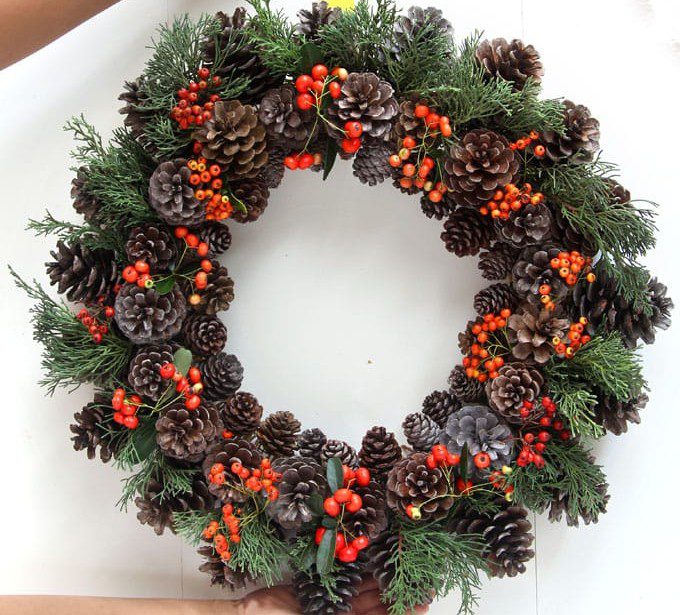
Start by gluing the pine cones to the wire frame. Overlap them slightly. Once the glue has dried, do the same with the larger pine cones. Be sure to stagger them so that it looks natural. Hang your wreath on a hook on your door, or use a command hook to avoid damaging your doorframe.
23. Spray paint using a toothbrush
Give your pine cones a snowy effect with just a few simple steps! First, gather some supplies. You’ll need to spray paint in white or a light color, a toothbrush, pine cones, newspaper, or cardboard to protect your work surface, and an outdoor space to spray.
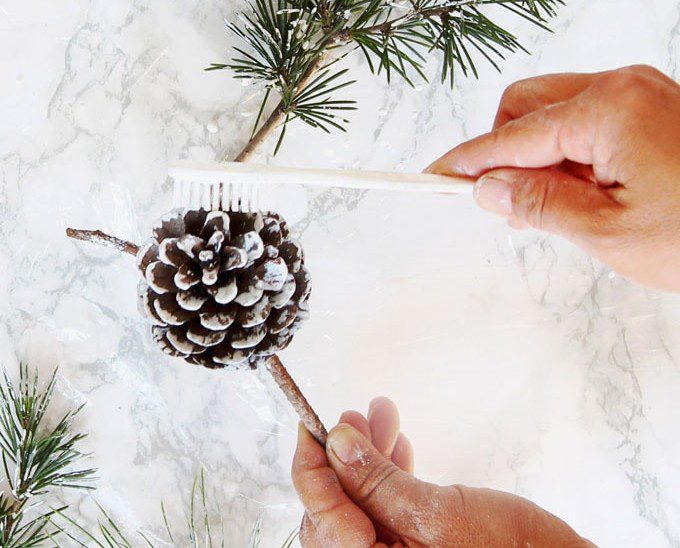
Next, cover the surface with newspaper or cardboard. This will protect it from paint overspray. Then take your pine cones and give them a good coat of spray paint. Make sure you get all sides of the cone covered. You may want to do multiple coats for the best results.
24. Large pine cone tree
Enjoy this great way to make a festive tree or holiday decoration! All you need is a bunch of pine cones, some styrofoam in the shape of a triangle, and some hot glue. Start by gluing the largest pine cones to the bottom of the triangle. Make sure that they are evenly spaced out.

Glue smaller pine cones on top of the larger ones in order to create a layered effect. Once you have covered the entire surface with pine cones, use hot glue to attach the triangle to a base, which can be a piece of styrofoam or cardboard.
25. Miniature owls
For the owl bodies, you’ll need pine cones and brown felt. You’ll also need white and black Sharpie markers, googly eyes, a hot glue gun, glue sticks, scissors, a wire hanger, and needle-nose pliers. To make the owls, start by cutting two circles out of the brown felt.
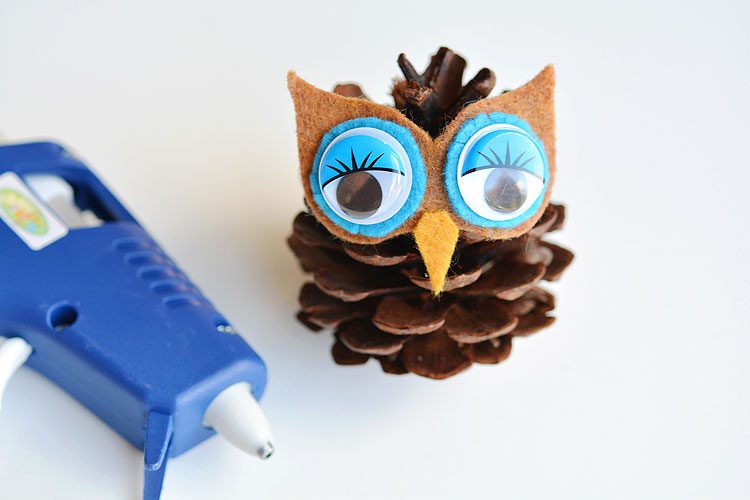
Use the Sharpie markers to draw on the facial features—be sure to make them cute! Glue on the googly eyes and use wire to create hangers on the back. With this hanger, you may hang the owl from the fireplace and door entrance.
26. Thanksgiving table decor
Thanksgiving is a time to be with family and friends, and what ideal way to decorate your table than with natural elements? Dry leaves and pine cones can add a rustic touch to your table setting. Choose pine cones when you’re on the hunt for something a bit more festive.
Try adding some berries or other autumnal fruits. You may start by placing the leaves and pine cones in small piles around the edge of your table or in the center of the table as a centerpiece. If desired, you can also spray them with fake snow to give them a more festive look.
27. Small fox for decor
You’ll need to gather some supplies to make your pine fox. You’ll need some pine cones, orange and white felt, scissors, and hot glue. To make the fox, start by cutting a triangular shape out of the orange felt for the body.
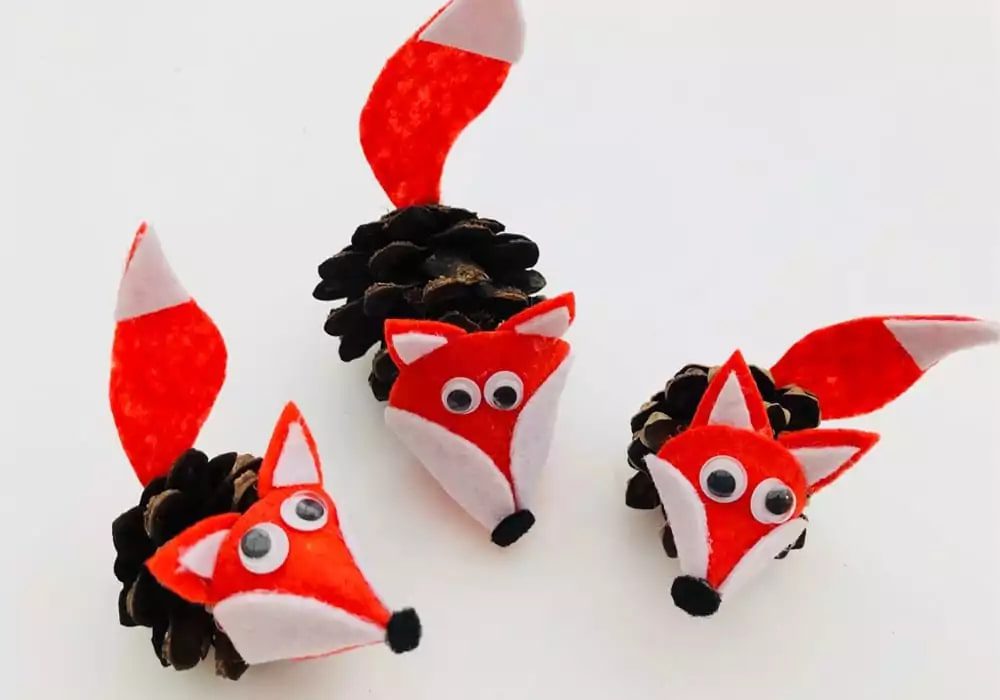
Cut a smaller triangle out of the white felt for the face. Glue the white triangle onto the orange one, then add two small black circles for the eyes. Cut four small strips of white felt for the tail. Glue them to the bottom of the pine cone and then to the fox.
28. Terracotta topiary
Start by gathering your supplies. You’ll need a terracotta pot, pine cones, styrofoam, a hot glue gun, a wire cutter, and floral wire. Cut a piece of styrofoam to fit inside the top of your pot. Glue the pine cones to the Styrofoam in any desired pattern.
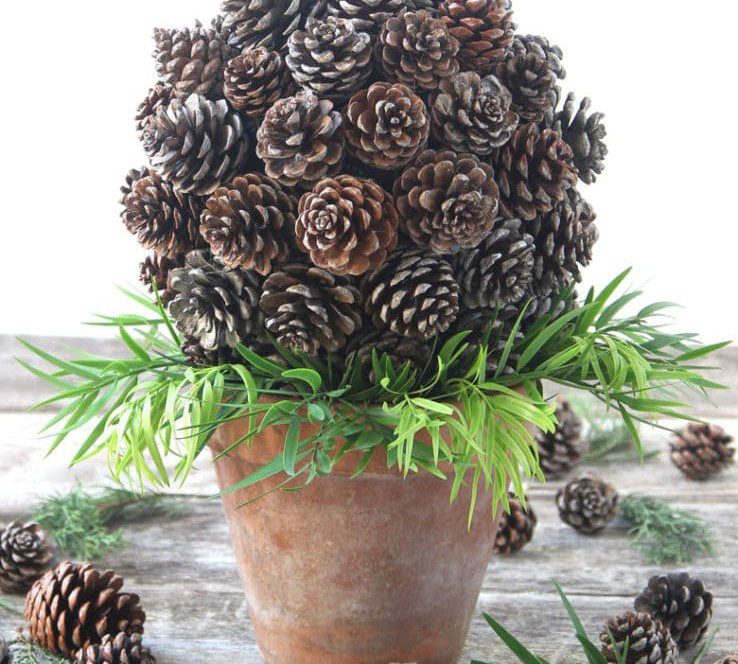
Cut a piece of floral wire to fit around the top of your pot, then twist it into place. This will act as a hanger for your topiary. Hang your topiary on a door or wall and enjoy! You may also place it by the door along with other holiday decor items.
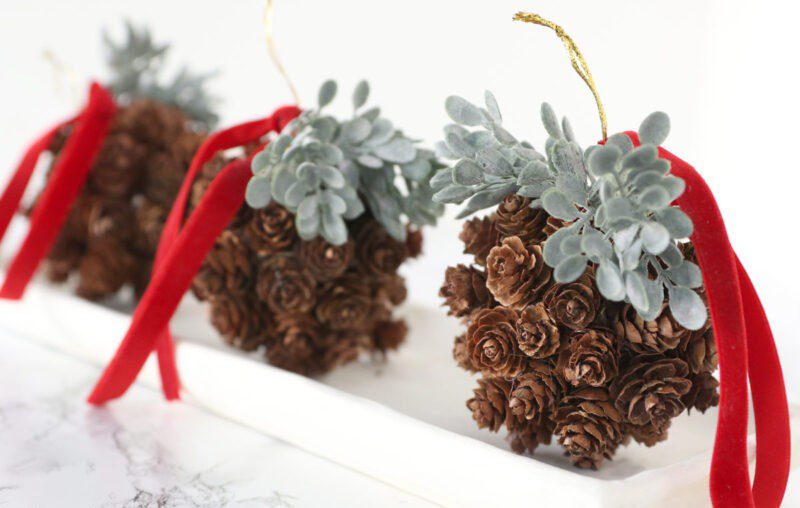
29. Pine cone kissing ball
Grab some pine cones, a circular styrofoam ball, a ribbon, a piece of wire or sturdy string, a hot glue gun, and glue sticks. Start by cutting the styrofoam ball in half with scissors. Now, start hot gluing pine cones onto the ball. Glue them close together so there aren’t any spaces between them.

You may add ribbons, leaves, and berries to the ball. Also, attach a ribbon or a wire to ensure that the ball can be hung to the ceiling or the door frame. This will be a great decoration for your Christmas party while adding holiday vibes.
30. Farmhouse topiary
To make a farmhouse topiary, you will need a farmhouse-themed pot, pine cones, a styrofoam ball, a green ribbon or festive bow, a hot glue gun, and floral wire (optional). Cut the styrofoam ball in half with pruning shears or scissors. Discard the bottom half. This will be your topiary’s base.
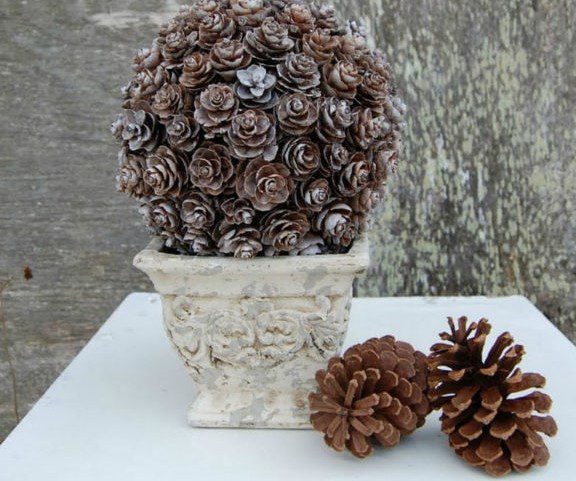
Glue pine cones to the top of the designer pot with a hot glue gun. You may use as many or as few pine cones as you’d like. Make sure that they are evenly spaced. Add ribbons for an additional flair. Place the topiary on the table or doorway.
31. Creative candleholders
Ditch the glass candle holder and make something nature-inspired for your home. Grab pine cones and clean them. Measure and mark the desired height of your candle holder on the pine cone with a ruler or tape measure. Cut the top of the pine cone off using a knife or scissors at the marked height.
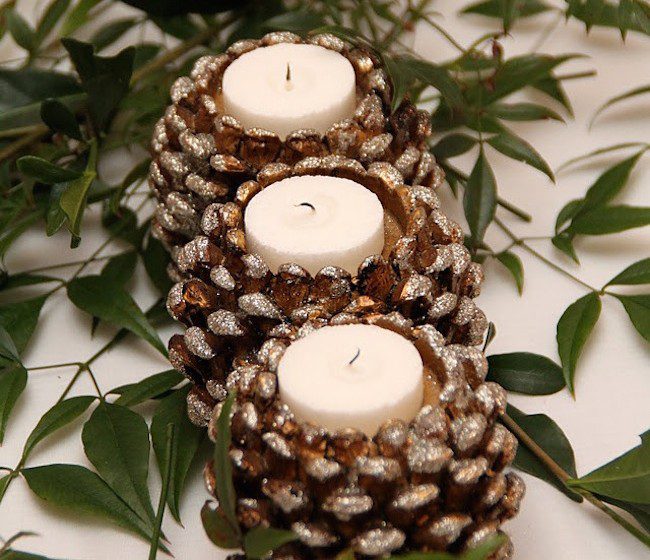
If there’s any excess wood on the cone inside, use a knife to remove it until the opening is wide enough for your candle to fit snugly. You may add a metal holder for the candle and then use it as a candle holder. Insert your candle into the opening of the pine cone.
32. Pine mason jar centerpiece
Mason jars and pine cones together will add a glimpse of holiday cheer. You can fashion a pine cone mason jar centerpiece in just a few simple steps. Start by gathering some supplies. You’ll need a mason jar, pine cones, a hot glue gun, and a tealight candle.
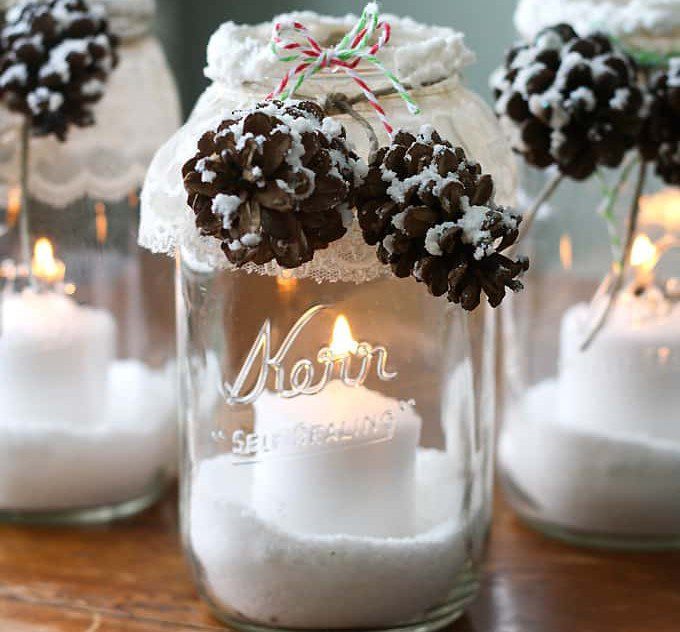
One way is to glue the pine cones around the top of the mason jar lid. Make sure to evenly space them out so that it looks nice and symmetrical. Put the tealight candle inside the mason jar and replace the lid. You may also arrange a mason jar candle with cones in a box.
33. Snowflake wreath
With the upcoming holidays, it’s time to start thinking about festive decorating ideas! Snowflake wreath arrangements are a great way to welcome the winter season. They’re also really easy to DIY! All you need is a wire hanger, some small pine cones, and some ribbon or thread.
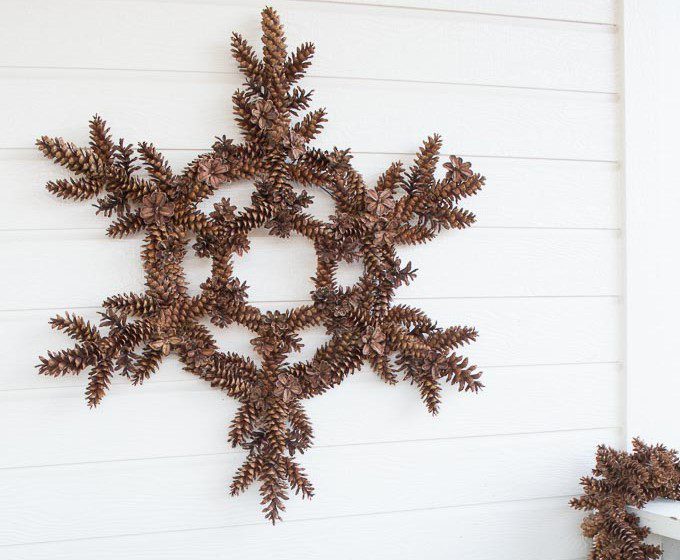
Bend the hanger into the desired shape for your wreath, and then use wire or thread to wrap around the pine cones and secure them in place. Once you have your pine cones in place, use ribbon or thread to attach them securely to the hanger.
34. String lights and mason jars
If you’re looking for an exciting and easy way to decorate your home for the holidays, consider adding pine cones and fairy lights to mason jars! It’ll make your house look festive and also add a touch of rustic charm to the space.
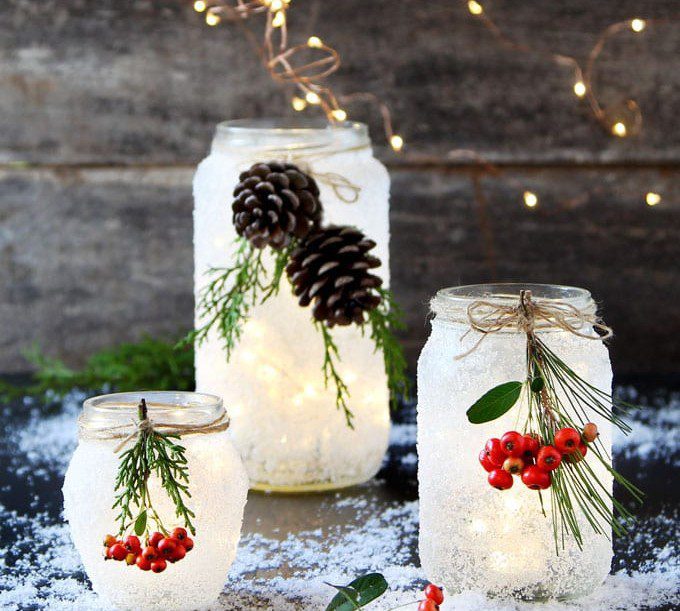
Gather some pine cones, fairy lights (either battery-powered or plugged in), and mason jars to get started. If you’re using battery-powered fairy lights, pop them into the jar. If you’re using plugged-in fairy lights, remove the plug’s cover and poke the wire through the top of the jar lid.
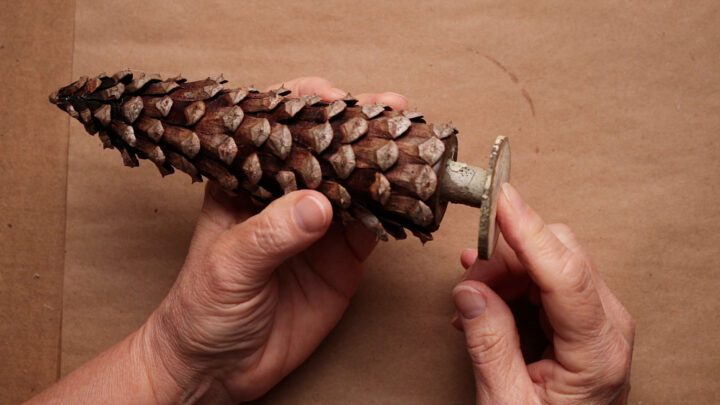
35. Cone picks for a floral arrangement
The best way to attach the sticks to the pine cones is with a strong adhesive, such as hot glue. First, make sure the cones are completely clean and dry. Then, use a glue gun to apply a thin strip of glue along the length of the stick.
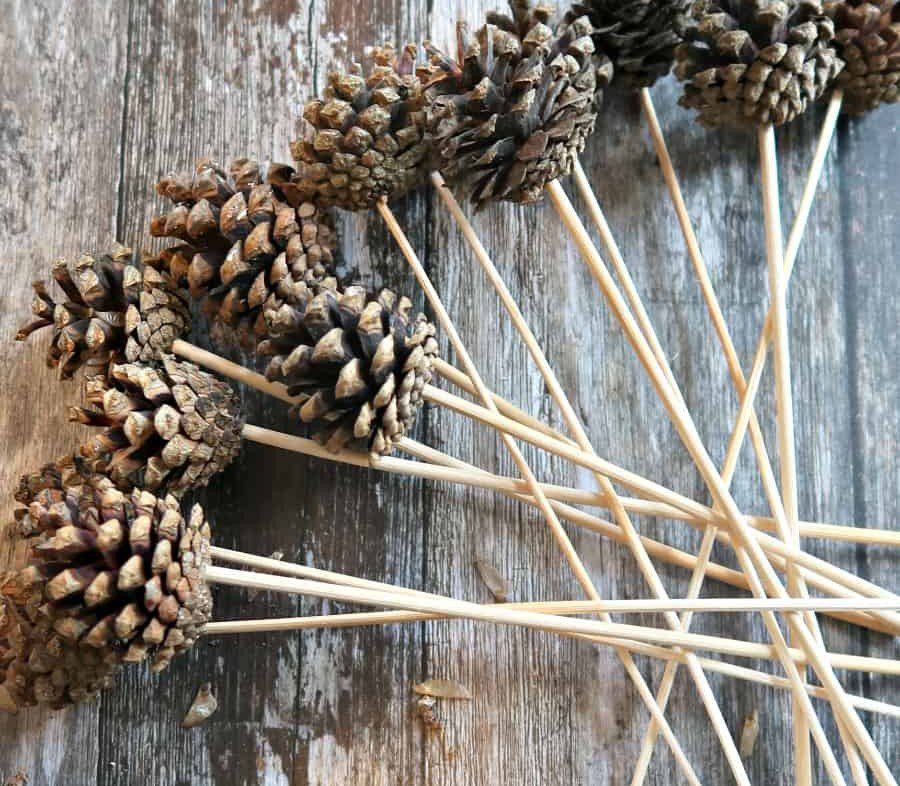
Place the cone on top of the glued stick and hold it in place for a few seconds until the glue dries. These will be ready to use in your next floral arrangement! You can place these in the vase with flowers and also use them to make a wreath.
36. Deer sculpture
To make the deer sculpture, you’ll need a handful of pine cones, brown-colored pipe cleaners, and googly eyes. Starting with the head, twist a pipe cleaner around two pine cones to create the antlers. Glue on googly eyes. Next, sculpt a small cone out of another pipe cleaner to create the deer’s nose.

Glue this in place between the antlers. Finally, use the remaining pipe cleaners to wrap around the body and legs of the deer. Felt may also work to construct the nose and eyes of the deer. Make a few of these to place over the fireplace or windowsill.
37. Cute turkey for holidays
This is a charming and easy project for Thanksgiving or any other holiday! All you need are some pine cones, felt paper, scissors, and hot glue. To make the turkey’s body, cut a piece of felt paper about twice the size of a pine cone.
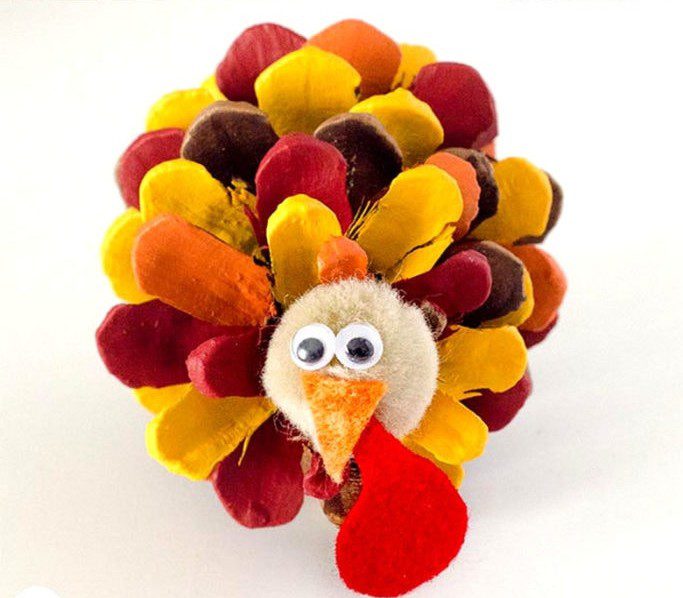
Wrap the felt around the cone, and use hot glue to secure it in place. Glue two googly eyes onto the front of the cone, and use a black marker to draw on a beak and smile. To make the turkey’s feathers, cut six strips of felt paper and fold each strip in half lengthwise.
38. Mini fireplace topiaries
There are many ways to dress up your home for the holidays, and one of our favorites is creating mini fireplace topiaries using pine cones and ribbons. It’s easy to do and makes a significant impact, plus it’s an exciting way to get into the holiday spirit!
Gather some small pine cones and strips of red ribbon. Wrap each pine cone with a strip of ribbon, then use hot glue to hold it in place. Once all the cones are wrapped, attach them to a metal fireplace screen or another decorative backing. Add battery-powered Christmas lights or garland for extra sparkle.
39. Shiny warm bowl
Adding a touch of sparkle to your décor is a great way to add some cheerfulness and style. And what could be easier than using pine cones? Just cover them in glitter, and you’re done. You may use either craft glitter or metallic foil.
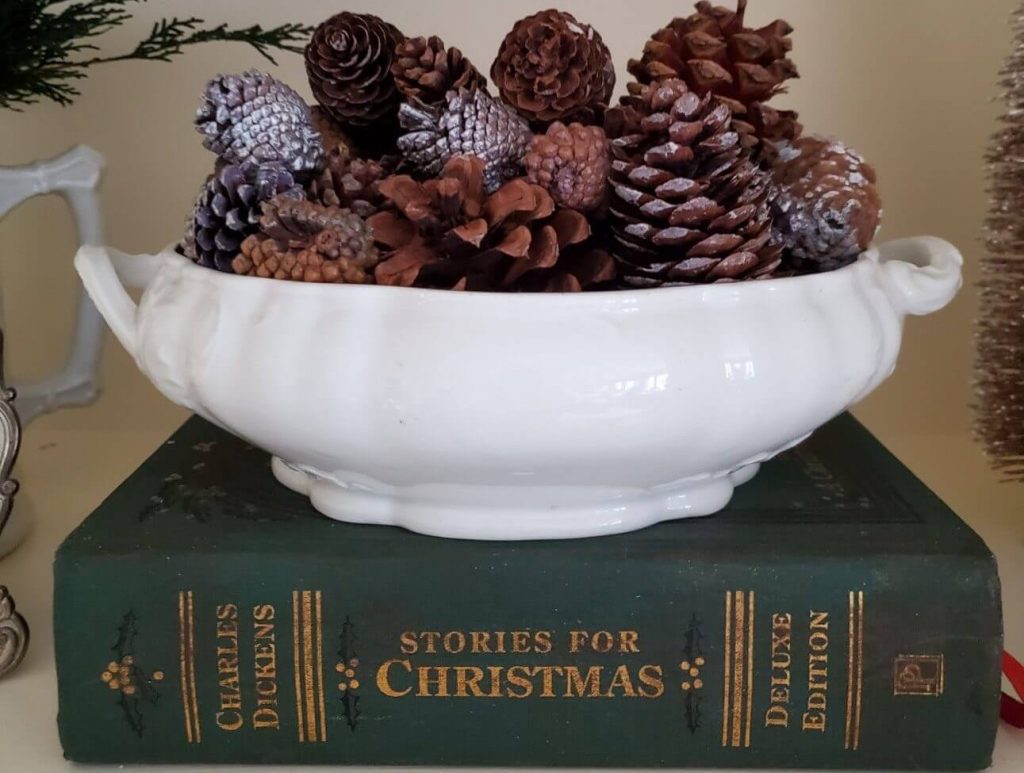
For the best results, use glue that dries clear. Using hot glue or silicone sealant is also a good idea. If you’re using craft glitter, it’s best to apply it with a spray adhesive. Place the glued pine cones in a bowl or other decorative container, and you’re good to go!
40. Glittery pine cookie jar
Glue on some colorful sparkles and your pine cones will look amazing. You can use any color of glitter, but we recommend sticking with silver or gold for a classic look. And be sure to put them in a space where they’ll be visible from all angles, like on a mantel or coffee table.
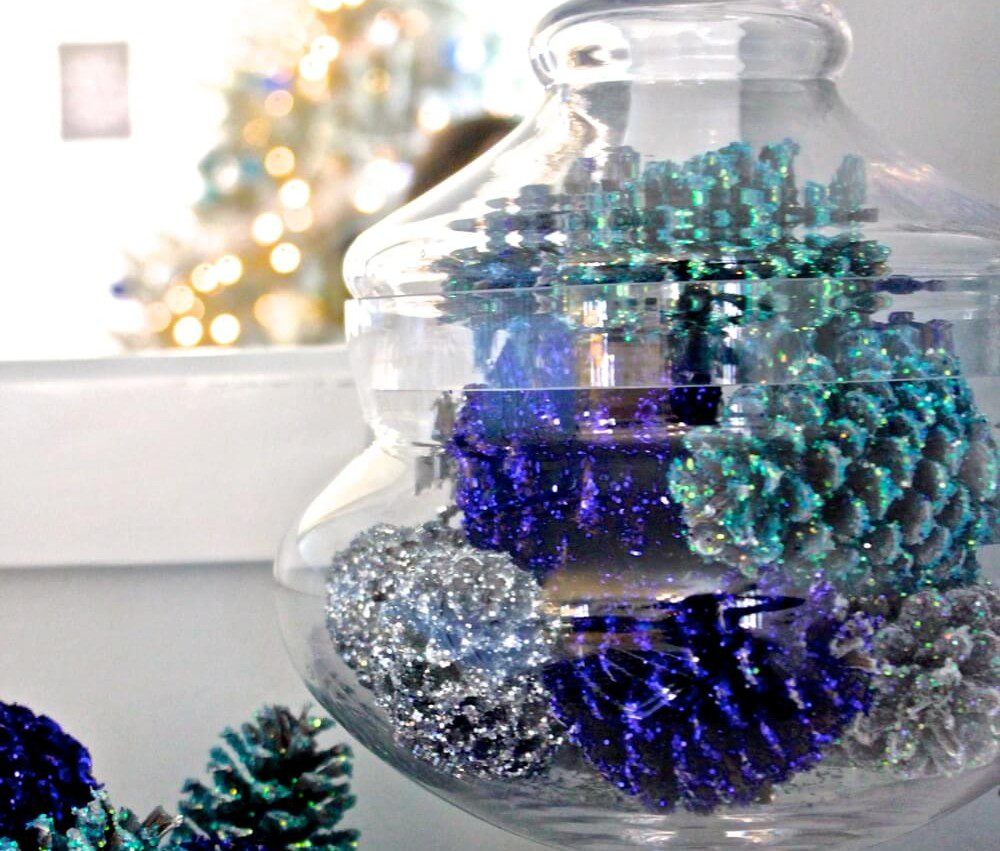
Just be sure to place them in a cookie jar or another airtight container for holiday decor. You may fill the cookie jar with pine cones. For a snowy look, add salt to half of the container and then insert the glitter pine cones into the top.
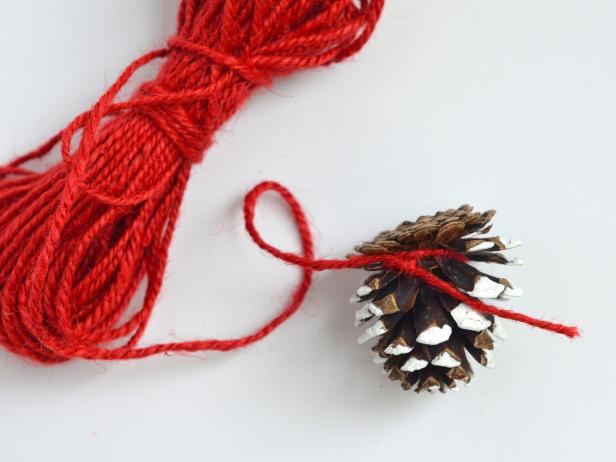
41. Simple door decor
An excellent way to add some holiday cheer to your door is by hanging pine cones with twine. Use colored twine or keep it earthy as per your style. You can buy pine cones at any craft store, or if you’re lucky, you might find some lying around outside.
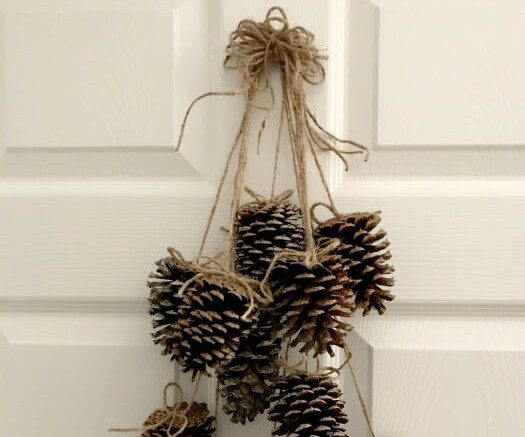
Tie a length of twine around the top of each cone and then hang them from your door knob or handle. This is a budget-friendly and easy way to add some festive decor to your home this holiday season! If you wish to skip a wreath this year, it’s a creative decor.
42. DIY holiday gift
Look no further than the humble pine cone if you’re looking for an easy, all-natural way to start a fire. Packed with sap, these little cones are the perfect kindling for getting a campfire going. To make your pine cone fire starter, melt some soy wax flakes in a pot on the stove.
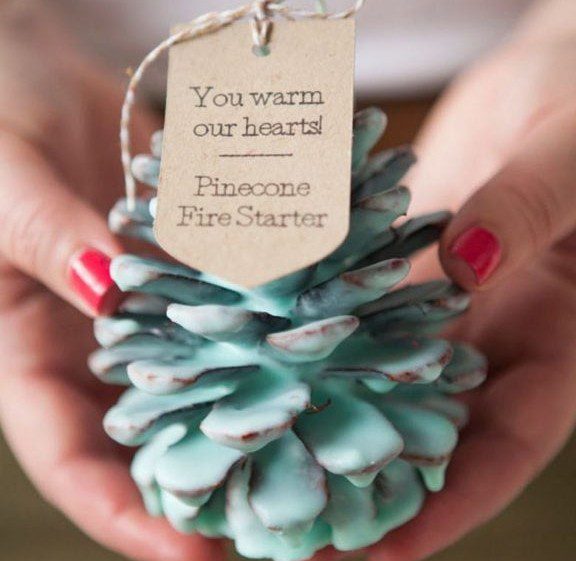
Then, dip each pine cone in the melted wax until it’s well-coated. Finally, place the cones on a baking sheet and leave them to cool completely. Once they’re cool, they’ll be ready to use! You may also add candle fragrance oil to make the cones smell nice when burnt.
43. Pom-pom cones ornaments
It’s easy to dress up plain pine cones with colorful pom-poms for a festive look on your Christmas tree! Start by picking out some pretty pom-poms in various colors. The bigger the pom-pom, the bigger the pine cone will look. Use hot glue to attach the pom-poms to the pine cone.
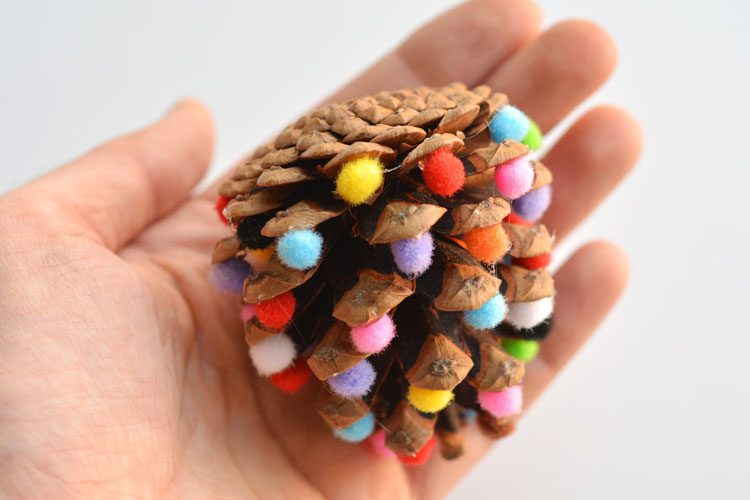
Ensure to hold them in place for a few seconds until the glue sets so that they won’t fall off. Add a ribbon on top so that it’s all done to hang from the tree or string them into a garland spaced evenly. Hang them on your Christmas tree and enjoy!
44. Starry arrangement
When looking for a festive way to spruce your old walls this holiday season, why not try arranging small pine cones in a starry pattern? Gather a bunch of small pine cones from your backyard or local park. Arrange the pine cones into a star pattern on the wall.
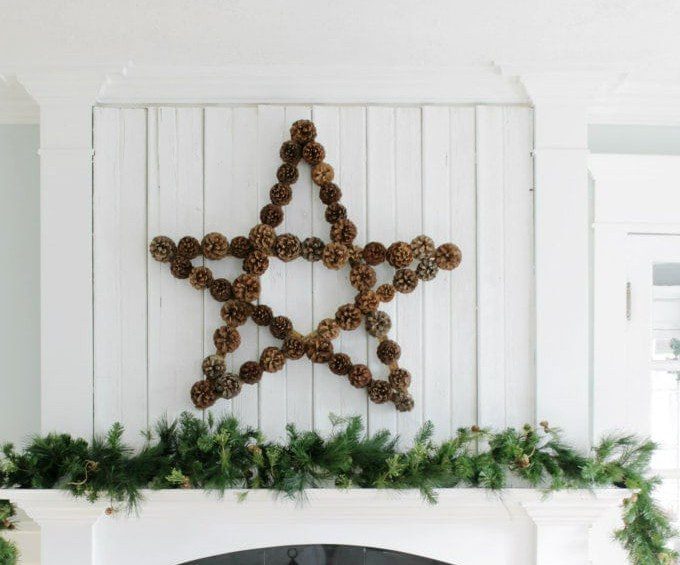
You can either use tape or glue to hold them in place. Add some festive Christmas lights or garland to complete the look. You could also try clustering them together in a bowl or vase or using them to top a holiday wreath.
45. Adorable cone fairies
Make adorable fairies using pine cones. It’s a great way to upcycle pine cones that would otherwise be thrown away, and it’s also a lot of fun for the whole family. Gather your materials. In addition to pine cones, you’ll need craft paint, paintbrushes, glue, googly eyes, and pipe cleaners.
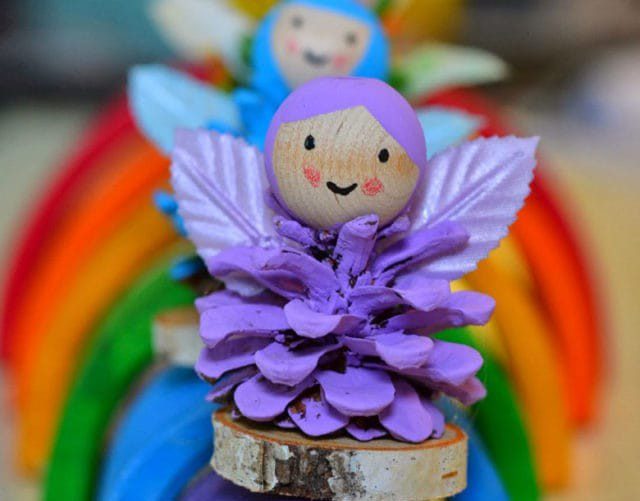
Paint your pine cones in fun colors. You can use any color combination you like—have fun with it! Once the paint is dry, start attaching the googly eyes with a bit of glue. You can also add other details like shoes and a dress made of felt.