
40+ Creative DIY Spring Decor Ideas To Usher In The Season
Using DIY spring decor ideas to spruce up your home can be cost-effective, creative, fulfilling, eco-friendly, and community-building. It allows you to add a personal touch to your home while enjoying the process of creating unique decorations that reflect the spirit of the season. Besides, it can be a rewarding experience to see your finished DIY spring decor ideas come to life and transform your home.
So, don’t be shy this season. Tap into your creativity and customize your house decorations to suit your taste and style. Pick designs that showcase your personality and make your home unique and inviting. DIY projects offer endless possibilities for creativity and personalization. Plus, even more importantly, they’re fun! Keep reading to get ideas on how you can bring spring vibes to your home!
1. Bring cherry blossoms to your living room
Witness the breathtaking beauty of cherry blossoms as you incorporate them into your home decor. These are great for brightening any room and inspiring a magical ambiance. Skip the artificial branches and opt for a DIY approach by making your own.
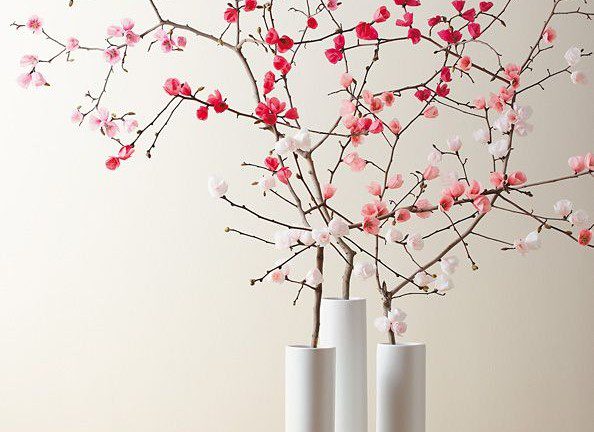
Use a random branch and toilet paper in bright shades. Creating an ombre vibe with varying pink and red hues will make your cherry blossom tree look more real and visually appealing. You can then use it as a mesmerizing centerpiece for your dining table or a striking accent in your living room.
2. Vibrant 3-D paper flowers
Add a touch of beauty and simplicity to your home while celebrating the arrival of spring with DIY 3D paper flowers. These stunning faux floral arrangements are a simple project perfect for beginners since they only require minimal origami techniques, pipe cleaners, and glue.
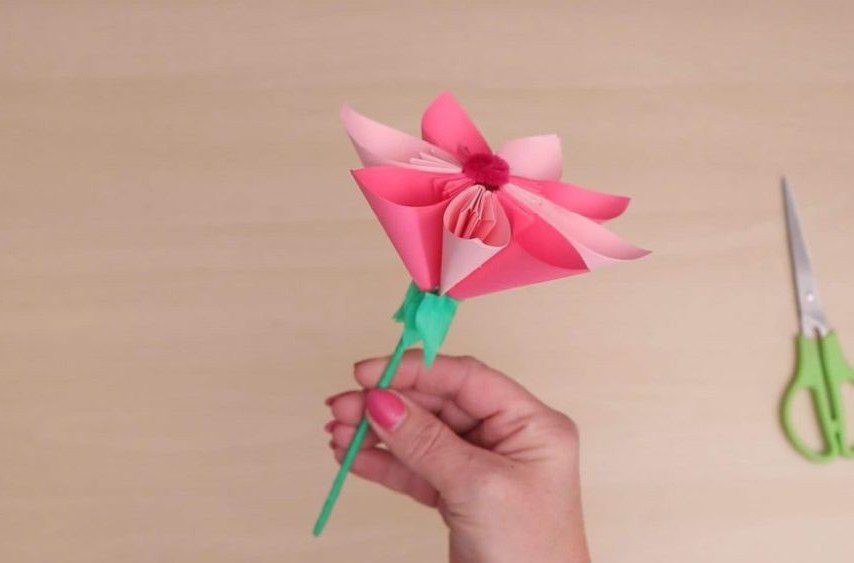
Use these to create a wreath or a simple floral arrangement. The possibilities are numerous when sprucing up your home for spring with these flowers. Let your creativity bloom as you craft these beautiful paper flowers and transform your space into a vibrant and cheerful haven to celebrate the season.
3. A green botanical leaf wall
Creating a botanical leaf wall by framing dry leaves and hanging the frames on a wall is a beautiful way to bring nature indoors and add a touch of natural beauty to your home decor. For this one, just go outside and collect various dry leaves with exciting shapes, sizes, and colors.
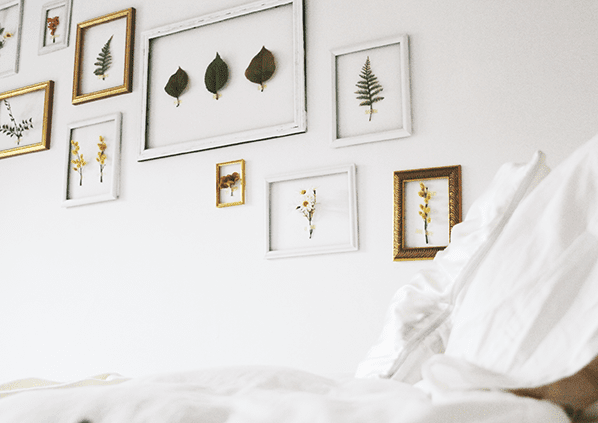
You can choose unique frames for added pizazz. Just ensure they have glass on them to protect the leaves and keep them from becoming brittle over time. Lay out the dry leaves on a flat surface and arrange them in a visually pleasing way within the frames before displaying them
4. Apothecary jar-inspired floral arrangement
For your apothecary-style jar, find a clear glass jar with a lid or cork stopper with a vintage or rustic feel. You can find these at antique stores, thrift shops, or online. Next, select fresh flowers and greenery that complement the style of your jar.
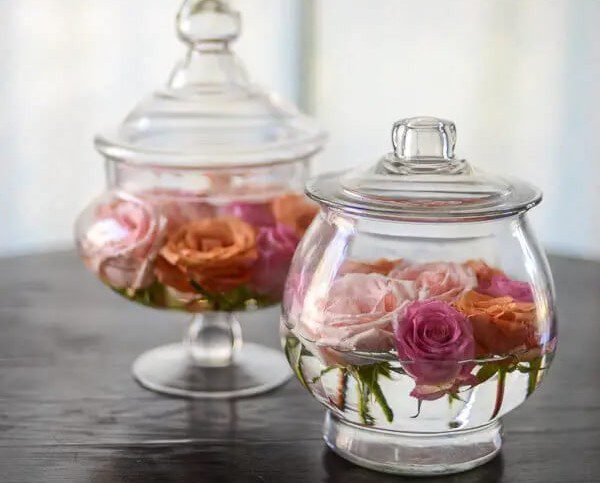
Mix blooms with different colors and looks to create a chic and intriguing piece. Start by inserting the larger flowers into the foam and placing them towards the center of the jar. Once you’re done with the flowers, put the lid or cork stopper on top of the jar to complete the look!
5. Ombre effect glass bottle vases
Ombre effect glass bottle vases can make for beautiful spring decor. To begin, thoroughly clean the glass bottles with soap and water to remove dirt, dust, or labels and allow them to dry before proceeding to the next step. Pick the acrylic paint colors you’d like and get to work!
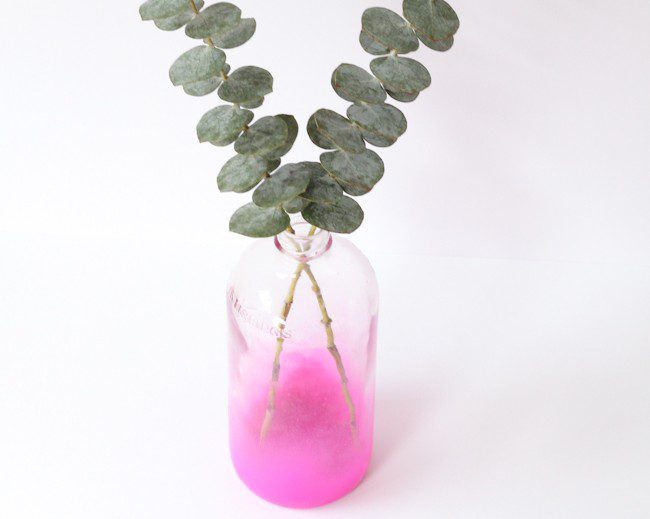
Choose colors that are in the same color family but vary in shade to create a gradual transition from light to dark or vice versa. Starting with the lightest, use spray paint to put a thin layer of paint on the bottom of the bottle and proceed. Ensure they’re dry before using them.
6. Felt flower wall art
Creating felt flower wall art using felt, glue, and silk ribbon is a fun and creative DIY project that can add a touch of whimsy and elegance to your home decor. Select the colors you want to use for your flowers, and carefully cut out flower shapes from the felt sheets using scissors.
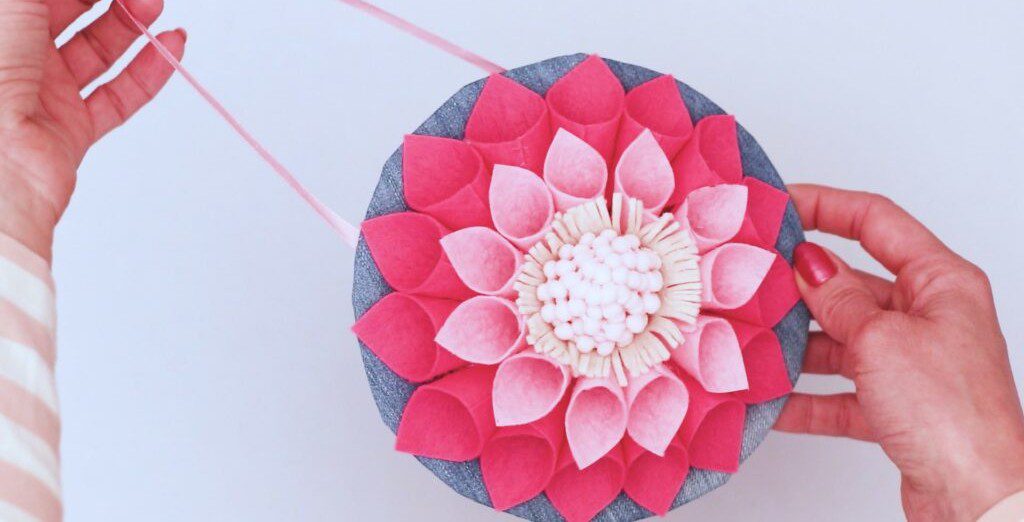
You will need multiple layers of petals in different sizes to create a realistic and dimensional look for your flowers. Try to experiment with various shapes and sizes to create a unique arrangement. Use hot glue to attach the flowers to the frame or canvas, et voila!
7. Delicate light bulb flower holders
Upcycling old light bulbs into small flower vases can be a creative and eco-friendly DIY project. Simply hold the light bulb firmly with one hand and use pliers or wire cutters to carefully break off the top metallic part of the light bulb. After removing that, shake it gently.
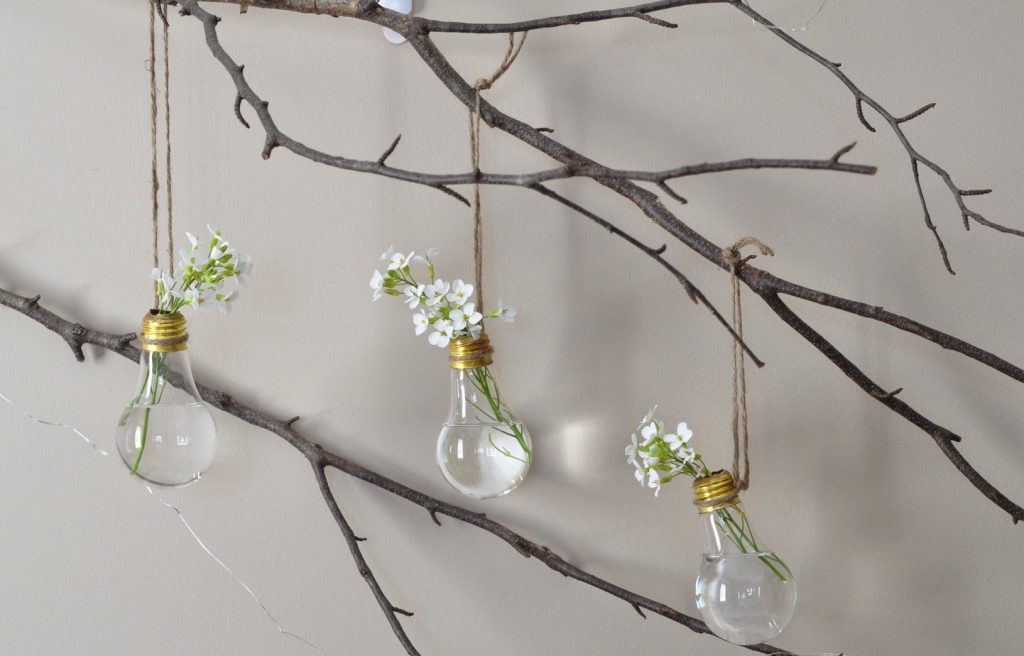
Remove any loose filaments or debris that may be inside. You can also use a dowel rod or a tiny brush to ensure it’s clean. Once that’s done, fill the light bulb with water and arrange your desired flowers or greenery. You can use a small bouquet, a single stem, or even dried flowers.
8. Bright color block wooden vases
Elevate your spring decor with the elegance and sophistication of a color-block wooden vase. This stunning decorative piece features natural wood hues complemented by pastel blocks of color, adding a pop of brightness to any indoor or outdoor space. What makes these vases truly special is the opportunity for creative combinations of texture and color.
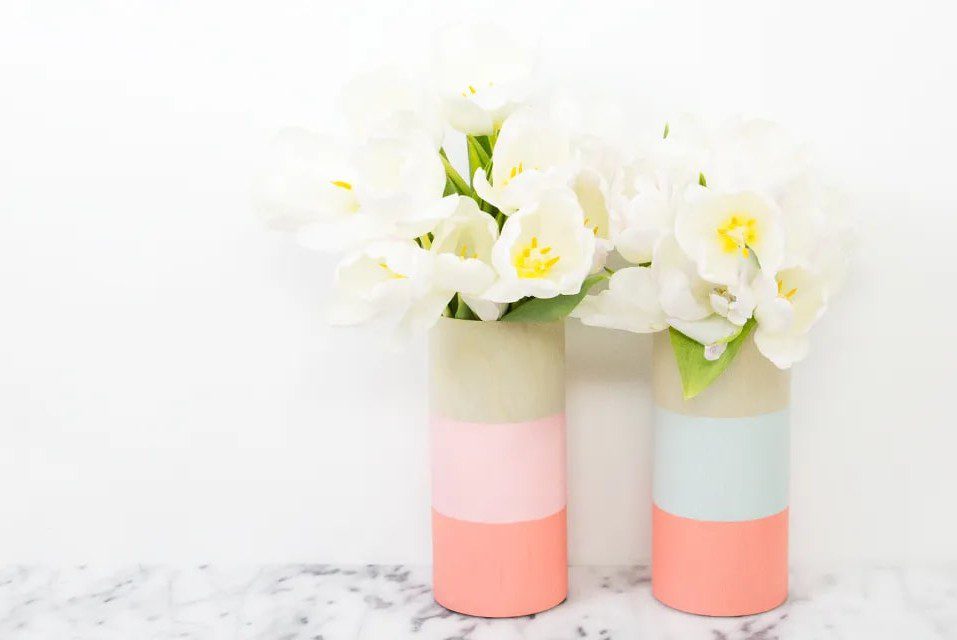
Creating these unique vases is surprisingly simple since you wrap wooden sheets around a glass vase and apply craft paint to achieve the desired pastel shades. You can also opt for a cohesive look with a palette of pastel shades or go bold with vibrant tones to make a statement.
9. Tiny copper and white succulent planters
Making tiny copper-striped white succulent planters is an excellent way to add a unique and stylish touch to any home or garden. You can make these planters from different materials, including ceramic. To start, find a piece of copper or plastic wire thicker than your preferred design.
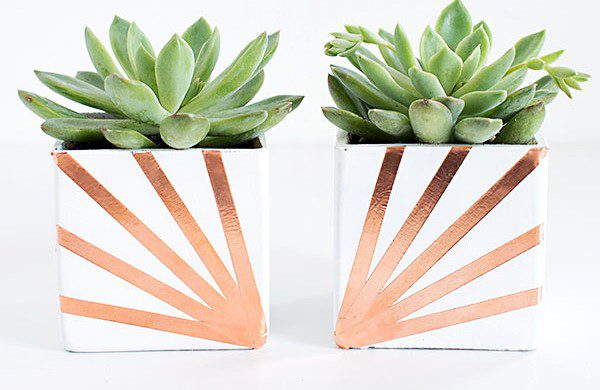
If you can’t find some, use copper paint to make designs on the pot. Finally, paint the exterior of your planter with several coats of white paint. Ensure it’s dry, and then plant your succulents. For extra detail, you can add elements like twine, beads, or ribbon to the exterior of the planter.
10. Paint a pot to look rustic
Use a rustic-inspired flowerpot with faux flowers to add charm and character to your home decor. Start by cleaning your terra cotta flowerpot to remove any dirt or dust. In case there are rough patches, you can lightly sand them with sandpaper before painting.
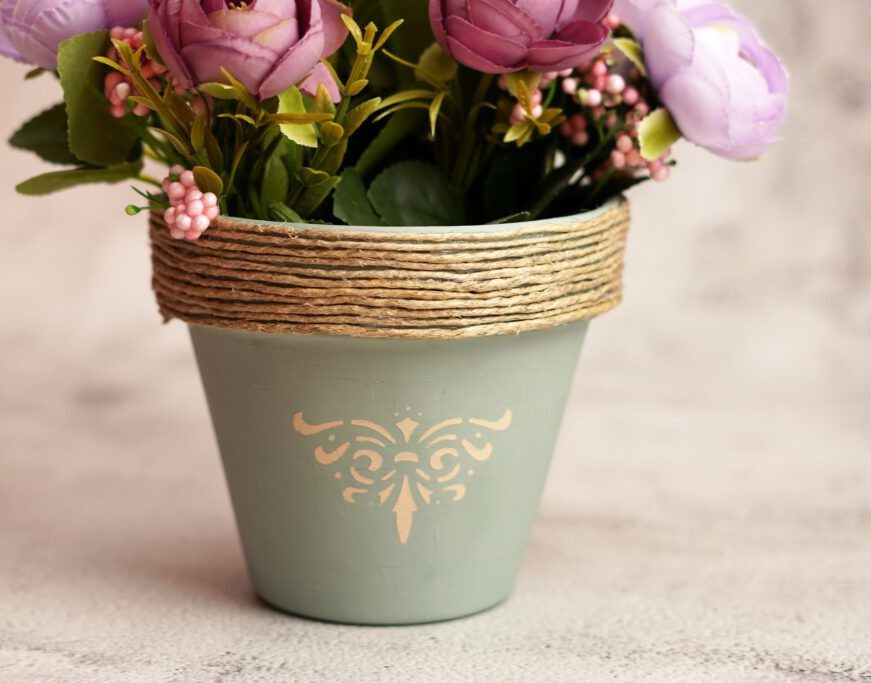
Then, choose your desired colors for the rustic look you desire. Chalk or acrylic paint works best for terra cotta pots. You can also distress the painted flowerpot using sandpaper or a sanding block for a rustic and weathered look. Use a hot glue gun to hold the stems, and add faux flowers or greenery.
11. Simple magnetic flower planters
This easy DIY project will create a vibrant display of colorful flowers in your home. You only need a few old metallic cans, magnets, and some creativity. First, cut the tops off of your cans and paint them. Remember to add the necessary coat of sealant for the paint to stay intact.

Attach some magnets inside the cans and attach a thin magnet to the wall. Now start filling the cans up with soil and your favorite flowers. Place the cans on the wall, and you have an instant magnetic flower planter! With this simple and fun project, you can repurpose old cans into something beautiful.
12. Try origami flower art on a frame
Origami flower art on a frame can be a beautiful and unique way to add a touch of elegance to your wall decor. Start by selecting the flower designs you want to create for your art piece. You can choose different designs to create a visually exciting arrangement or stick to a single style.
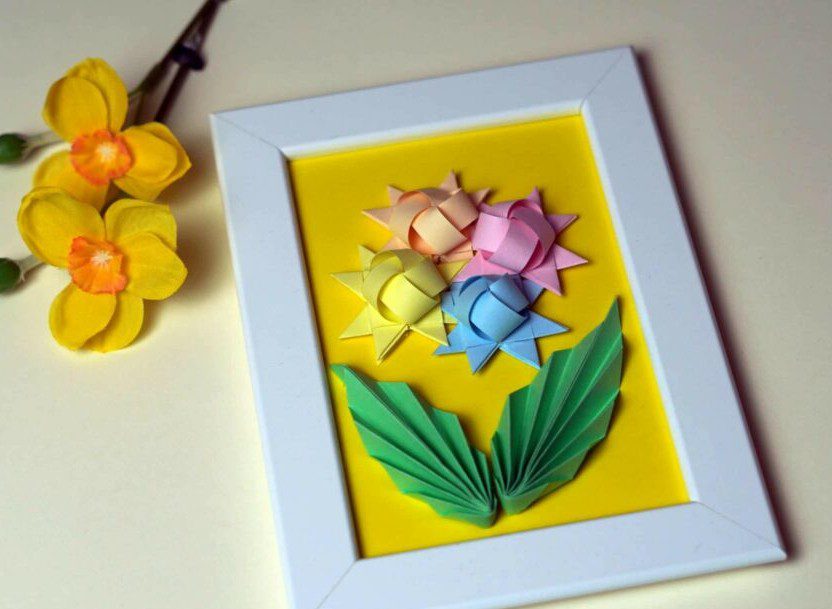
Carefully follow the instructions for each flower design and fold the paper to create the flowers’ petals, stems, and leaves. Then, assemble the origami flowers using double-sided tape or glue to secure the folds and hold the design together. Finally, arrange them on the backing within the picture frame.
13. DIY macrame hanging succulent planters
Measure and cut eight equal lengths of cotton cord or dyed jute, each approximately 4-5 times the desired length of your hanging planters. These will be used for the macrame knots and the hanging ropes. Fold the cords or jute in half and create a loop at the top, leaving a small loop for hanging.
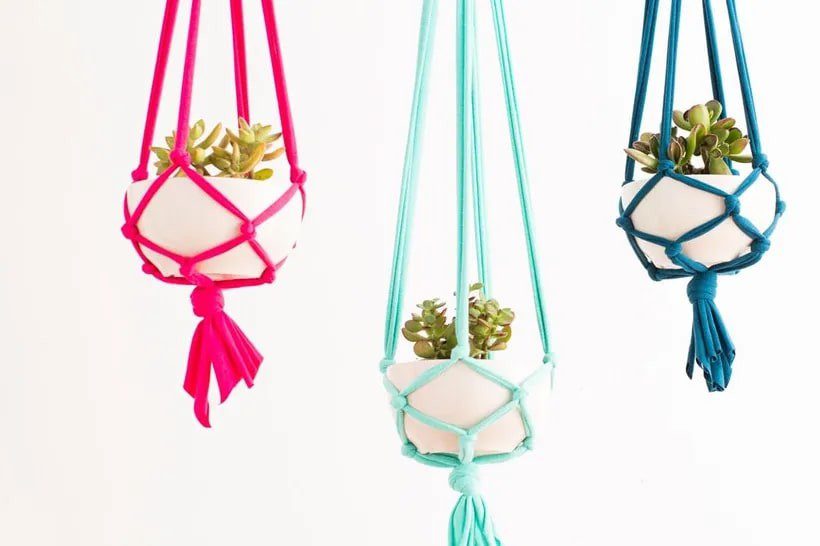
Secure the loop with a knot, creating a loop for hanging and two cords or jute strands on each side. Create square knots by taking the two cords or jute on the left and tying them over the two cords or jute on the right. Finally, insert the pots inside this knotted loop.
14. Embroidered artwork
Create an embroidered artwork that’s on theme with the season! You may also do quotes if that’s your kind of vibe. To do this, use a pencil or a water-soluble fabric marker to lightly trace the quote onto the fabric. Then, use your chosen colors of embroidery floss and through the words.
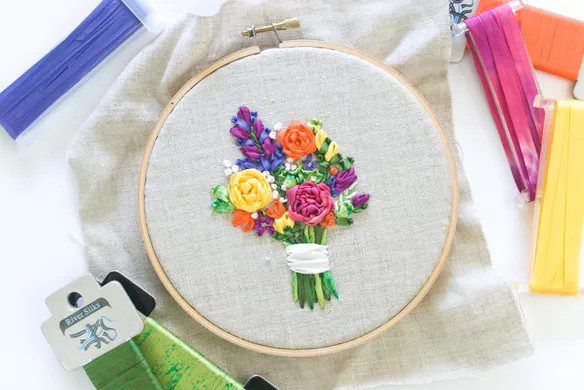
Trim any excess threads or glue strands, and ensure that all elements are securely attached. Adjust the fabric and tighten the hoop screw if needed. You can also add a ribbon on top to assist with hanging if desired. Hang it on your wall and enjoy the fresh and vibrant look.
15. Pansy wall art
This DIY project is a great way to add color to your walls! Create beautiful felt pansy wall art with supplies you have at home. Cut yellow and purple felt into simple pansy shapes. Spray paint a wooden board and attach the yellow and purple pansies to it using a hot glue gun.
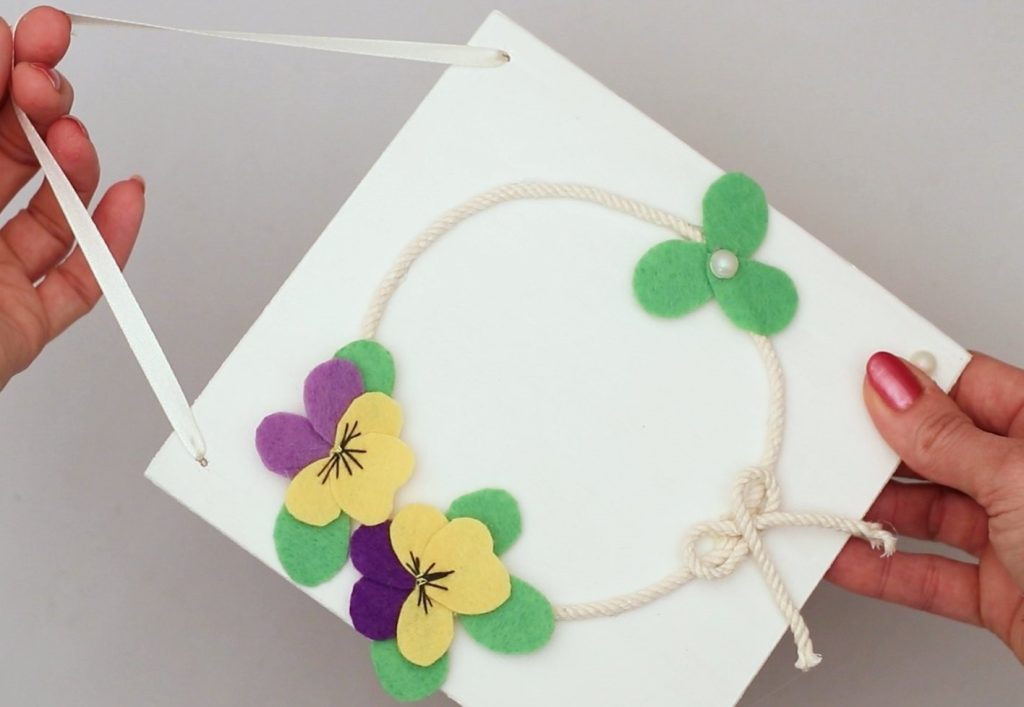
To finish the project, create a circular wreath with rope and attach it to the board. This wall art will add a unique touch to any space since you can customize it with different colors and materials. Try this simple project, and have fun creating a special design with a bit of you in it!
16. Minimal concrete flower stand
To make a small concrete flower stand, choose silicone mold or cardboard tubes in the size and shape you want for your flower stand. Follow the concrete mix package instructions to mix it with water in a mixing container. Stir until you achieve a pourable consistency and pour.
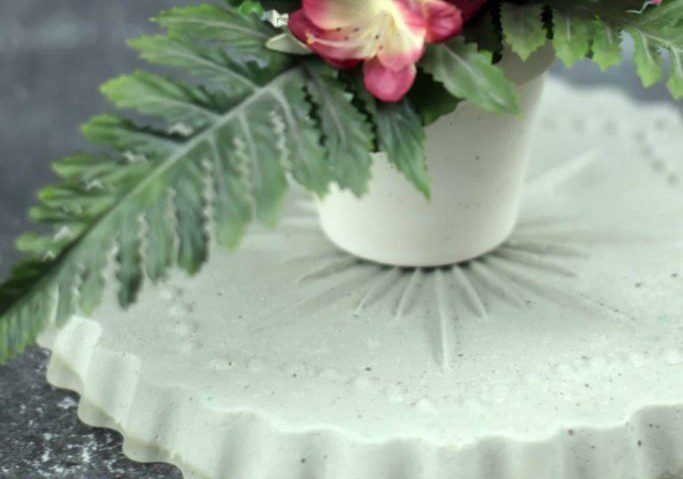
Cure the concrete and de-mold it. Use sandpaper or an abrasive pad to smooth rough edges or surfaces on the concrete flower stand. You can also use it and other tools to shape the edges or add details and designs. Finally, wipe off any dust or debris from the surface and add your flowers.
17. Giant paper flowers for the wall
Creating giant paper flowers using colored tissue paper is a fantastic way to add a vibrant and eye-catching display to your walls. Select the colors of tissue paper you want and get on it! You can choose various colors to create a colorful and playful arrangement.
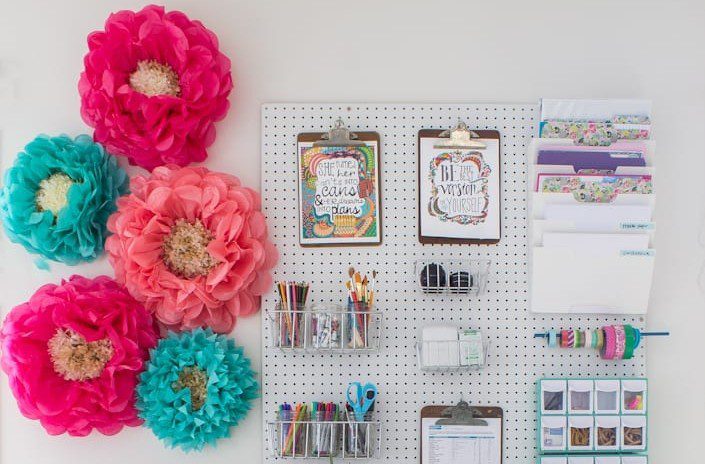
Decide on the flower designs you want to create, e.g., roses, peonies, or sunflowers, and find templates or patterns to guide you in cutting the tissue paper. Using scissors, carefully cut petal shapes according to your chosen designs. Assemble the designs by layering the petals using hot glue.
18. Fancy pine cone flower canvas
Doing a paint project on pine cones to make a lovely spring display is one of the most unique and creative ways to decorate your home. Collect some pine cones from outdoor areas, such as parks or your backyard. You can use acrylic paint and a paintbrush to add some color.
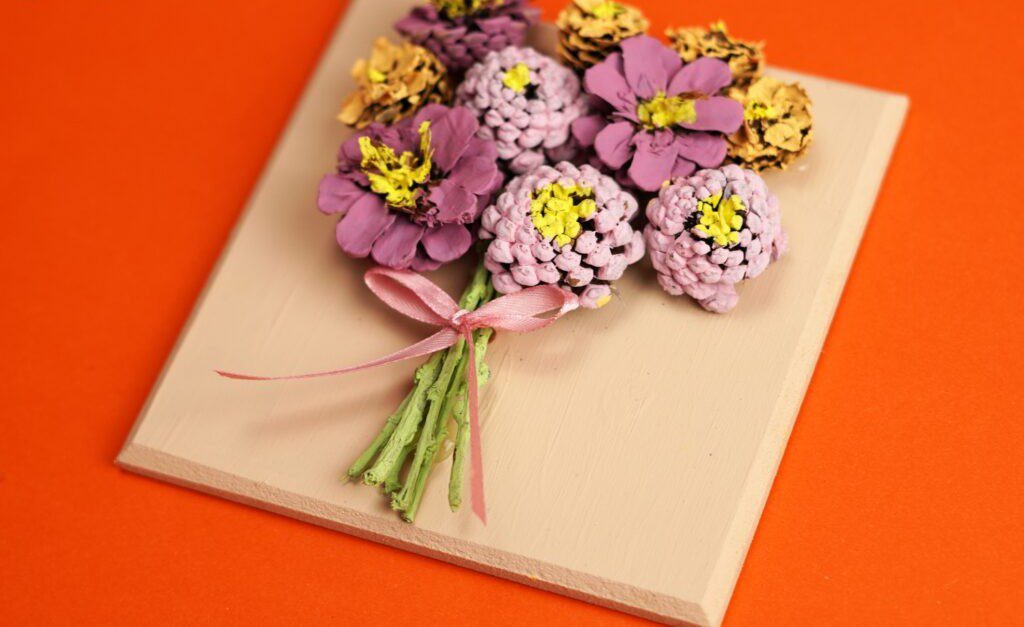
You can also add some glitter for a sparkly effect. When the paint has dried, you can assemble the pine cones into a flower shape on a canvas to create a beautiful spring display. This project will brighten up any room and bring a bit of spring into your house.
19. Colorful wine cork letters
Celebrate the season with this creative and unique home decor idea – wine cork letters! These lovely creations are made by sticking wine corks together to form shapes, adding warmth and character to any space. For a touch of the season, choose pastel-colored corks.
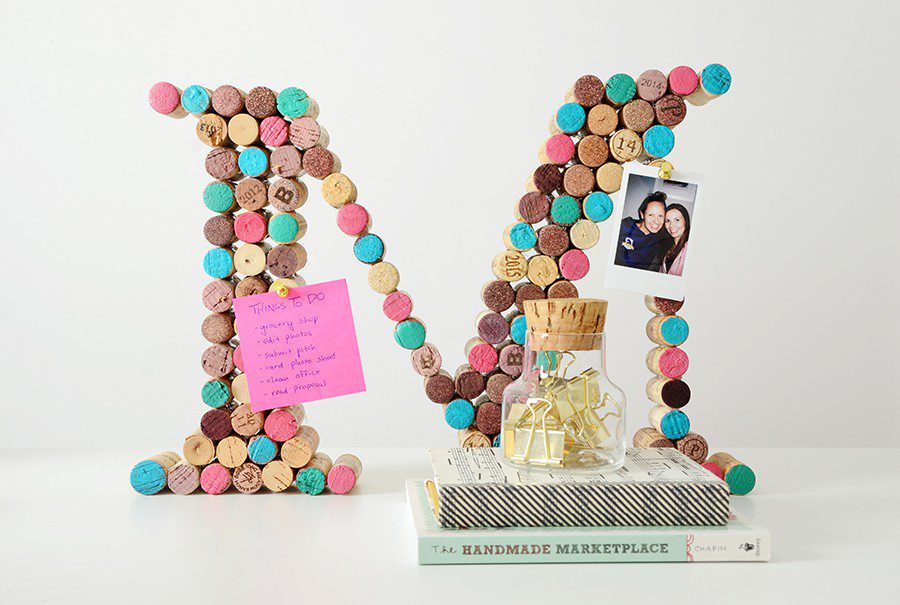
You may use colors like pink, purple, blue, yellow, or green to evoke the freshness of the season. Arrange the wine cork letters on a mantel, a shelf, or a wall to bring out a rustic appearance. They are not only excellent decor pieces, but they also provide an eco-friendly way to repurpose wine corks.
20. Embroidery floral hoop
Embroidery hoop floral wall decor brings a touch of handmade charm to your home. Unscrew the hoops and separate them. Then, lay the fabric of your choice over the inner hoop, ensuring it is centered and pulled tautly before placing the inner hoop.

Decide on the floral design you want to create on your hoop. You can either draw the design directly onto the fabric with a pencil or freehand it as you go with the embroidery floss. Thread your embroidery needle with the desired color of floss, and start embroidering your floral design onto the fabric!
21. Simple 3d floral frame
For this project, get a few colored sheets, a frame, glue, and scissors. Measure and cut the dark-colored paper to fit the size of the frame’s backing. Place it on the frame and secure it with adhesive. This will act as the base of your 3D floral frame.
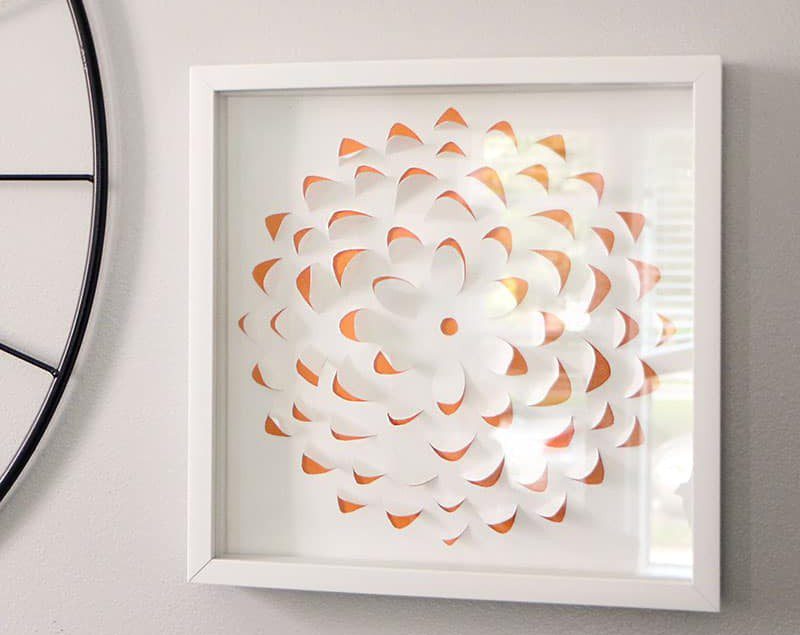
Add a lighter shade on the top, and ensure the petals are evenly spaced and symmetrical. Carefully cut along the pencil lines of the petals using scissors or a craft knife. Leave the base of the petals attached to the paper. Finally, gently lift each petal and curl them upward for a 3D effect.
22. Paint flowers on a canvas
Begin by choosing the size of the canvas or canvas board you prefer for your flower painting. Next, decide the type of flowers you want to paint and plan your composition. You can find inspiration from reference photos online or create your own design. Lightly sketch that on the canvas.
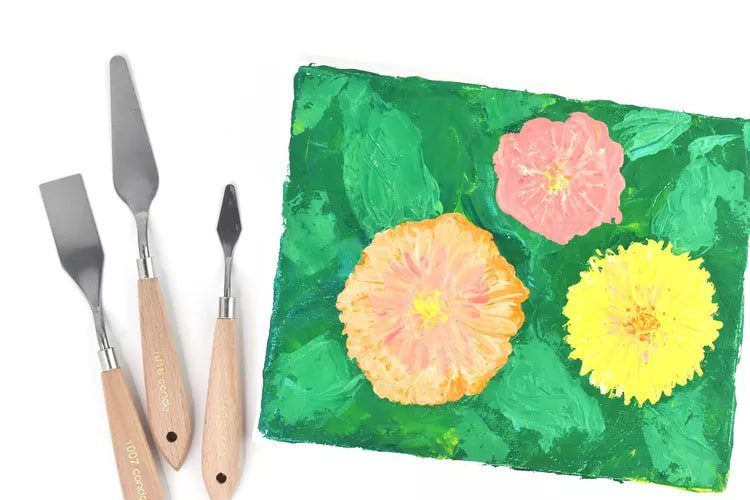
Experiment with mixing different colors to achieve the desired hues for your flower petals, leaves, and stems. Start by painting the background in whatever color or style you want. Finally, paint the flowers in your planned design and enjoy the beautiful painting!
23. Spring mason jar floral arrangement
For this, start by thoroughly cleaning your mason jar and ensuring it is dry. Use a regular-sized mason jar or a smaller one if you like. Also, choose a jar with a wide mouth that can accommodate the size of the flowers you plan to use. Use ribbons to decorate it.
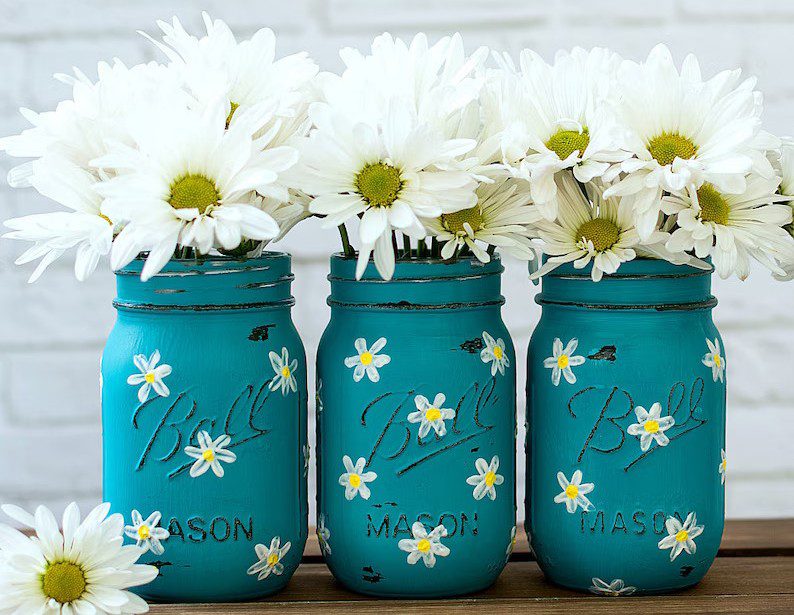
If you’re using fresh flowers, trim the stems to the desired length using scissors and remove any leaves or thorns submerged in the water to prevent decay. Once all the flowers are arranged, take a step back and marvel at the overall appearance!
24. Make potted paper flower balls
Embrace the joy and whimsy of a potted paper flower ball as a delightful addition to your spring decor. This charming decoration features a tiny pot with a polystyrene ball adorned with miniature paper flowers in soft pastel hues like orange, pink, or lavender, arranged in a spherical shape.
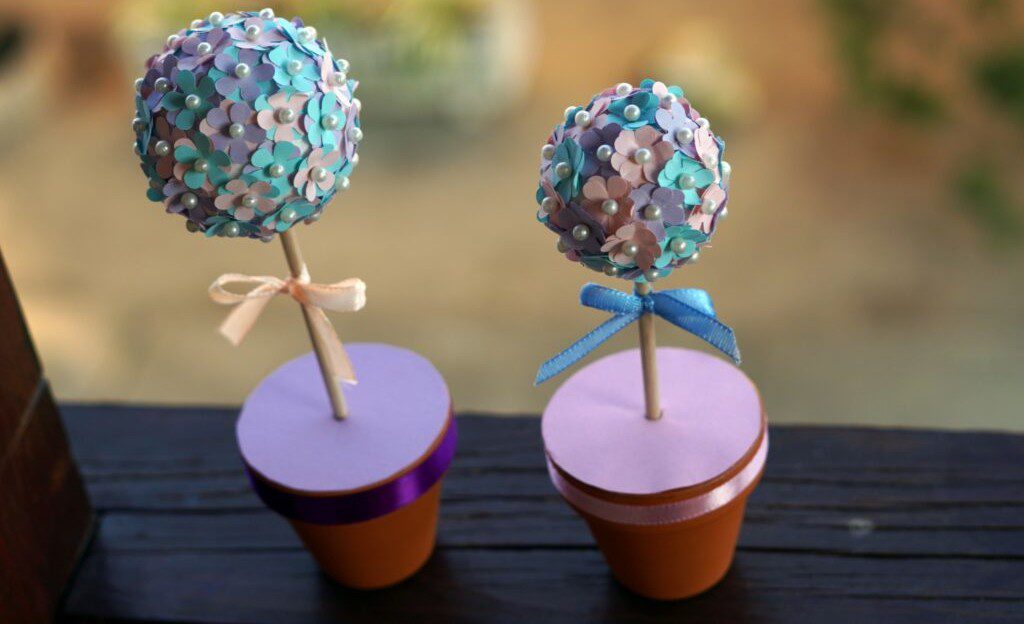
This DIY project is a creative way to invite spring into your home and an excellent opportunity to involve your kids in the process. Let them choose the paper colors and help them insert the tiny flowers into the polystyrene ball with pushpins. This will keep them busy, engaged, and entertained.
25. Print spring wall art
Welcome the season by adding printed spring quotes and flowers to your home decor. Frame these and hang them on your walls to create a vibrant and refreshing atmosphere. Choose quotes that capture the essence of the season, such as “Hello, Spring!” or “Blossom by Blossom the Spring Begins.”

Pair these with colorful, printed images of blooming flowers, butterflies, or other spring motifs. Also, select frames that match your style and the size of your prints, and hang them on your walls to instantly add a touch of cheer and renewal to your space. It’s a simple and affordable way to celebrate the season.
26. Floral monogram for walls
Creating a floral monogram using faux flowers is a beautiful and personalized way to add floral elegance to your home decor. If desired, you can paint the cardboard alphabet letter with acrylic paint or spray paint it in a color that complements your decor, then leave it to dry.
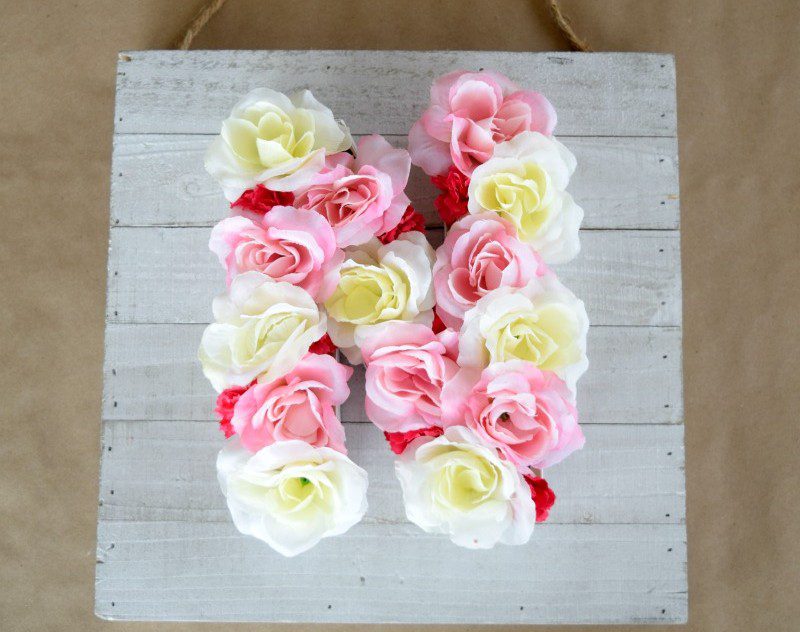
Using wire cutters or scissors to trim the stems of the faux flowers to your desired length, leaving enough length to attach them to the alphabet letter. Lightly arrange the flowers on the alphabet letter to get an idea of the desired placement. Using a hot glue gun, apply hot glue to stick each flower.
27. Inexpensive paper leaf wreath
Get creative and welcome the freshness of spring into your home with a budget-friendly DIY paper leaf wreath! Gather colorful sheets of paper in bold hues that complement your spring decor. You can use cardstock, scrapbook paper, or even repurpose old magazines or books. Trace and cut out leaf shapes in various sizes.
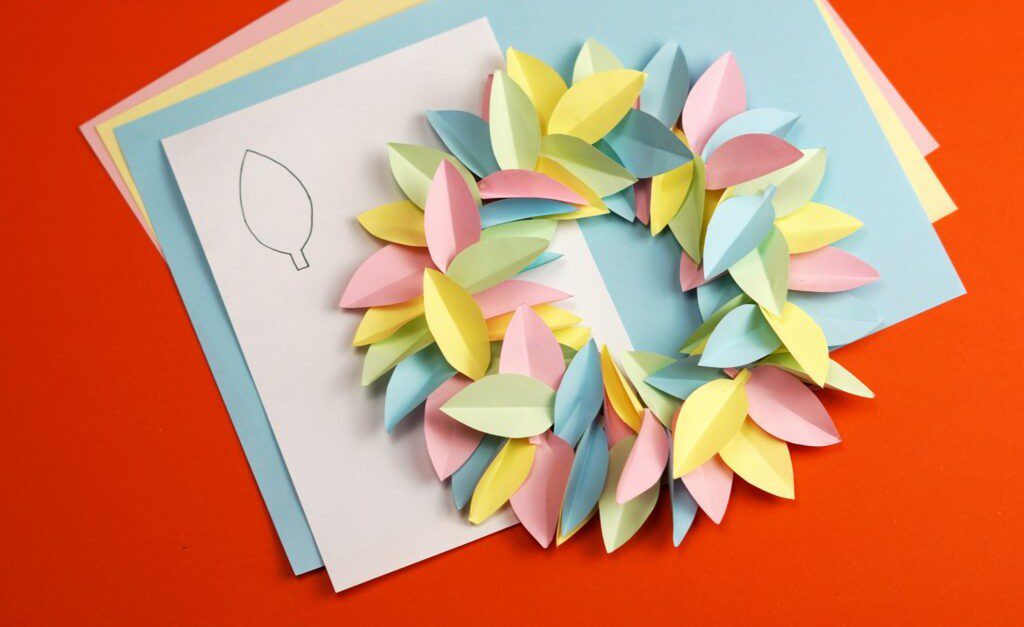
Fold and curl the leaves to create dimension. Next, arrange the leaves in a circular shape, overlapping them to create a wreath pattern. Glue the leaves onto a foam or cardboard ring, securing them with hot glue or craft glue. Add a ribbon or bow for a finishing touch and hang your vibrant paper wreath!
28. Classy concrete letters
Create durable and unique spring welcome signs with concrete letters that can be used for indoor or outdoor decorations. Concrete letters are a versatile DIY project that allows you to spell out any word, such as “Home,” “Hello Spring,” or “Sweet,” and can be customized to match your decor.

Carefully pour the concrete mixture into the letter molds, filling them to the top. Smooth the surface with a spoon or spatula and allow the concrete to harden according to the instructions on the package. It typically takes around 24-48 hours. Once the concrete has fully cured, carefully remove the letter molds.
29. Pressed floral wooden coasters
Create unique and nature-inspired coasters with a DIY project that combines pressed flowers with wooden discs! Start by gathering fresh flowers or leaves, making sure they are flat and dry. Place the flowers between sheets of wax paper and press them in a heavy book for a few days to flatten them completely.
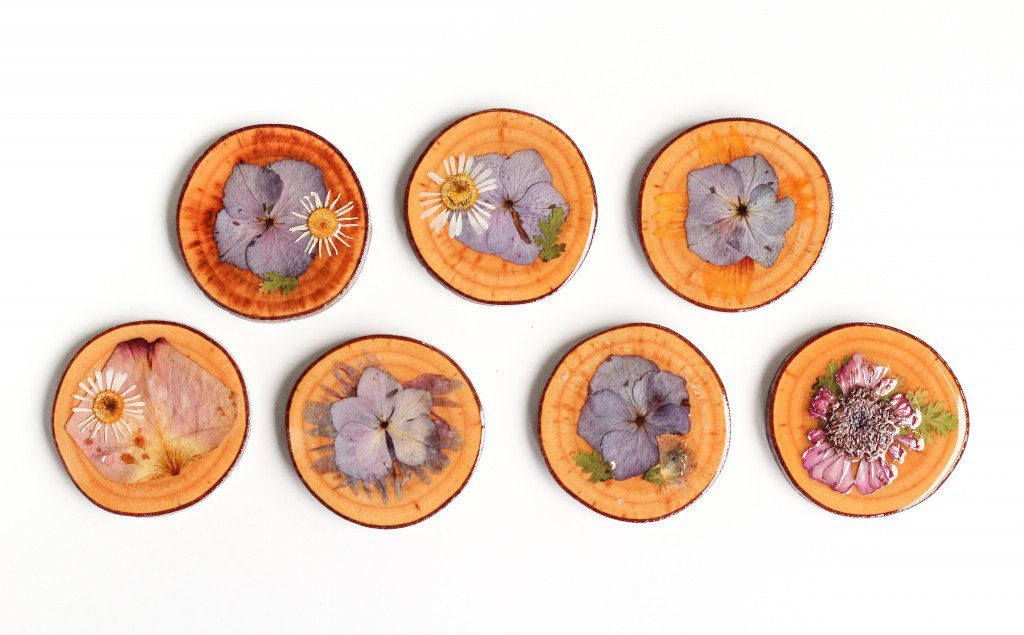
Next, gather wooden discs, which can be purchased from a craft store or cut from a fallen tree branch. Sand them down to smooth out any rough edges. Once the pressed flowers are ready, arrange them on the wooden discs in your desired design, securing them in place with a thin layer of resin.
30. Chalk paint garden rocks
Get ready to spruce up your outdoor space with an easy and creative DIY project using chalk paint! This spring, transform ordinary garden rocks into charming pieces of decor with just a few simple steps. Start by gathering smooth rocks from your backyard or a local garden center. Clean and dry them thoroughly.
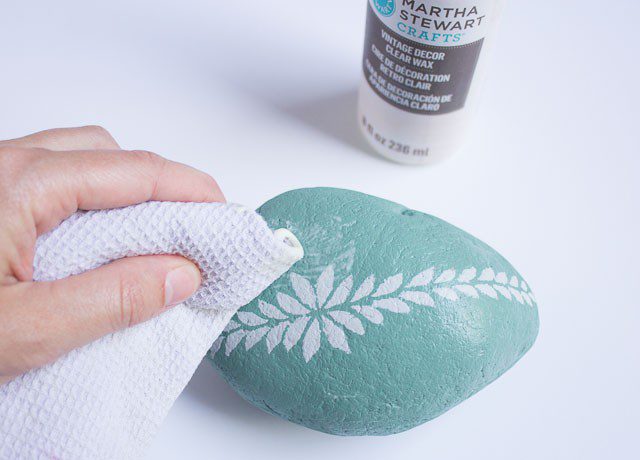
Choose your favorite colors of chalk paint and apply them to the rocks, allowing them to dry between coats. Once the paint is dry, you can add cute designs, patterns, or inspirational words with a chalk pen or regular chalk. These painted rocks will add a pop of color and personality to your garden.
31. Yarn wall hanging
Add a touch of boho chic vibes to your home decor with a stunning DIY yarn wall hanging! Get a stick of wood from your backyard or a craft store, and choose a variety of yarns in different colors. Cut the yarns into desired lengths, ensuring they’re longer than the height of the stick.

Next, tie the yarns onto the stick, layering them and mixing the colors to create a beautiful, textured design. You can experiment with different knotting and braiding techniques or add beads for flair. Once you’re happy with the arrangement, trim the yarns and hand your chic creation on a blank wall.
32. Fresh air plant wreath
Bring a touch of nature indoors with a stunning wooden wreath adorned with fresh air plants! Start by getting a wooden wreath frame from a craft store or repurposing an old one. Choose air plants in various shapes and sizes, ensuring they are healthy and free of debris.
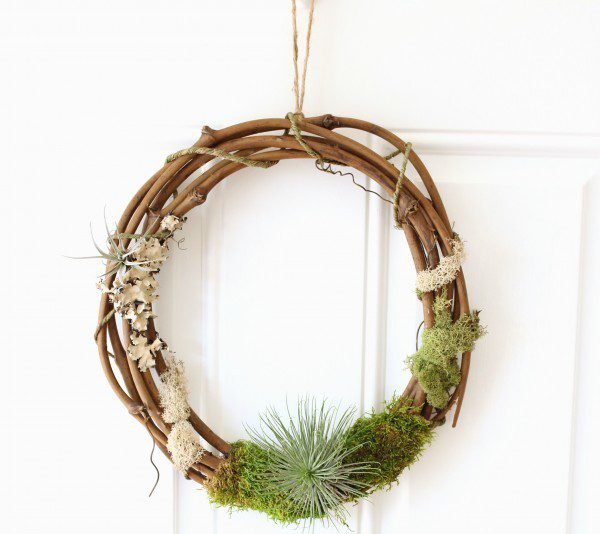
Attach these to the wooden wreath frame using floral wire, making sure they are secured in place. You can arrange them in a symmetrical pattern or create an asymmetrical design for added visual interest. Add a bow or ribbon for a finishing touch, and hang your unique wooden wreath in a well-lit area.
33. Switch to a bright shower curtain
Elevate your bathroom decor for the spring season with this awesome project. Bring the beauty of watercolor art by creating a mesmerizing marbled effect on a plain white shower curtain. Start by mixing latex paints in colors that evoke the freshness of spring.
Dilute the paints with water, pour them onto the surface of a large container of water, then use a skewer or toothpick to swirl the paints together to create a marbled pattern. Carefully dip your shower curtain, allowing the colors to transfer onto the fabric before gently lifting it out and drying it.
34. Floral gift wrap garland
Turn old gift wraps into charming floral gift wrap garlands that will add a pop of color to any room! Simply gather a variety of gift wraps in different patterns and colors. Cut out flower shapes in various sizes or use pre-made flower cutouts if available. Arrange these in a garland pattern.
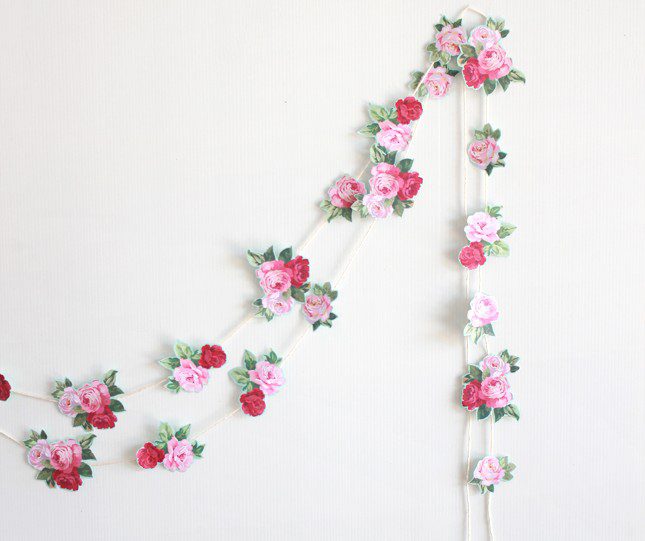
Overlap them to create a cohesive look, and use double-sided tape or adhesive dots to attach them to a blank wall, creating a stunning floral display. You can also add faux leaves, ribbon, or other embellishments for added flair. This DIY floral gift wrap garland is budget-friendly and perfect for this time of year.
35. Wooden block letter vases
Create unique and charming wooden block letter vases by repurposing wooden blocks into stylish vases that can hold fresh flowers or faux blooms. Start by gathering wooden blocks in different sizes and shapes, such as square or rectangular ones. Sand the blocks and paint them using acrylic or chalk paint.
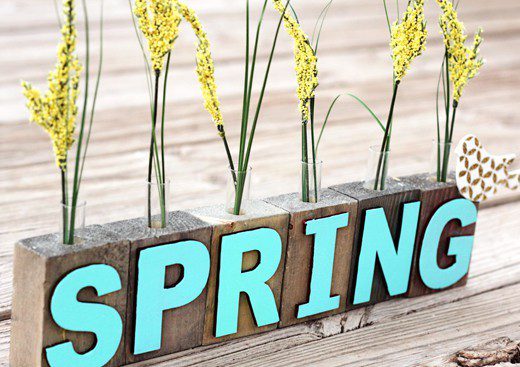
Once the paint is dry, use a drill to create a hole in the center of each block that is large enough to hold a small glass test tube. Insert the test tube into the hole, and secure it with a small amount of waterproof glue. Finally, fill the test tubes with water and flowers.
36. Flower garland lights for the garden
Create a magical ambiance in your garden with this DIY flower garland lights project! Start by gathering string lights and silk flowers in various colors and sizes. Choose flowers that are weather-resistant and suitable for outdoor use. Remove the stems from the flowers, leaving just the heads.
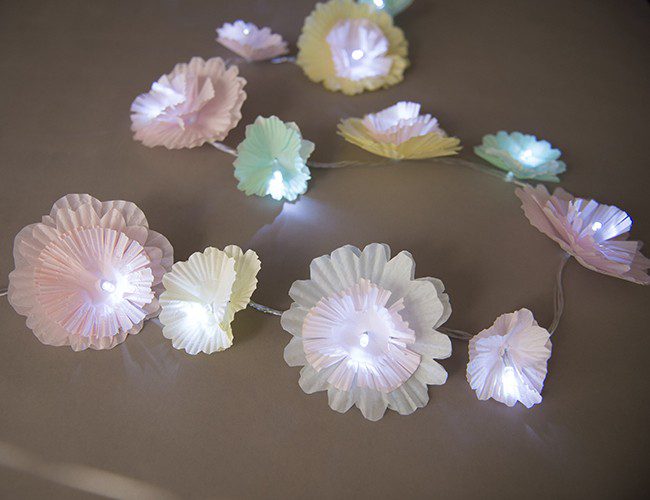
Using hot glue, carefully attach these to the string lights, spacing them out evenly along the length of the string. Be sure to leave enough space near the plug for easy connection to a power source. Once the glue has dried, hang the flower garland lights in your garden and enjoy the magical ambiance!
37. Spring floral organizing tray
Get organized and add a touch of springtime charm to your home with a DIY floral organizing tray using paper trays and a fresh coat of paint! Gather paper trays and choose a paint color that complements your spring decor, such as pastel pink, mint green, or sky blue.
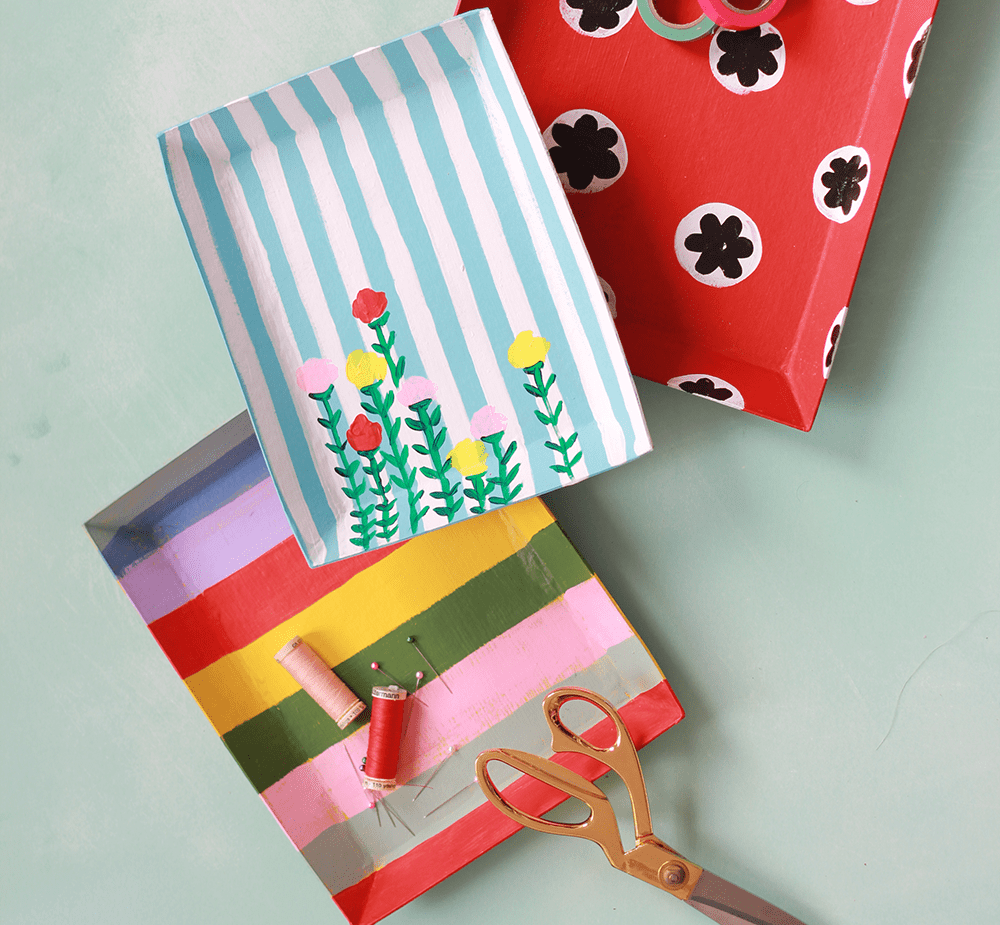
Use acrylic paint or spray paint to coat the trays evenly, allowing them to dry completely. Once the paint is dry, use floral stencils or freehand to paint delicate flowers on the trays to create a whimsical floral design. You can also add leaves, stems, or other floral details to complete the look.
38. Bright tufted cushions and pillows
Give your home a cheerful spring decor upgrade with bright tufted cushions and pillows that are sure to add a burst of color and comfort to your living space! Start by selecting vibrant fabric in hues like sunshine yellow, coral pink, or sky blue that reflect the season’s spirit. Cut out two identical fabric squares.

Sew three sides of the fabric squares together, leaving one side open for stuffing. Turn the fabric right side and stuff it with your preferred filling, e.g., polyester fiberfill or foam. Finally, use a needle and thread to carefully tuft the cushion or pillow, pulling the thread tight to create the desired tufted effect.
39. Aesthetic wine cork butterfly
Elevate your home decor with a fun and trendy DIY project – creating aesthetic wine cork butterflies! Gather wine corks from your favorite bottles and arrange them in a butterfly shape on a flat surface. You can use different sizes and shapes to add a stunning visual aspect.
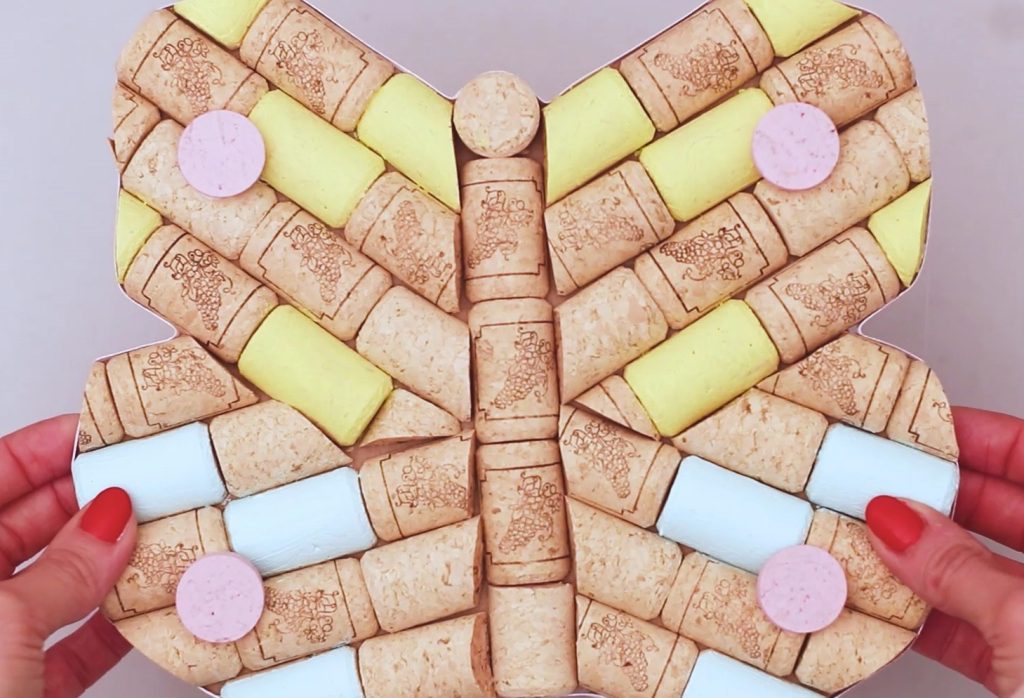
Once you’re satisfied with the arrangement, carefully glue the corks together using a hot glue gun, ensuring they’re securely attached. You can add small decorative accents like googly eyes, faux flowers, or painted patterns to customize it. These wine cork butterflies make unique and eye-catching decor pieces.
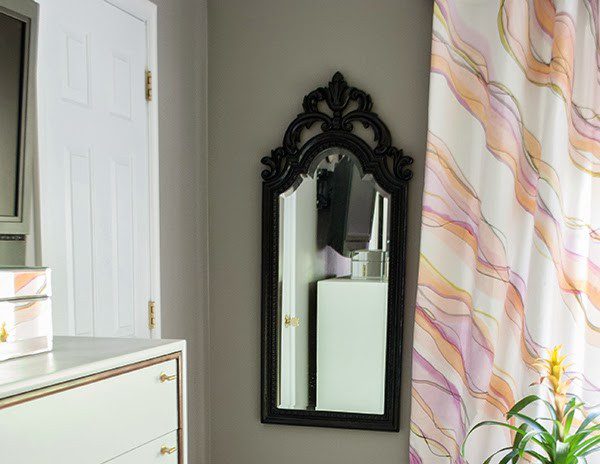
40. Floral entryway mirror
Create a fresh and welcoming entryway for spring with this beautiful idea! Transform a plain mirror into a stunning focal point by adding faux flowers that evoke the colors and blooms of the season. Start by selecting an assortment of faux flowers.
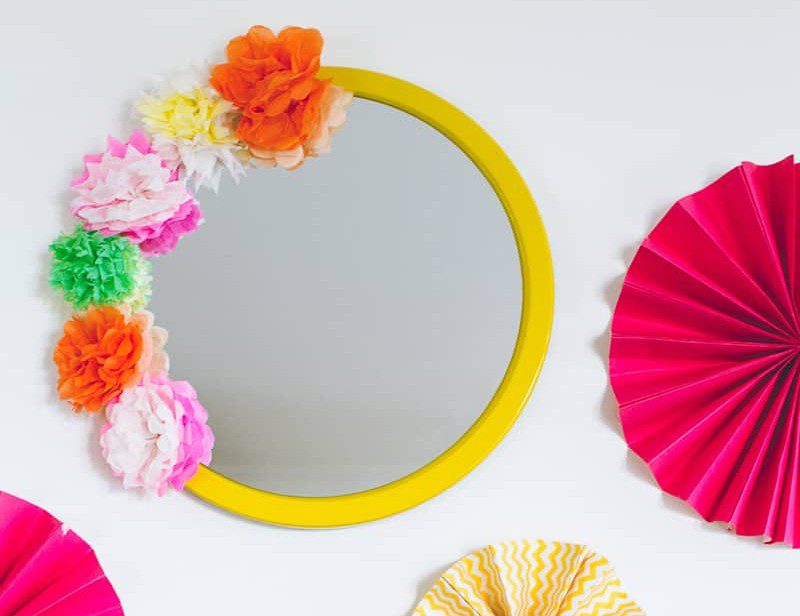
Remove the stems, and use a hot glue gun to stick them to the frame of the mirror. You can create a symmetrical design or go for a more random and organic arrangement for a natural look. Once the glue is dry, hang your mirror in your entryway.
41. Rainbow wooden floor mat
Elevate your home’s spring decor with a DIY project that’s sure to make a splash by painting a wooden floor mat in rainbow colors! Embrace the joyful and vibrant hues of the season by using a variety of rainbow shades to create a stunning pattern on a plain wooden floor mat.

Start by sanding the surface for smoothness, then apply a base coat of white paint to make the colors pop. Use a ruler and painter’s tape to create even stripes, and paint each section in the desired color. Allow the paint to dry before peeling off the tape to reveal your stunning rainbow floor mat!
42. Serve in style with a floral tray
Elevate your serving style by adding floral contact paper to a transparent tray! Choose a transparent tray in a shape and size that suits your needs, whether it’s rectangular, round, or square. Next, select floral contact paper in a design that complements your decor.
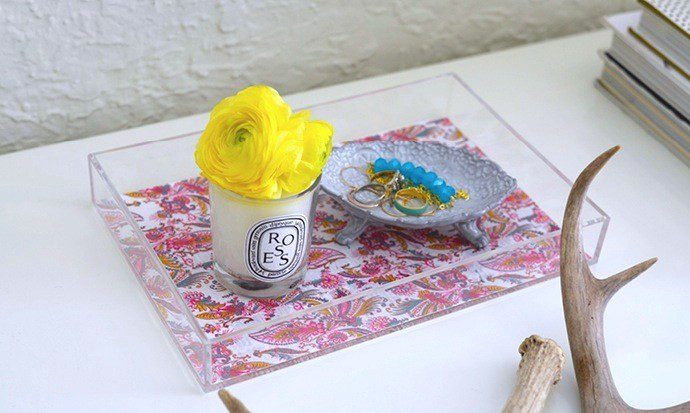
Cut it to fit the bottom of the tray. Peel off the back paper and carefully apply the contact paper to the tray, smoothing out any bubbles or wrinkles. This will instantly transform the transparent tray into a chic, eye-catching piece. Use it to serve drinks, appetizers, or desserts at your next gathering!
43. Add multicolor chairs to the kitchen
Add the vibrant colors of spring into your kitchen with this creative and refreshing update: paint your kitchen chairs in different hues! Embrace the spirit of the season by selecting an array of pastel or bold shades, such as mint green, lemon yellow, or sky blue, to give your kitchen a fresh and inviting look.
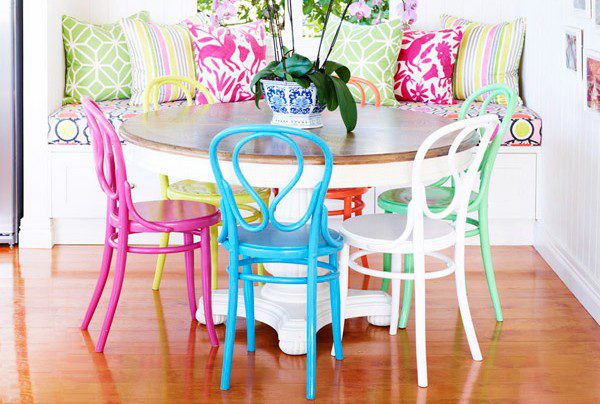
Whether you have wooden, metal, or plastic chairs, a few coats of paint can instantly transform them into eye-catching focal points. Mix and match the colors for an eclectic vibe or opt for a coordinated palette for a cohesive look. Get ready to enjoy your meals in style with these fun and colorful kitchen chairs.
44. Make wooden geometric succulent planters
Making wooden cuboid-shaped succulent planters is a great way to bring a unique touch to your garden. You can create a beautiful planter that will last for years with a few simple supplies. You’ll need some plywood, a saw, glue, and paint.
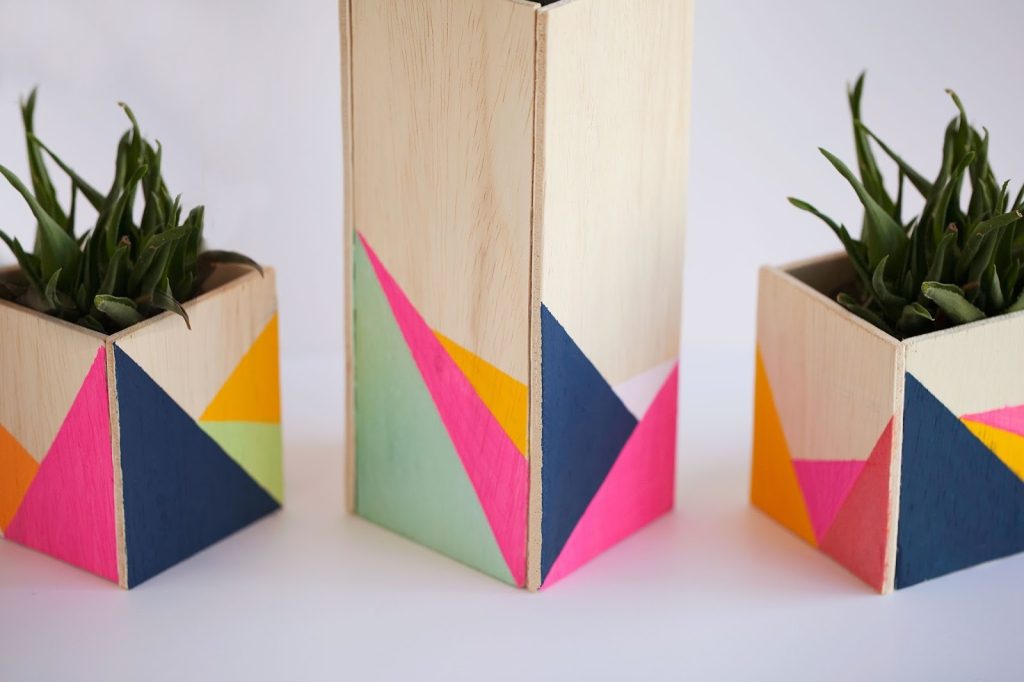
Trace the desired shape of your planter, then cut out the pieces with the saw. Glue them together to create the basic cuboid shape, and choose any color scheme to paint the designs. After the paint has dried, you can add a fun geometric design. Add a layer of soil, and then add the succulents.
45. Plant trellis for empty walls
Measure and cut the dowels or bamboo poles for your plant trellis on the wall where you plan to hang it. Use a saw to cut them to the appropriate lengths, taking into account the desired height and width and any additional spacing between the poles.
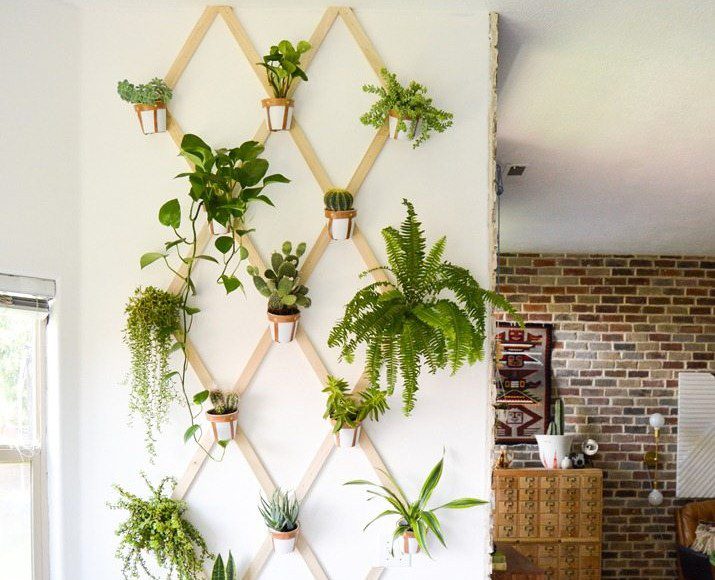
Next, lay them on a flat surface, arranging them in the desired pattern or design for your plant trellis. You can create a simple grid pattern, a diagonal or herringbone pattern, or any other design that fits your aesthetic. Use twine or plant-friendly wire to secure the dowels at intersecting points.