
30 Brilliant Bathtub Hacks To Revamp And Repurpose Old Tubs
There’s nothing more relaxing than a long, hot bath. But it can be a real mood killer when your tub is damaged, outdated, or looking a little worse for wear — the porcelain is stained, the caulking around the edges is peeling, and it could use a good scrubbing. You might be tempted to buy a new fancy bathtub, but first, take a moment to consider what you already have. Why not just upgrade your old bathtub to something new and shiny? Before you go out to purchase a new one, consider trying these brilliant bathtub hacks to upcycle, transform, and fix your bathtub! You’d be surprised how far a little bit of creativity and some DIY skills can take you. If you need some inspiration, we’ve compiled a list of brilliant ways to upcycle, transform, and fix your bathtub.
1. Use a power ball
Looking for a way to make your bathtub shine? Look no further than the electric power polishing ball! This nifty little device will quickly and easily polish your tub to perfection. Here’s how it works: Simply place the ball on all corners of the tub and let it do its job!
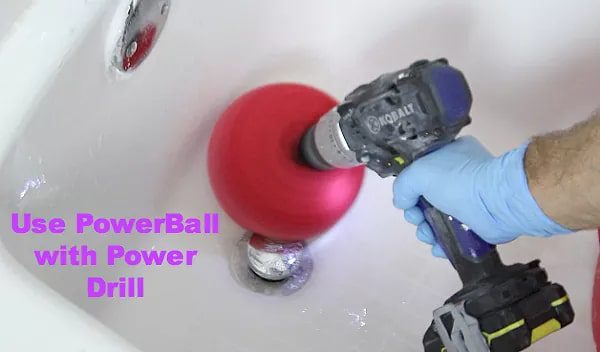
The rotating action of the ball will emit a high-powered vibration that will quickly break down any dirt, grime, or soap scum on your tub’s surface. The electric power polishing ball is perfect for anyone who wants to keep their bathtub looking its best. In just minutes, your tub will be shining like new!
2. Power of baking soda and vinegar
There are a few ways that you can clean your bathtub drain using baking soda and vinegar. One method is to pour a mixture of baking soda and vinegar down the drain, let it sit and work for a few minutes, and then flush with hot water.
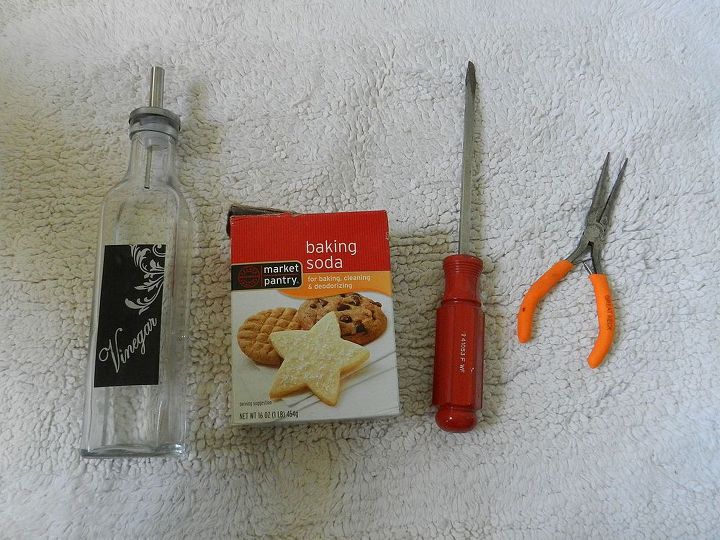
Or, put a pot of boiling water on top of the drain, let it sit for 2-3 minutes, and then pour in a mixture of baking soda and vinegar. Finally, you can try using a plunger to suction the mixture down the drain. Be sure to rinse your tub well afterward to remove any residue.
3. Add some new tiles
One of the most convenient options to spruce up your bathroom is to add new tiles. But there are so many tiles available, that you might have a hard time deciding which ones are right for you. The best tips for your bathroom makeover are to stick to a theme and stay on budget.

Set a budget before you get started. Once you know how much you may be willing to spend, you can narrow down your choices and focus on only the options that fit within your budget. Tiles can get pricey so stick to what you’ve set aside and work from there.
4. Make a wooden tray
If you’re on a hunt for a way to upcycle some old wood and turn it into something both practical and stylish, a bathtub tray is a great option. Here’s how you can make your own. First, sand down the wood to smooth any rough edges and remove dirt or debris.
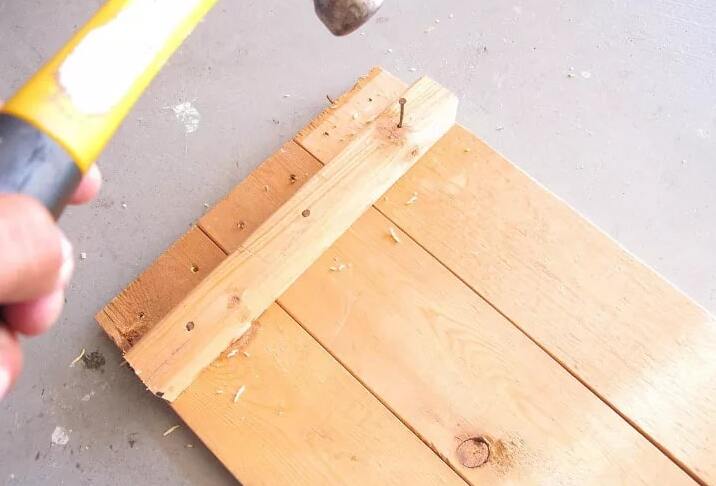
Next, measure the exact length and width of your bathtub, so you know how big to make the tray. Then, use a saw to get it to the right size. Once you have your perfect piece of wood cut to size, it’s time to start decorating! Paint and stain it and let your creativity shine!
5. Paint the side
This is one of the easiest and most convenient ways to spruce up your tub. Decorate one side of the tub with freehand designs, stencils, or even simple vertical lines. The new coat and colors will make your tub look new and exciting.
Just get some acrylic paint suitable for bathtubs to paint one side. Don’t be afraid to get creative and let your imagination run wild. But take care when you paint; it is better to be precise to avoid leaving paint marks or mistakes on the tub.
6. Custom frame for your tub
This is an out-of-the-box idea for many people; however, it may be the fanciest one so far. Adding a custom frame panel to your bathtub is a great way to add extra visual interest and personality to your old boring bathroom.
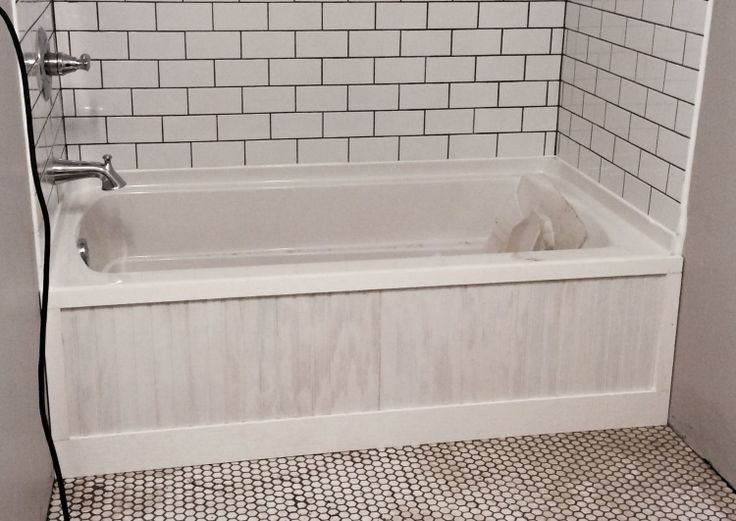
Measure the size and shape of the opening where you want to install the panel to make sure that it will fit correctly. Finally, choose a design and color for your vinyl panel to match your existing decor. Use glue on the panel to stick it to the side of the tub along with silicone adhesive.
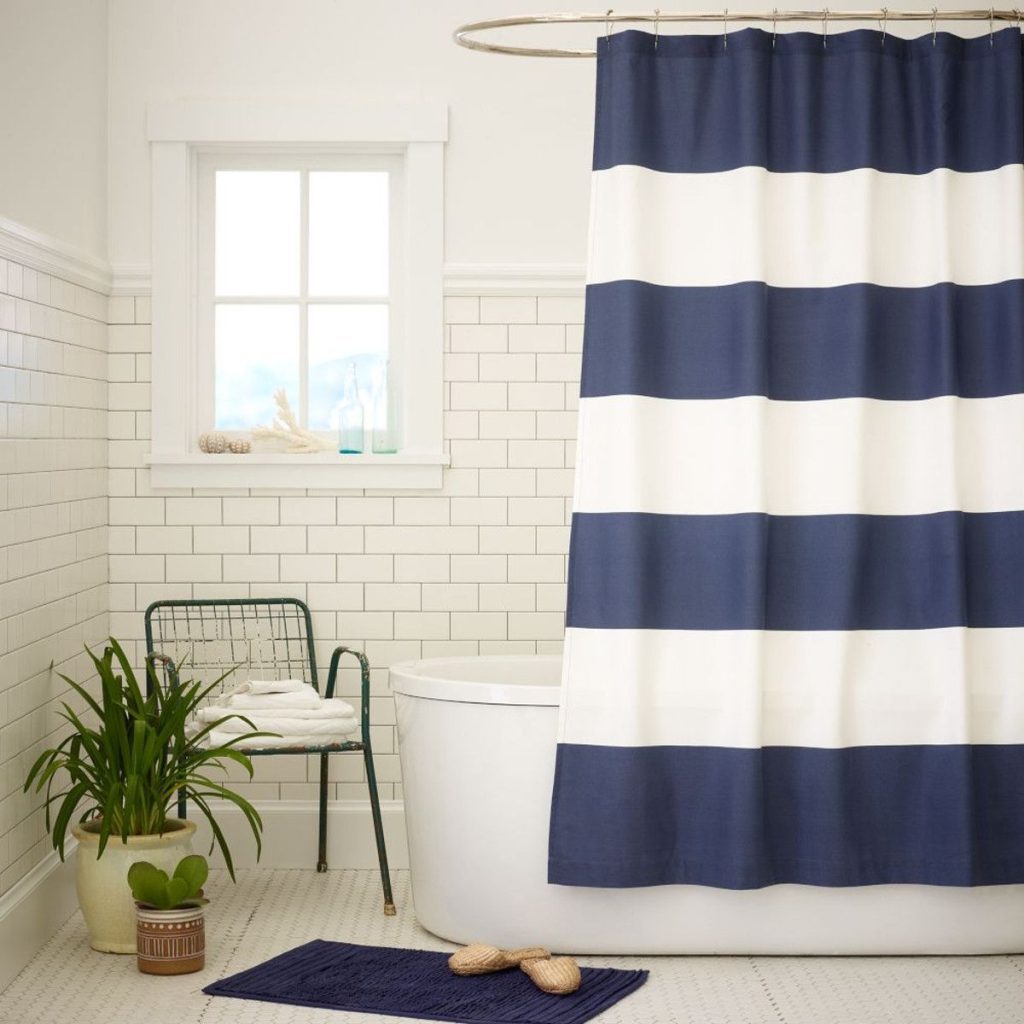
7. Use a vibrant shower curtain
Choosing the perfect shower curtain for your bathtub makeover can be tough. You want something that will add a pop of bright color and vibrancy to the room, but you also need something that’s going to be durable and long-lasting.
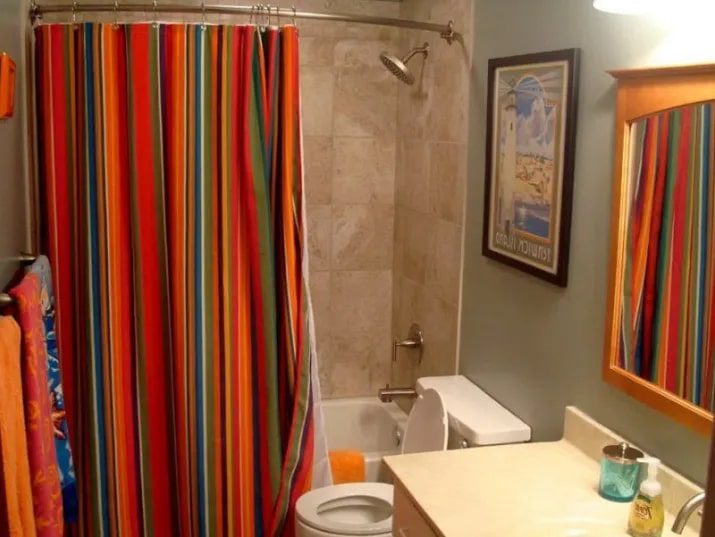
It’s important to consider the colors of your bathroom. If your bathroom is decorated in neutrals, then a bright, colorful shower curtain may be just what you may need to add some life to the room. If your bathroom is already brightly colored, then you may want to choose a more subtle shower curtain.
8. Fix the plumbing leak
You should take care of leaks as soon as possible; they can get really expensive if you’re not paying attention. To fix a leak, you can try a few things yourself. First, ensure that the area around the leak is clean and free of any debris or obstructions. Next, locate the source of the leak.
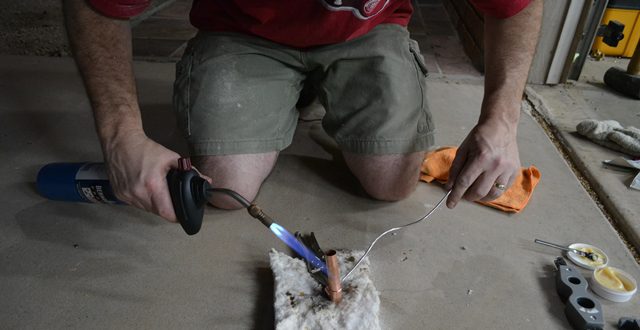
Once you’ve identified the source of the plumbing leak, you can start working on fixing it. Take a wire and melt it into the hole in the pipe to seal the leak. All this work may require a good amount of time, so be patient. Repairing leaks this way is more reliable and lasts longer.
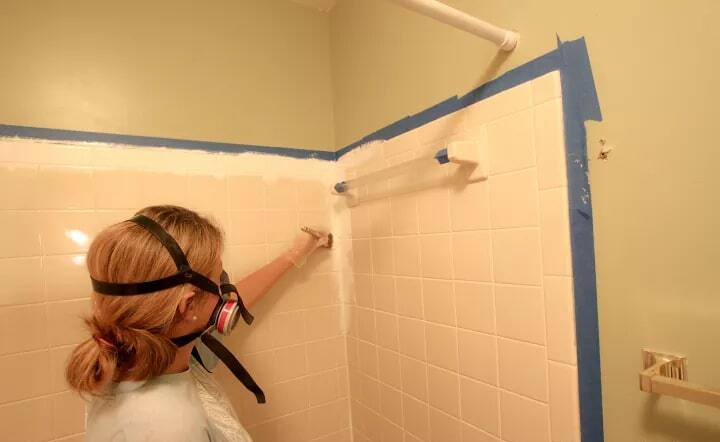
9. Update your tub on a budget
Before you use the Rustoleum Tub and Tile Refinishing Kit to update your tub, you should remember a few tips. First, using a kit is a great idea to refinish your tub or tile rather than replace it and it can help you save a lot of money.
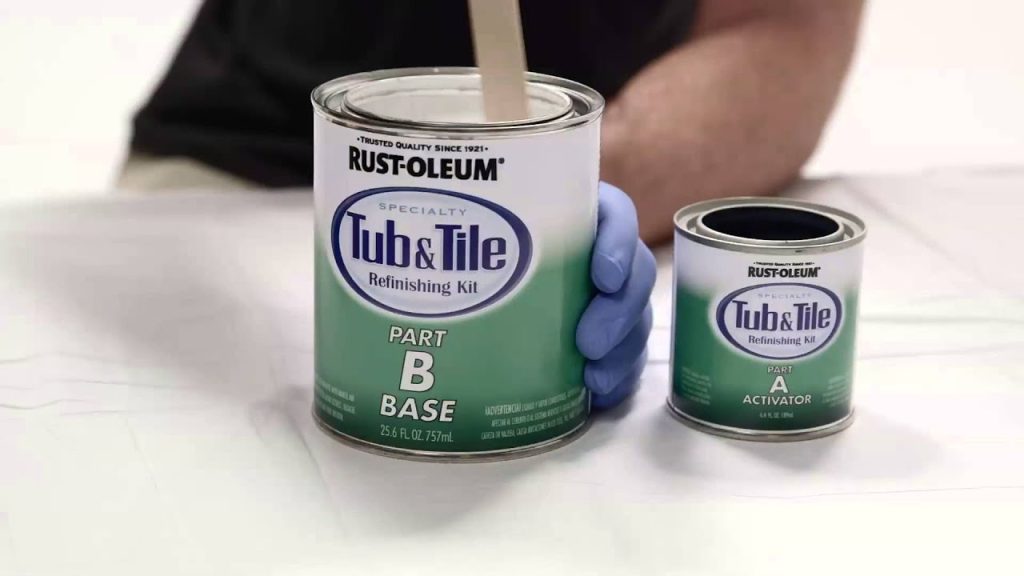
The best part: kits like this are easy to use and will get you great results. For safety, you must keep a few things in mind when using the kit, including proper preparation and ventilation. And, most importantly, clean the surface from all soap scum and dirt before you get working.
10. Santa’s sleigh
What a fantastic and unique Christmas decoration! All you need is a bathtub and some red and green paint. Cut the bathtub in the shape of the sleigh. Paint the bathtub red. Then, add green stripes around the top and bottom. Finally, attach the base of the sleigh for stability.

You can also use golden paint to make the sleigh feel more decorative. Finally, place the sleigh along with fairy lights and reindeers to make it look all festive. You may also add some fake snow around the sleigh for a perfect Christmas scene.
11. Apply new caulk
Depending on your situation, you have a few different options at your disposal for caulking your bathroom. First, remove the old moldy caulk from the bathroom. Clean and dry the tile before applying the caulk; this will help get a good seal.
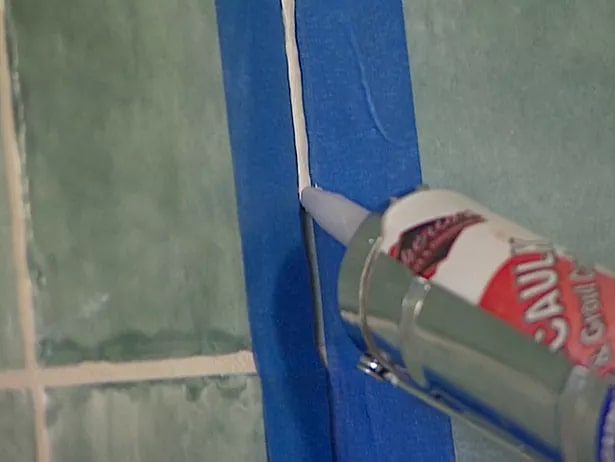
Cut the tip of the caulk dispensing tube at an angle to have a nice, smooth opening to work with. Apply the caulk in short, even strokes, and keep the nozzle pressed tightly against the surface as you go. If needed, use a damp cloth to smooth out any bumps or unevenness in the caulk.
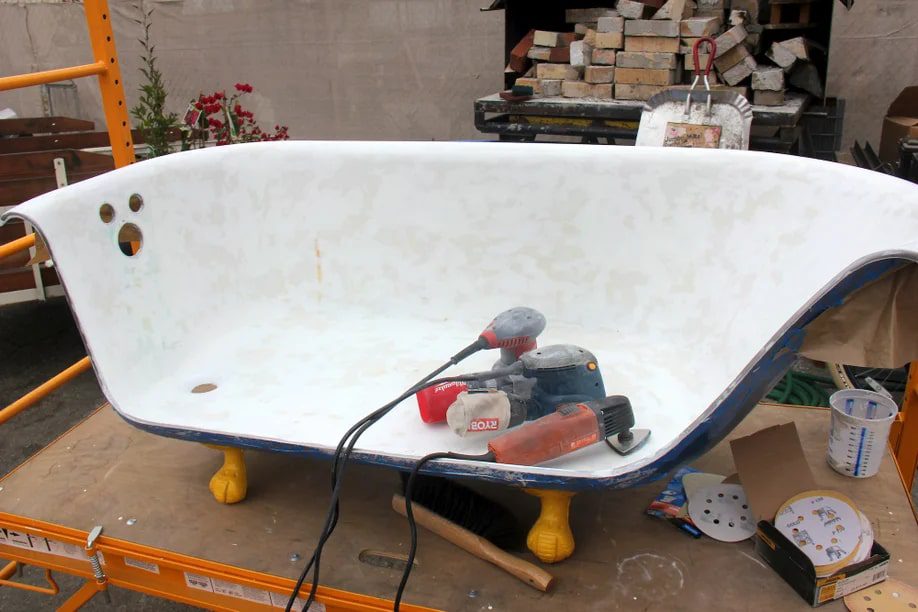
12. Bring back the shine
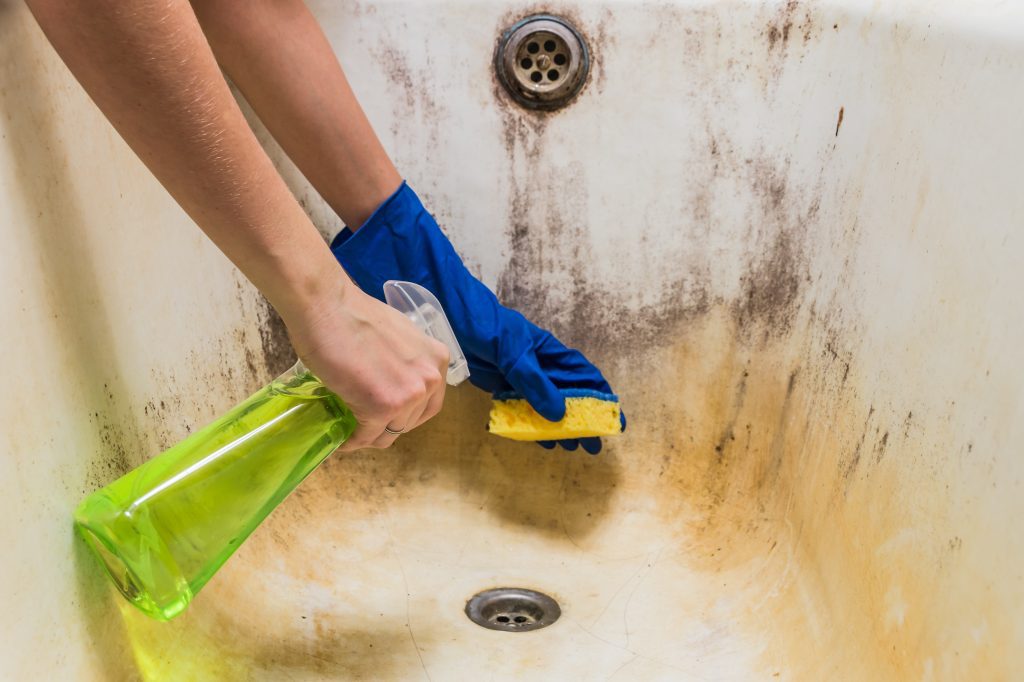
Your once beautiful tile and tub are now dull and lifeless, and you feel like you’ve tried every cleaning product on the market with no success. But before you give up hope, there is one more solution you can try — a repair kit and bleach to bring back the shine of your tiles and bathtub.
First, use the repair kit to fill in any cracks or chips in your tile or tub. Then, using a sponge soaked in bleach water, gently scrub away any remaining dirt or grime. Finally, rinse away the bleach water and admire your sparkling clean tile and tub!
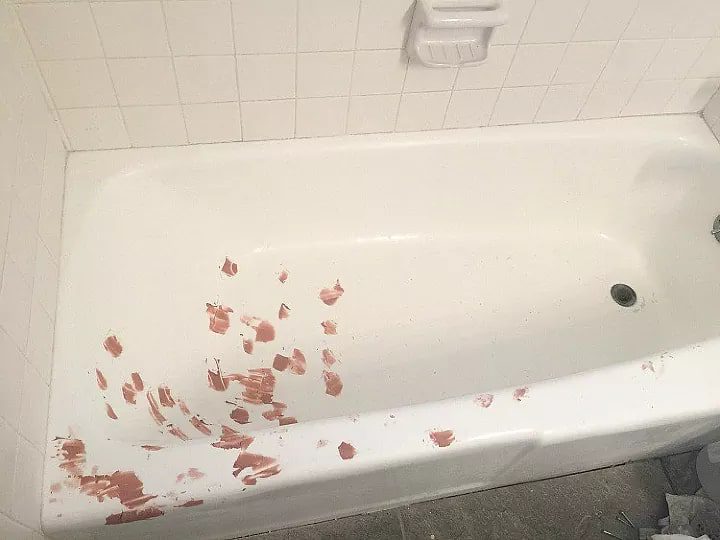
13. Remove pesky water spots
Water spots on bathtub taps can be removed with a little lemon. Just cut a lemon and use the juicy half to rub over the water spots. The stains are caused by mineral deposits, so the lemon’s citric acid will break those down and get your surface looking shiny again.
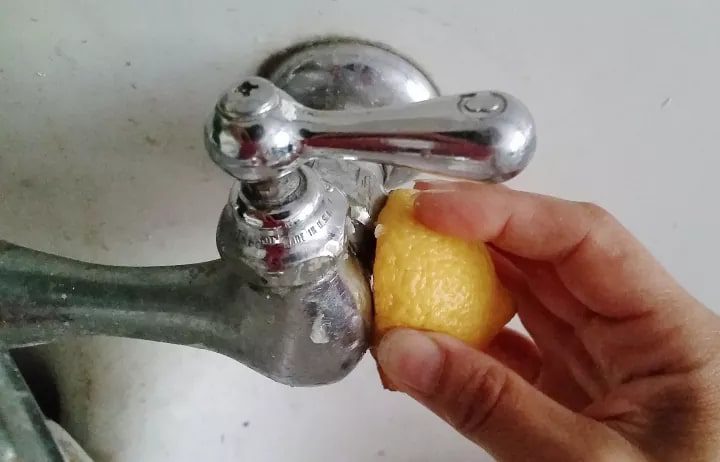
After a few minutes of scrubbing, they should disappear. If they don’t, you can try using a little baking soda to help scrub them away. Finally, warm water and a towel to dry it off will give you that new shine. If the spots aren’t fully removed, give it another go. Stubborn stains may take two treatments to remove.
14. Make a bath tray for reading
Using old wood to make a bath tray for reading is a great upcycling project. You’ll like the rustic look, or maybe you just want to find a way to reuse some old lumber that’s been sitting in your garage for years. First, you’ll have to select the right kind of wood.
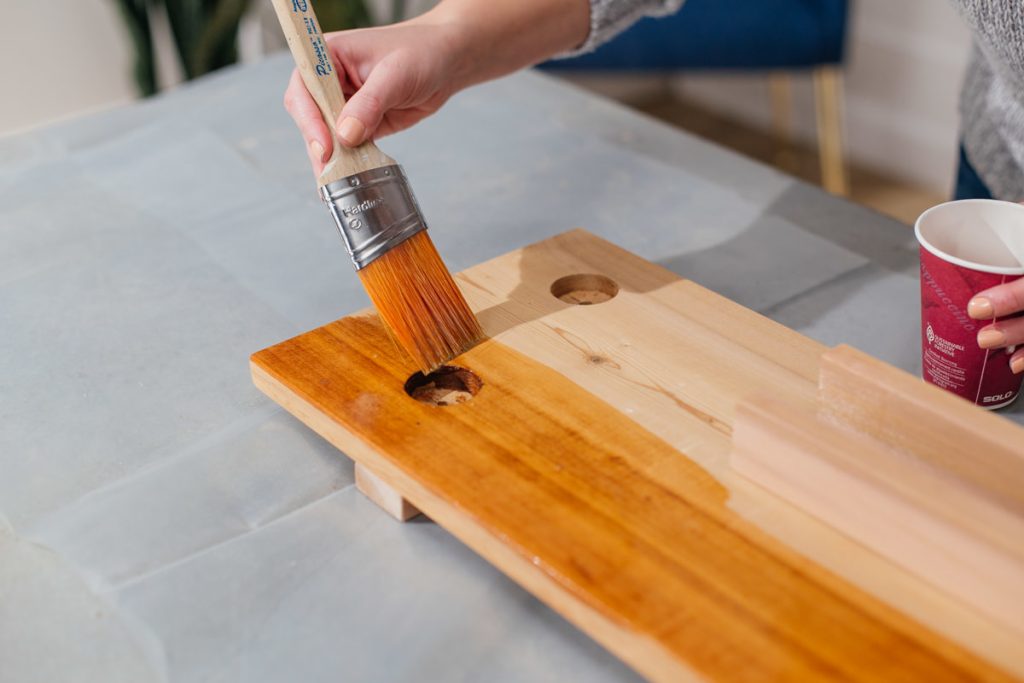
Ideally, you’ll want something lightweight and relatively easy to work with, such as pine or cedar. You’ll also want to ensure that the wood is relatively dry and free of any major cracks or defects. Once you’ve cut it as per measurements, color it in your favorite shade.
15. Remove fiberglass bathtub and surround
There’s no need to ask a professional to remove your fiberglass bathtub — you can do it yourself with a few simple tools. First, identify the tub’s edges where it meets the wall or tile surround. Then, score along these edges with a utility knife to help break the sealant holding the tub in place.
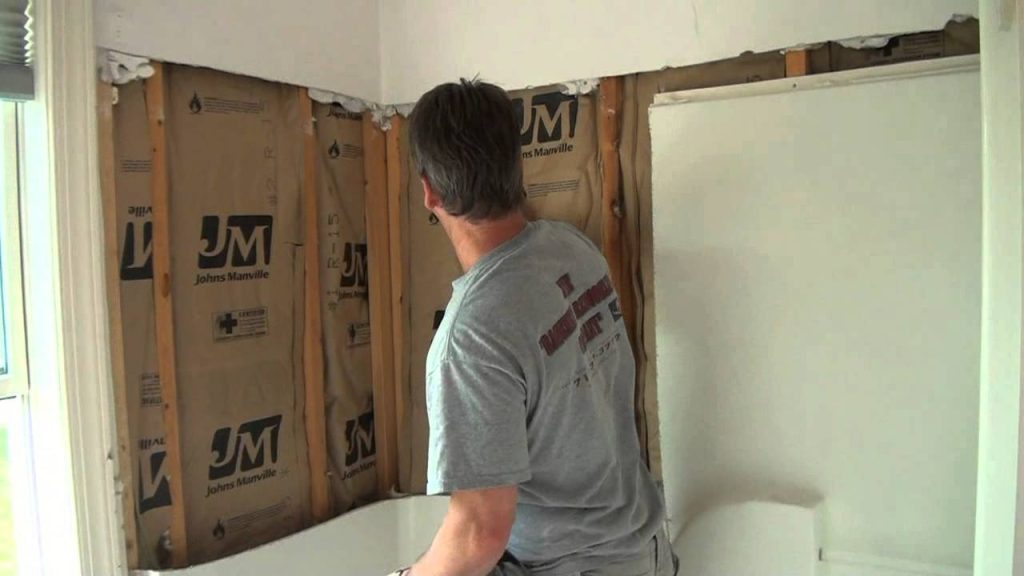
Next, use a putty knife or screwdriver to pry up any remaining sealant or caulking around the tub’s perimeter. Once you’ve removed all of the caulking, gently lift the tub out of its spot and dispose of it properly. Now you’re ready to upgrade with a new one!
16. Affordable decorative tiles
Sheet tiles are a great way to save money on your renovation project because they are less expensive than traditional ceramic or porcelain tiles. Sheet tiles can be found in dozens of colors and styles, so you’re sure to find a design to match your aesthetic.
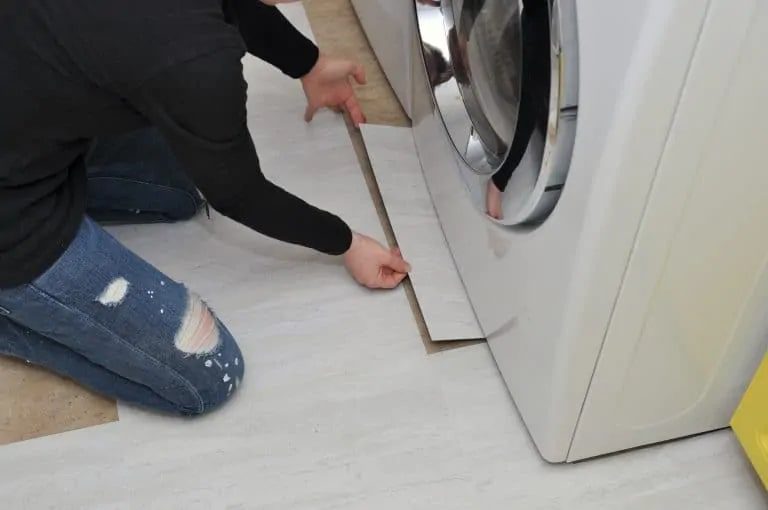
To install sheet tiles, begin by measuring the area you want to tile and then cutting the tiles to size. Next, stick these tiles by pressing them against the wall. These are great because they’re mess-free and have adhesive already built-in, so it’s easy to install.
17. Use monochromatic tiles
Adding monochromatic tiles around the bathtub is a great way to create a spa-like look. This can be done by using tiles that are all the same color or using different shades of the same color. Either way, the goal is to have a cohesive and relaxing space.
One reason why this look may be so popular in spas is that it creates a sense of calm. When you step into a space that is all one color, it feels more tranquil than if there were multiple colors competing for attention. Plus, who doesn’t love a crisp, clean aesthetic?
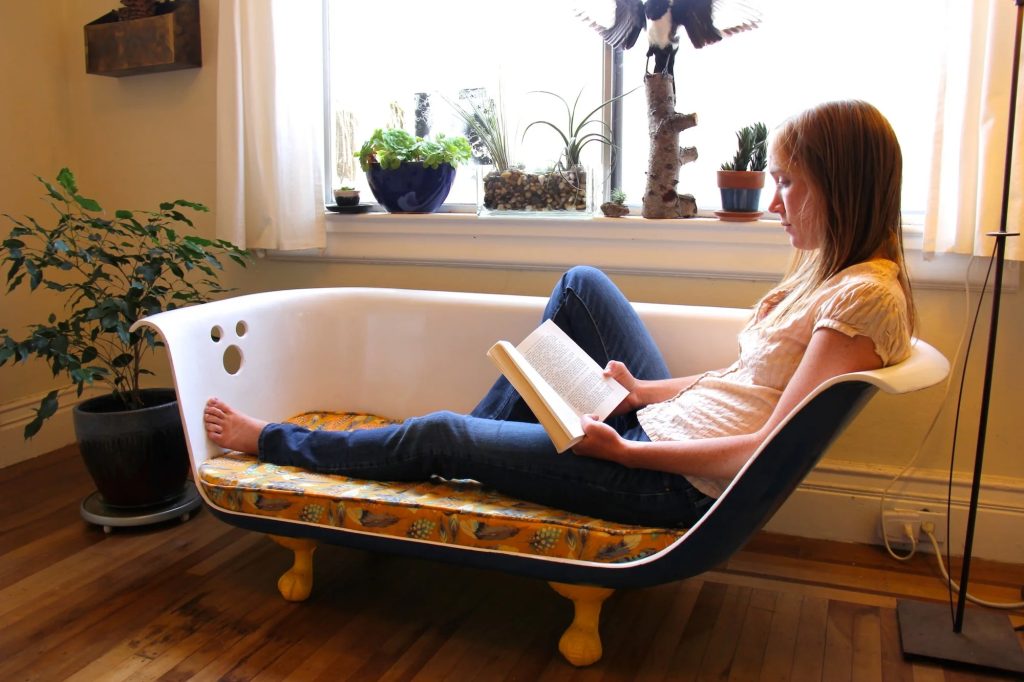
18. DIY clawfoot lounge
Have you always wanted to have a comfortable clawfoot lounge in your living room or balcony? You can refurbish an old bathtub into a clawfoot lounge in a few easy steps. Cut the tub into a lounger shape and grind the rough edges.
Make sure there are no rough corners left around the cuts. Paint the tub in a color that goes with the room’s theme. Add designer clawfoot legs to the lounge to give it a rustic element. Lastly, add a comfy custom cushion and pillows over the lounge.
19. Sparkly tub using hydrogen peroxide
Rust and mold stains feel impossible to get rid of, but don’t give up home. With some easy chemicals, you can clean it up in no time! You can use a commercial cleaner, vinegar, or hydrogen peroxide. To use hydrogen peroxide, mix it with water in a spray bottle and spray it onto the stained area.
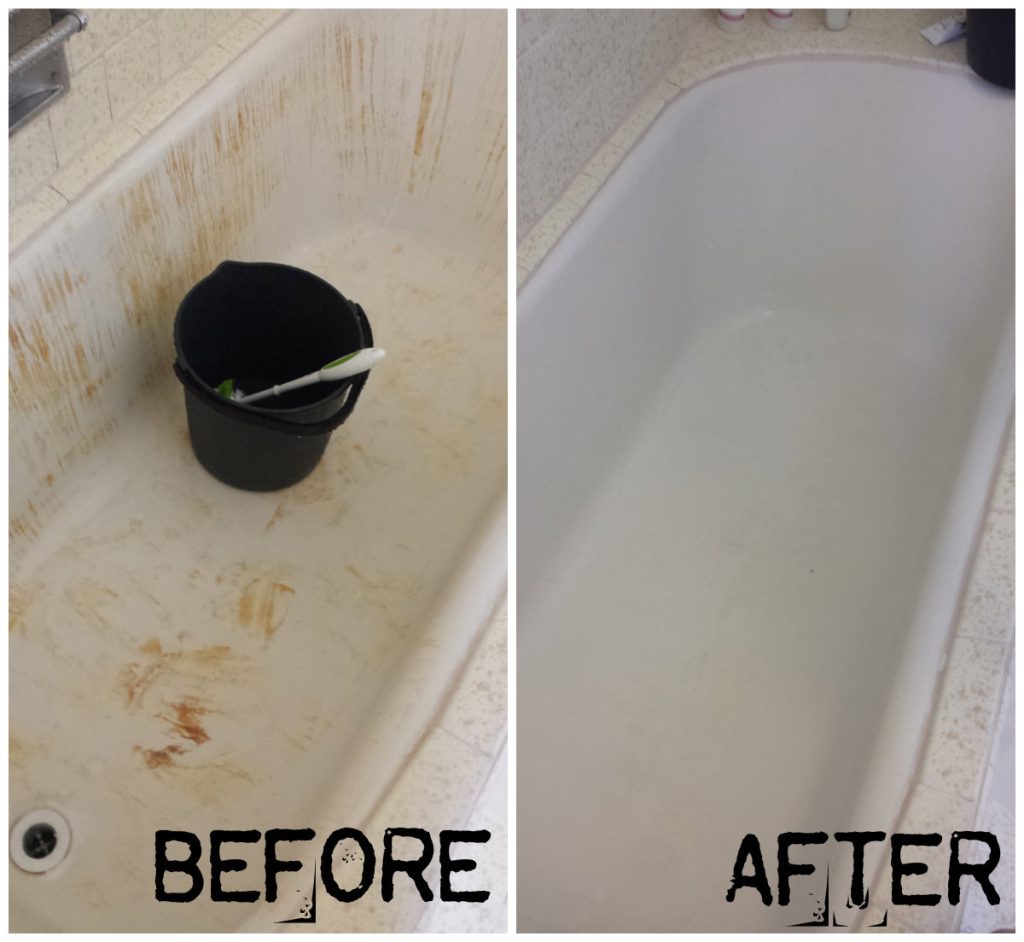
Let it sit for about 12-15 minutes, then scrub the area with a brush or sponge. Rinse the tub with water and dry it off. Finally, a brush or soft cloth will help clean up the stain. Do this a few times to get rid of all the stains and make your tub look better.
20. Firepit for backyard
You can easily turn your old bathtub into a firepit for your backyard with just a few simple steps. First, check that the tub’s material can safely handle higher temperatures. Next, find a location in your backyard that is away from any trees or other combustible materials.
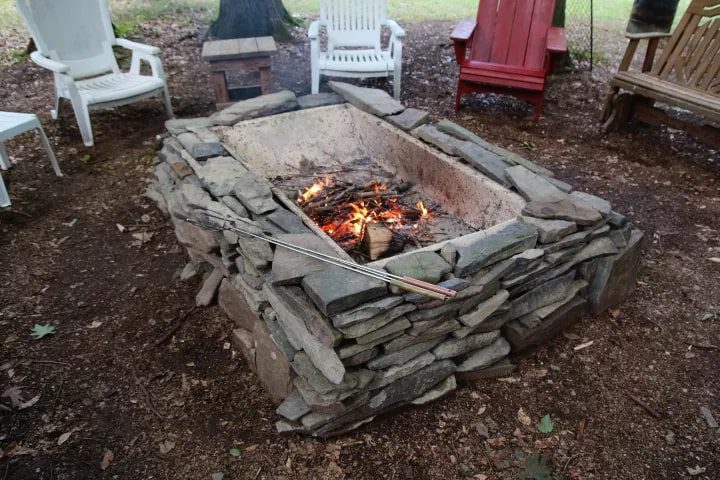
Then, clean out your tub and remove any dirt or debris that could catch fire. Cover all four sides of the tub with cinder blocks or any other material of choice to make it look nice. Finally, build a small fire in your tub and enjoy the warmth of the flames!
21. Stone bathtub
If you want to change up the aesthetic, maybe an earthy look is the way to go. Some people use rugs with natural stones to add this element to the space. For this, choose rugs and add airstones in a gray tone to the bathtub.
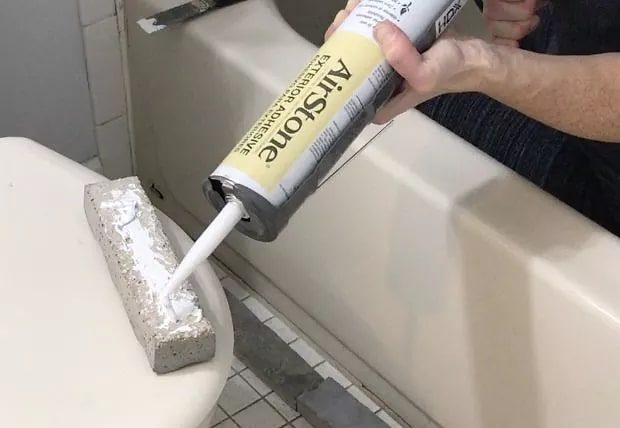
These materials can be found at a utility store. Don’t forget to take measurements before buying the air stones. And get the airstone adhesive to stick these to the bathtub’s surface. You’ll also need a hack saw, putty knife, and calk gun for working on the tub.
22. Unclog the drains
If you’re like most people, your bathtub drain is probably clogged with hair, soap scum, and other debris. But don’t fret — there are a few simple ways to unclog your bathtub drain and get it flowing freely again. First, try using a plunger.
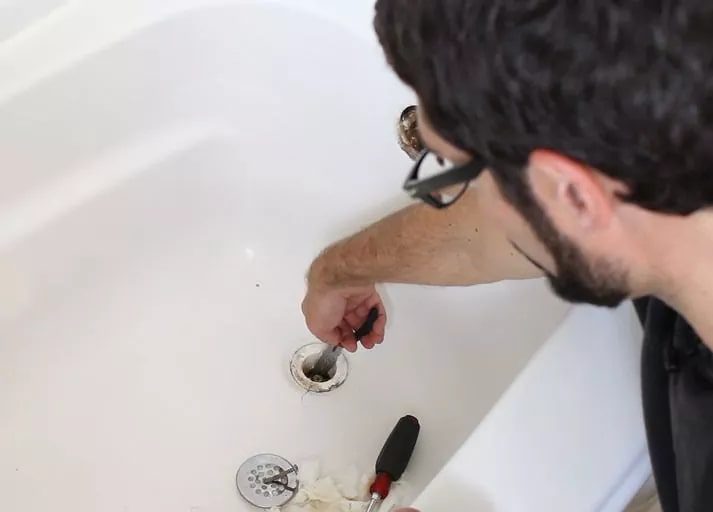
Cover the overflow opening with the plunger cup and work those muscles! This should dislodge the clog and allow water to start draining again. If a plunger doesn’t do the trick, you can try using a plumber’s snake to twist the gunk back and forth to loosen it and take it out.
23. Bathtub to sofa makeover
This is a fantastic way to incorporate an extra seating area into your home without spending a lot of money. Plus, it’s a nice option to upcycle an old bathtub. First, remove the faucet and drain from the bathtub. Then, cut off the side of the tub to make it similar to the sofa seat.
Next, work on the rough edges to ensure they are soft. If you want, you can add some batting or cushioning to make it more comfortable. You may also add a small mattress if you do not wish to upholster it.
24. Dark mosaic tiles for a rustic look
Use wooden tile squares around the bathtub to add a rustic elegance to the bathroom. Make sure you clean the area before starting to apply the tiles over a wooden board that fits the tub. This will give you access to plumbing without affecting the aesthetics.
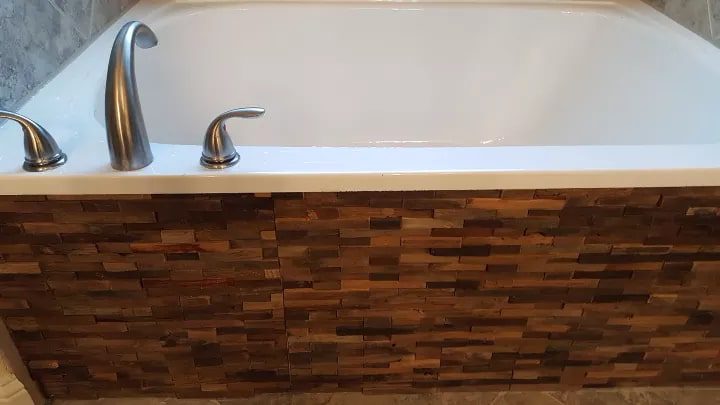
Use smaller tiles for some more texture and a soft look. Let the tiles dry. Then, screw the board on the tub area once the tiles are glued. Seal the wood tiles with a special wood sealer and wax coating to last longer.
25. DIY Scrub for cleaning
Making your baking soda, white vinegar, liquid Castille soap, and lemon essential oil bathtub scrub is easy! Here’s how you do it. Create a mixture of the aforementioned supplies, along with a little water. Mix it well enough for it to stay in its solid form.
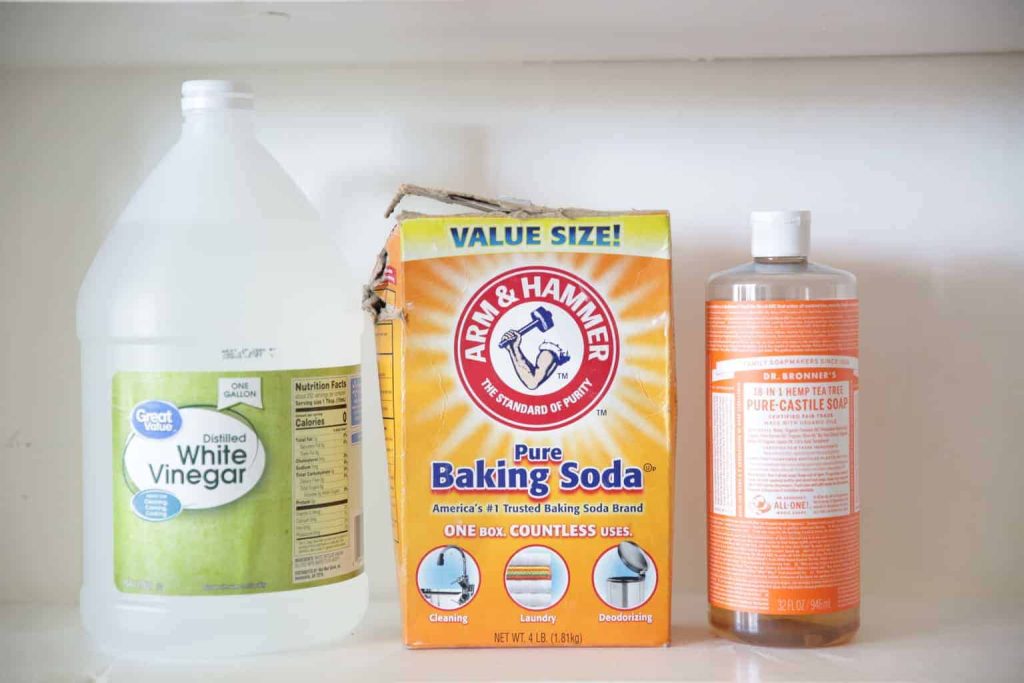
Keep this cleaning scrub in an airtight container to ensure it stays effective. Take out a spoonful every time your bathtub needs a good scrub. After cleaning, it’ll leave a soft lemon scent in the bathroom, making it feel fresh and clean.
26. Clean your old porcelain tub
There’s nothing quite like a sparkling clean bathtub. But getting your tub to shine can sometimes be a challenge, especially if you have an older tub and don’t know the proper way to clean it. You can use ammonia, baking soda, and lemon oil with a sponge.
This mixture is gentle for the porcelain and won’t cause any damage. Mix one-fourth cup of ammonia and baking powder in warm water to clean the tub. This will dissolve the soap scum and dirt easily. Rinse the tub well and see it shine for days.
27. Add a splash of new color
You’ll have to do a few vital things to paint your bathtub using a tub tile finishing kit. First, make sure that the surface of the bathtub is clean and free of any dirt, dust, or debris. You may use a scrub brush or cleaning solution to get rid of any built-up residue.
Next, apply a nice coat of primer to the bathtub’s surface. This will give you a smoother finish and make the paint adhere better to the tub. Once the primer is dry, add a coat (or two) of paint in your desired color. And don’t ignore the instruction manual for your kit!
28. Cover the bathtub
If you’re on the lookout for an option to add a touch of glamor to your bathroom, one basic solution is to invest in a new bathtub curtain. Curtains can be found in a wide range of colors, patterns, and sizes, so you’ll find one that fits your personal style.
Plus, they’re an easy and inexpensive way to refresh the look of your space. Just make sure to measure your tub before purchasing family bathroom curtains, so you know they’ll fit properly. And once you have your new curtain up, don’t forget to accessorize with some matching towels and rugs!
29. Paint tiles for a cleaner look
There are a few different ways to paint bathroom tiles white. One option is to use a tile paint or epoxy specifically designed. Another option is to use regular white paint, but you will need to seal the tiles with a clear sealant before painting.
This will prevent the dried paint from chipping and fading over time. If you choose to use regular white paint, be sure to test it out on a small area of the bathroom tile first to make sure that it adheres properly and looks nice in texture.
30. Birdbath and water feature
You can convert an old tub into a stylish and practical birdbath for your garden following these simple steps. First, find a place in your yard where you want to set up your water feature. Then, secure the tub in place. You can try using large stones, like this person did.
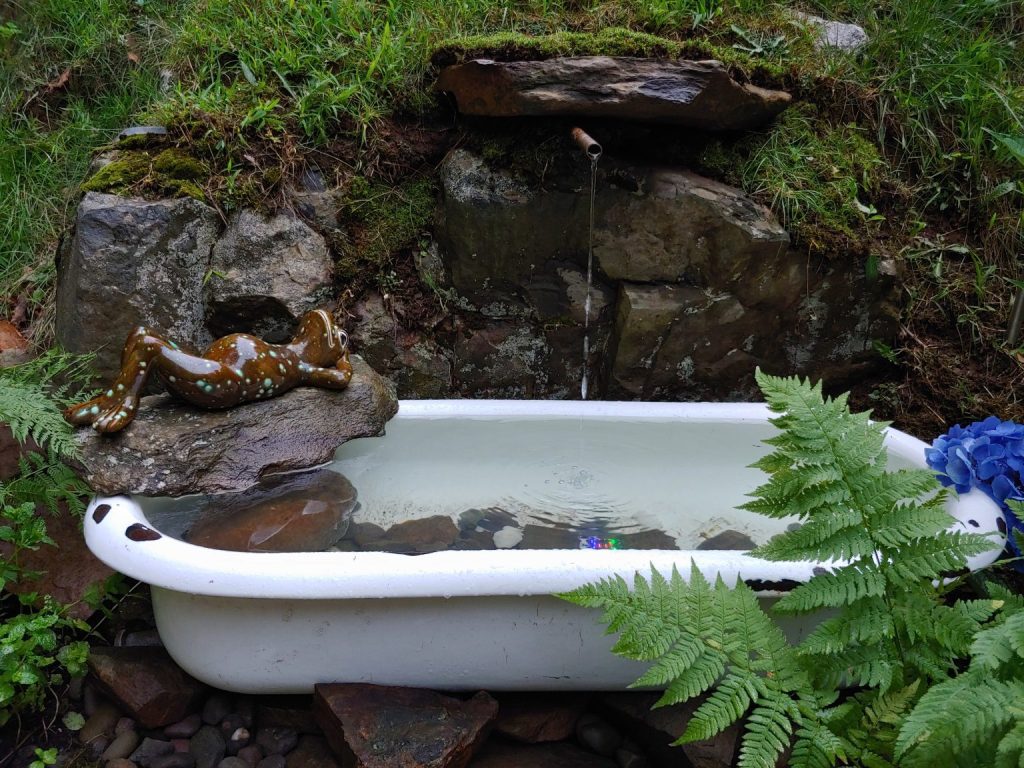
For some extra flair, add waterproof lights to give it some color at night. You can either install a piping system to have the water recycled back, or place it over a creek. That way, the water will overflow to the same place it would have before you added your decor.