
Ideas That Stick: 45 Creative Uses For Washi Tape That Will Spice Up Anyone’s Craft Life
Are you on the hunt for a unique and clever way to add some personality to your crafting and DIY projects? Washi tape is the answer! There is something special about the funky and colorful designs of washi tape. Because of this, you can use it in more ways than you ever pondered before. You can use this versatile adhesive tape for everything from scrapbooking to home improvement. You have the option to choose pastel, floral, neon, geometric, and basically, anything other design under the sun when it comes to this amazing tool. While it’s great for crafting and decorating, sometimes, it can be challenging to come up with new ideas. So, if you’re looking for some adorable washi tape projects, look no further! We’ve compiled 45 of the most crafty and original washi tape uses for your next DIY endeavor.
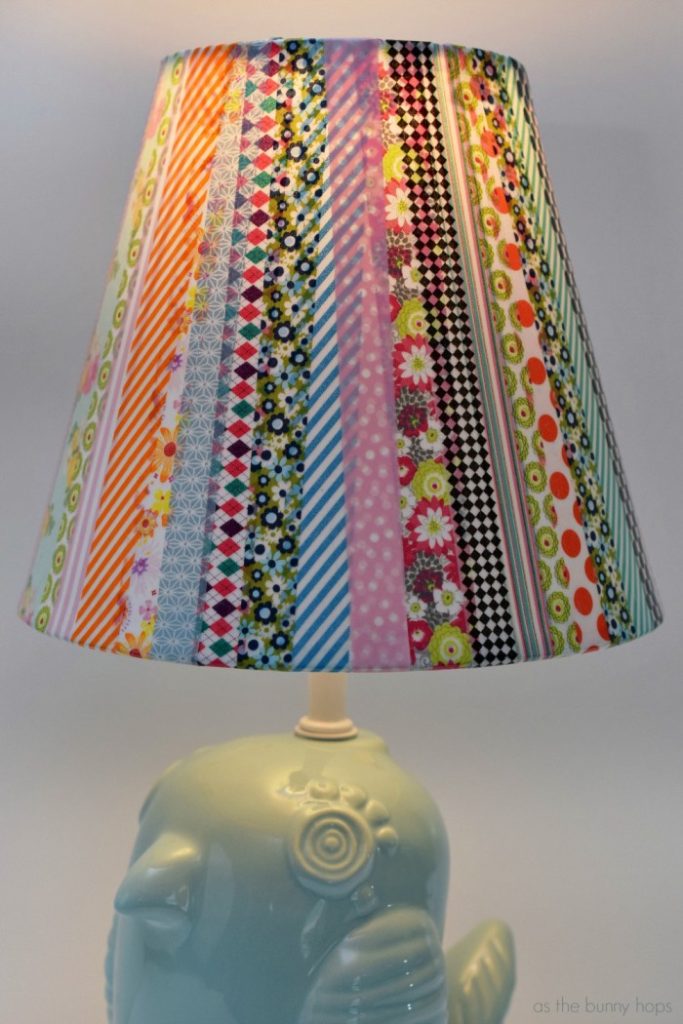
Decorate the inside of a lampshade
The look of monochromatic lampshades may do wonders for your room. And using washi tape is a genius way to achieve it. Choose your washi tape colors carefully. You want them to complement each other and create a cohesive look in the room.
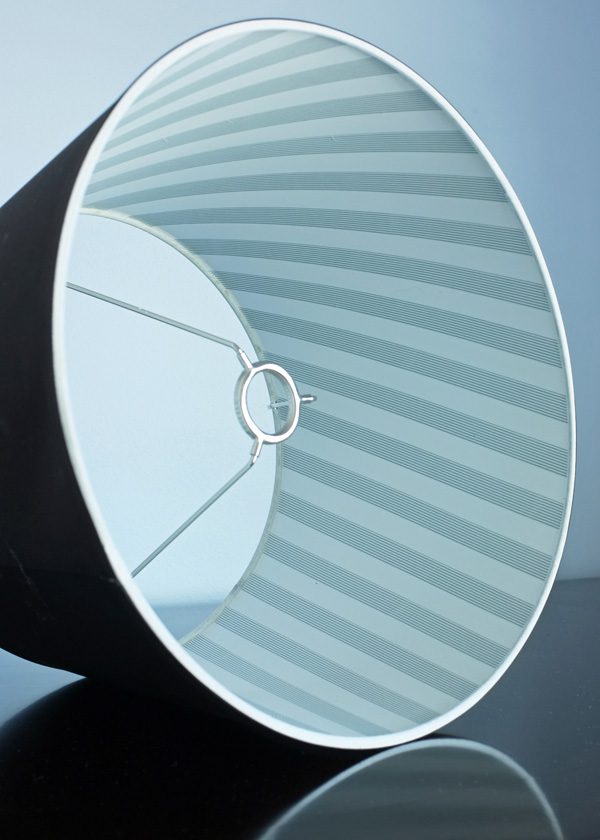
Apply the washi tape to the inside of the lampshade, making sure to smooth out any wrinkles or bubbles. Use different widths and patterns of the tape to create an interesting design. Trim off any excess washi tape at the top and bottom of the lampshade for a neat finish.
Candle decorating
Candle decoration is a great way to make custom pieces for your home décor. And what better way to add a personal touch than with washi tape? And if you don’t like glitter for candle decoration, as it gets everywhere, this may be the right DIY for you.
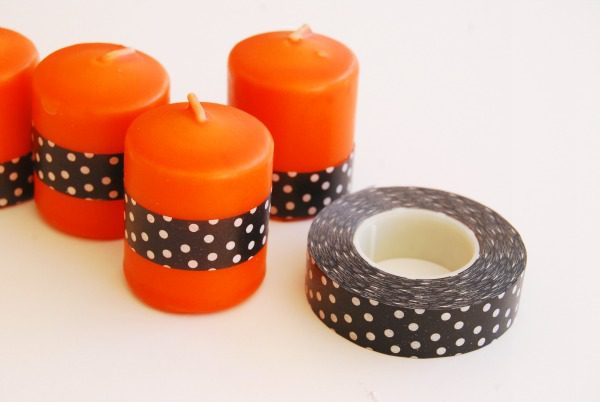
To decorate a candle with washi tape, start by wrapping the tape around the base of the candle. Then, wind the tape up the candle, wrapping it around in a spiraling pattern. You can also wrap the tape around the middle or top of the candle and leave the rest of the space.
Have fun with your computer keyboard
Why not jazz up your computer keyboard with some colorful washi tape? Not only will it look prettier, but it can also help you stay organized and be more productive. For a more pleasing look, you may use different colors and patterns for other rows.
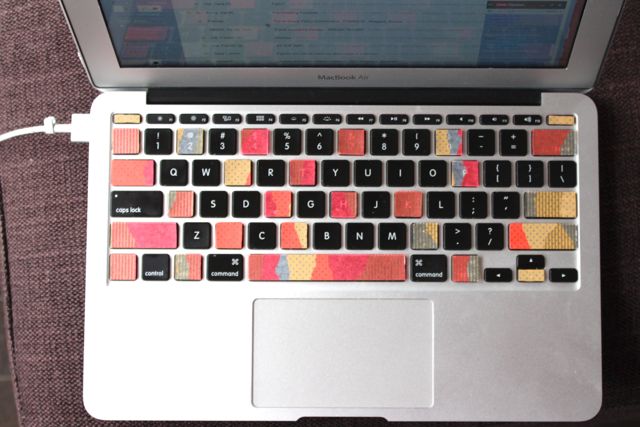
Also, use black tape to create a border around the edge of your keyboard. Use different colors to mark special keys (e.g., Ctrl, Alt, and Shift). This upgrade will make working on your computer way more fun for you throughout the day.
Upgrade switch plate cover
There are many ways to upgrade your switch plate covers and make them uniquely your own – and washi tape is a great way to do it! Just measure the dimensions of your switch plate cover, cut out a piece of washi tape to fit, and adhere it on.
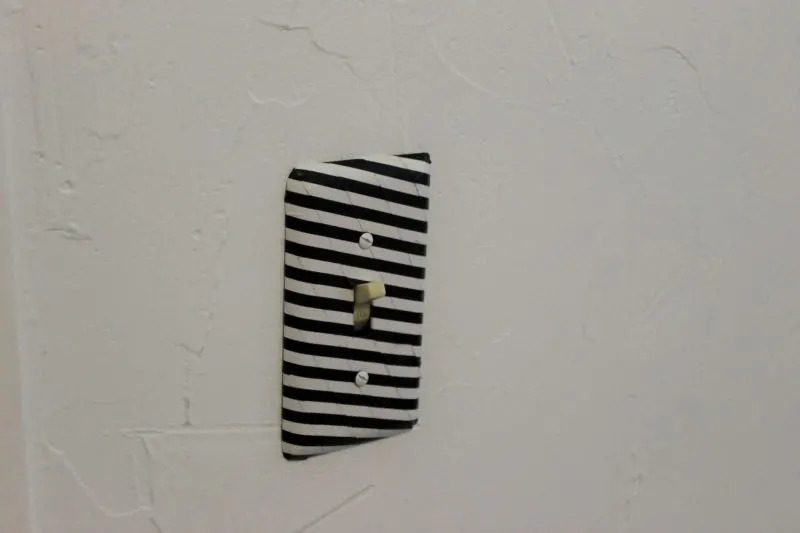
If you wish to be original, you can create your design with multiple pieces of washi tape. Be sure to seal it with a layer of clear contact paper or Mod Podge so that it lasts longer. And voila – instant custom switch plate cover that’s also renter-friendly.
Jazz up your notebook cover
Covering a boring notebook with colorful patterned washi tapes is super easy and fun! First, choose the tape you want to use. Make sure they’re patterns that you love and that will make you happy to look at every time you open your notebook.

Then, simply stick the washi tape onto the notebook’s cover in any design you like. For an added touch, you can write a personal message or an inspirational quote on one of the strips of tape before attaching it to your notebook.
Washi tape chopsticks
Washi tape is a fun, easy way to dress up plain chopsticks and make them unique. You can find it in various colors, designs, and patterns, so it’s perfect for any occasion. Start by cutting a length of washi tape about twice as long as your chopsticks.
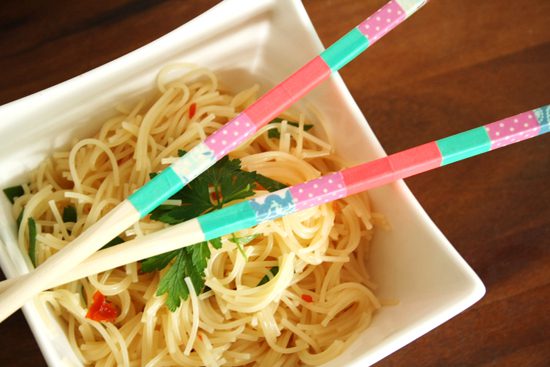
Place the chopsticks on top of the washi tape, then fold the top two corners down so that they meet in the middle. Apply pressure to hold the corners in place, then use your other hand to smooth out the rest of the washi tape down the length of the chopsticks.
Washi tape nail art
Washi tape is one of the most versatile crafting materials – you can use it for everything from scrapbooking to wrapping gifts to making funky nail art designs. And adding a touch of color to your nails is a great way to brighten up your day (or any outfit).
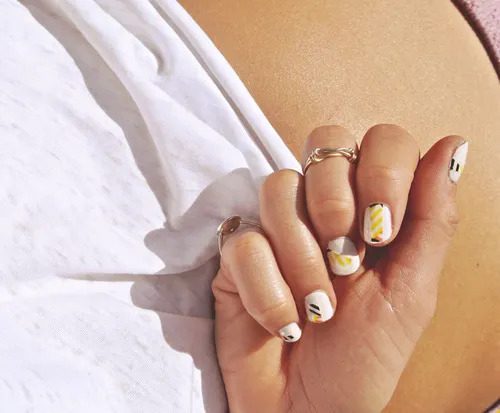
Start by painting your nails with a nude base coat. Cut strips of washi tape in various colors and patterns and apply them to your nails. Try cutting the strips into neat shapes before applying them for a more polished look. Finish off by applying a clear top coat over the entire design.
Label cords for organization
If you’re on the hunt for a quick and easy way to label cords for organization, washi tape is a great option! Various colors and patterns will make it easy to find the cords. Plus, it’s repositionable and removable, so you can always change things up if you need to.
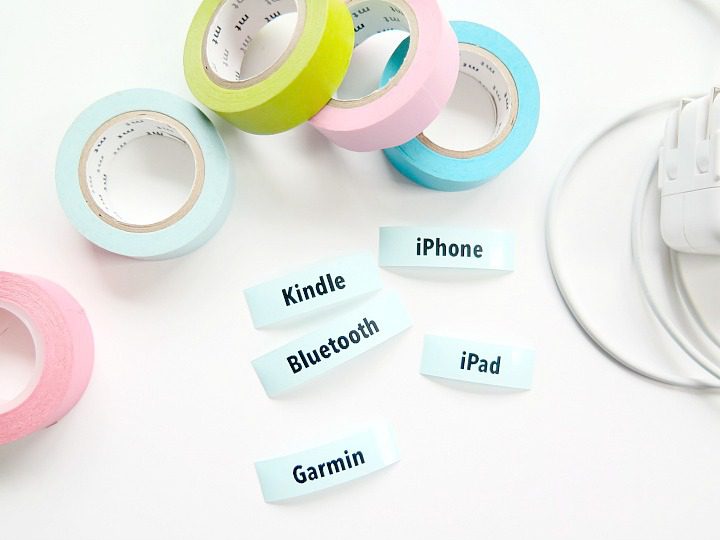
To get started, simply wrap the washi tape around the cord and write the label with a Sharpie or permanent marker. Then, cut off any excess tape with scissors. That’s it! Now you have a labeled cord that will help you keep track of everything.
DIY planter art
Washi tape is a fantastic way to make your dull planters look vibrant. This works magically for indoor planters especially. You can use any pattern or color you like, and it’s a quick and easy way to give your pots a makeover.

Cut strips of washi tape about 1/4″ wide, and slap them on the pot in any design you like. Be sure to press down firmly so they stick well. Continue adding rows until the entire planter is covered. You can even use different widths and tape colors for an added touch.
Write quotes on walls
This is a great way to add a touch of personality and inspiration to your home. Washi tapes come in a wide range of colors and patterns, so you can find the perfect one to match your style. Plus, they’re easy to remove without leaving any sticky residue behind.
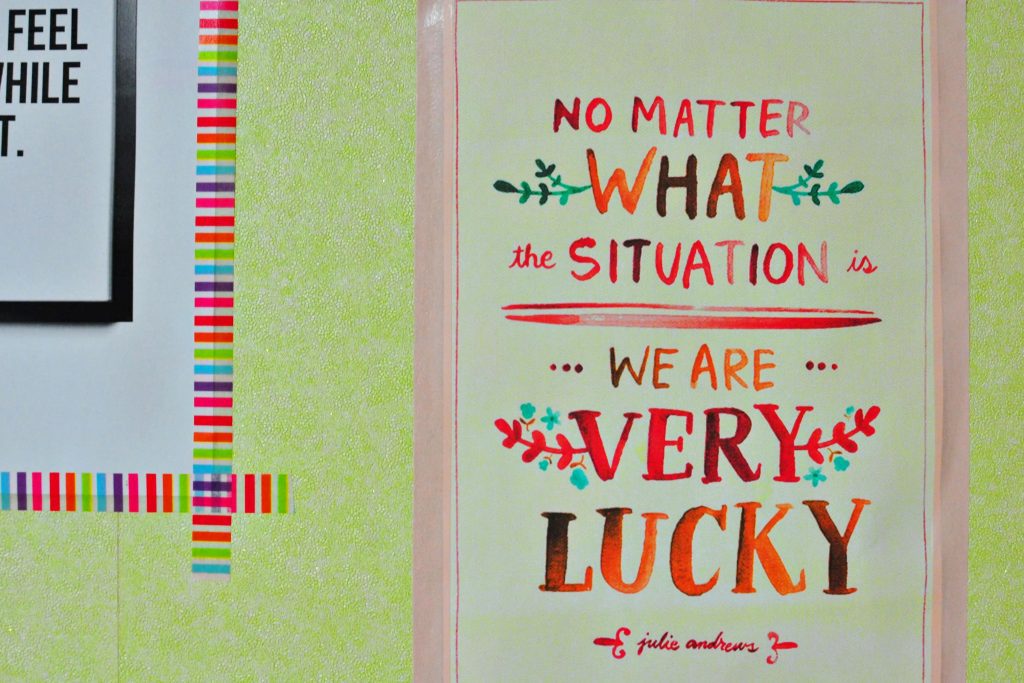
Use different colors and patterns of washi tape to create an eye-catching design. Just choose your favorite quote and get creative! You can write it out by hand or use a stencil. If you’re feeling ambitious, you might even create an entire wall collage.
Spruce up your ceiling fan
You can make an old and boring ceiling fan look attractive from, you guessed it, washi tape! First, take note of the size and shape of your ceiling fan blades. You’ll need to purchase washi tape that is wide enough to cover the blades completely.
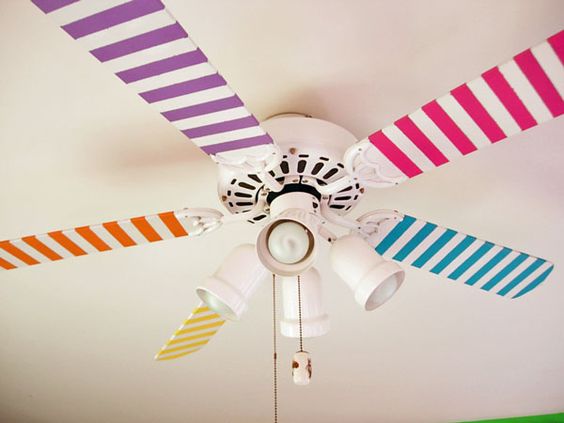
Once you have the right size, simply adhere the strips of washi tape to the top and bottom of each ceiling fan blade. The patterns and colors you choose will add a touch of style to your space. Try combining a mash-up of colors and patterns for a unique look.
Decorate a lampshade
Those on the hunt for a fun, easy way to add some character to your lamps, try using washi tape! Just cut a piece of tape to the desired length, place it on the lampshade carefully as per the design, and stick it to the surface.
You may make any pattern you want or just go with a simple solid color. In addition, you can then use additional pieces of tape to secure the design. And if you want to change your mind later, it’s easy to remove the tape and replace it with something new.
DIY Halloween pumpkins
This year, ditch the carving knives and try something new for your Halloween pumpkins – washi tape! It’s easy and exciting for those who are a little craft-challenged. Choose white pumpkins in different sizes. The stark contrast between the white pumpkin and the brightly-colored washi tape is eye-catching.
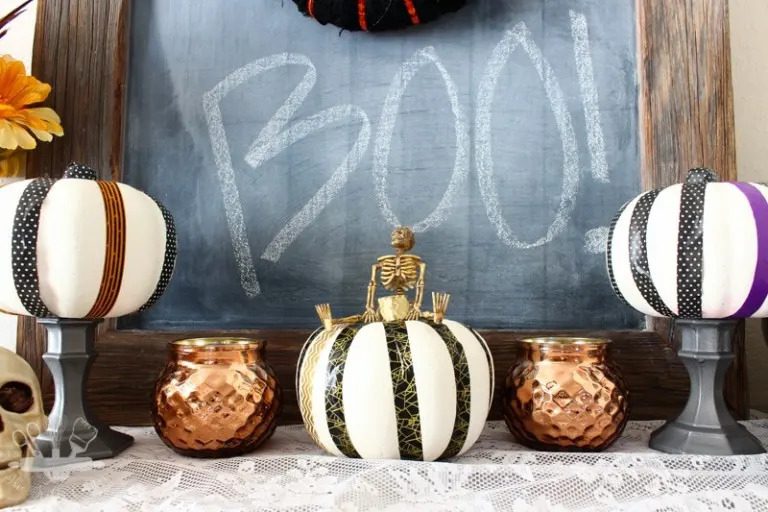
Stick strips of washi tape all over the pumpkin. You can create any design you like – stripes, polka dots, chevrons, etc. Besides, you may go for simple stripes or patterns or get creative with fun Halloween designs like spiders, bats, or ghosts. You could even make a jack-o-lantern face on your pumpkin!
Make paper lanterns
There are so many enjoyable ways to decorate paper lanterns! You can use washi tape in different colors and patterns for a simple, elegant look. Just cut some strips of tape the same length as the lantern, and attach them in a spiral pattern starting from the bottom.
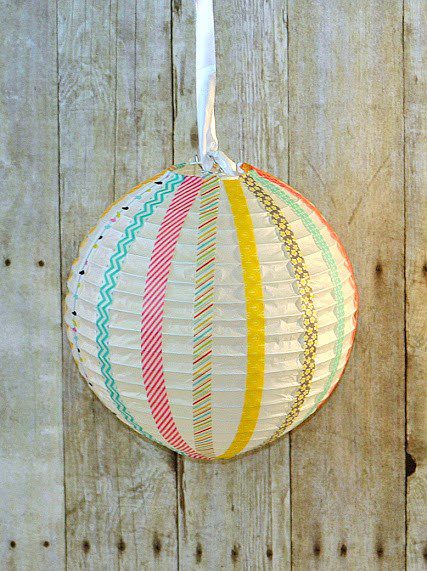
You can also add some flair by attaching small pieces of lace or other decorative trimmings along the edges of the lantern. If you’re feeling more crafty, you could try making your own paper flowers to attach to the lanterns. Or you could go for a colorful look by using sequins or glitter.
Revive your old coasters
Transform your old, boring coasters into pieces of art by using colorful patterned washi tapes! This easy and fun DIY project is perfect for a craft night with friends or as a weekend project. All you need are some coasters, washi tape, and scissors.
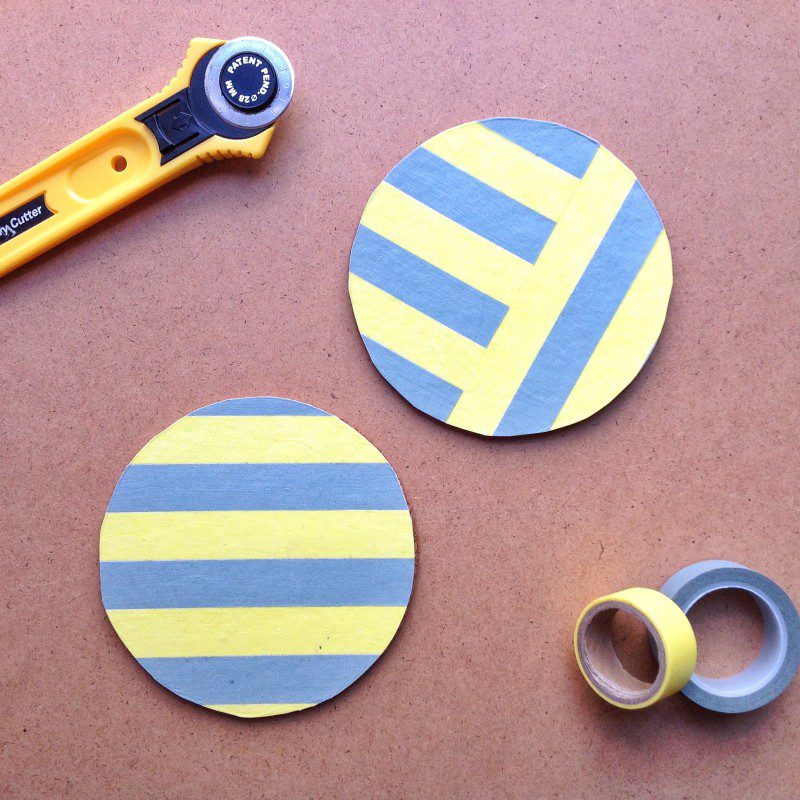
Cut strips of washi tape that are about 1-2 inches long. Stick the strips of tape to the top of the coasters in any design you like. These tapes will add charm to a plain coaster and ensure your drinks look fabulous on them.
Serving tray makeover
Giving your old serving tray a fresh new look is easier than you think! All you need is some washi tape and a little creativity. Simply measure the width of your tray and cut several strips of washi tape that are the same length.
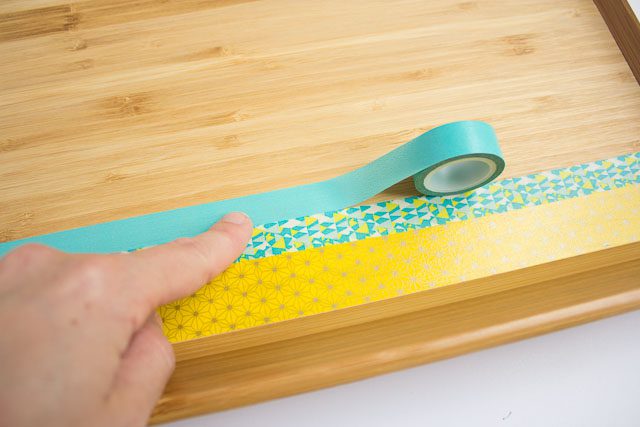
Then, start adhering the strips to the tray, overlapping them as you go. Be sure to leave a small border at the edge of the tray uncovered so it can be easily handled. It’s that easy! A few minutes of taping and your tray transformation are complete.
Use as a temporary wallpaper
You don’t need to use expensive wallpaper to redecorate your room. You can use colorful patterned washi tape as temporary wallpaper! It’s a great way to add a pop of color and personality to any space. Plus, it’s super easy to apply and remove.
This allows you to change it up whenever you need a fresh look. Start by choosing your favorite washi tape. You can go for a cohesive look with one color or mix and match different patterns and colors. Apply the tape to the wall in sections, starting at the top and leaving some negative space between.
Make boring clothespins colorful
Pegs and clips are a great way to add a personal touch to your home décor, and washi tape is the perfect tool to make them colorful and fun. Simply wrap the tape around the clothespin, starting at the base and working your way up.
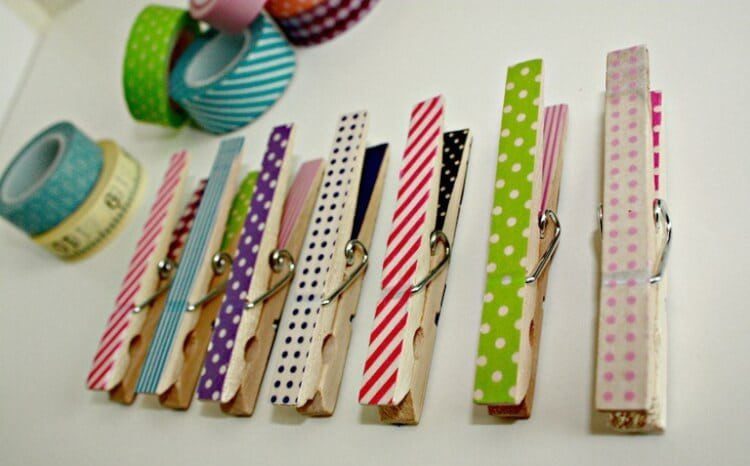
You can mix and match colors or use just one color for a monochromatic look. Moreover, you may decorate these with embellishments and glitter for an added effect. Washi tape is also great for labeling containers, wrapping gifts, and much more.
Cute laptop skin
You can make a second skin for your laptop using washi tape. Choose a light-colored design and cut it into strips so that you can line up the pieces precisely. After that, simply apply the strips to your laptop in any design you like.
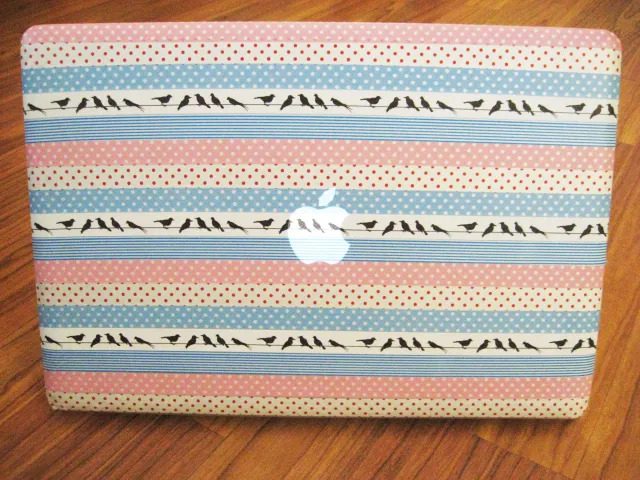
You could make a chevron pattern, go for a trendy ombré look, or keep it simple with stripes or minimalist dots. Not only will your laptop look great, but the tape protects it from scratches and bumps. And if you ever get tired of the design, simply peel off the tape and start anew.
Upgrade your old coffee table
There’s no need to spend a lot of money on a new coffee table when you can easily upgrade an old one using some colorful washi tape! Just measure and cut the tape to fit your table, then adhere them to any design you like, just like in the photo.
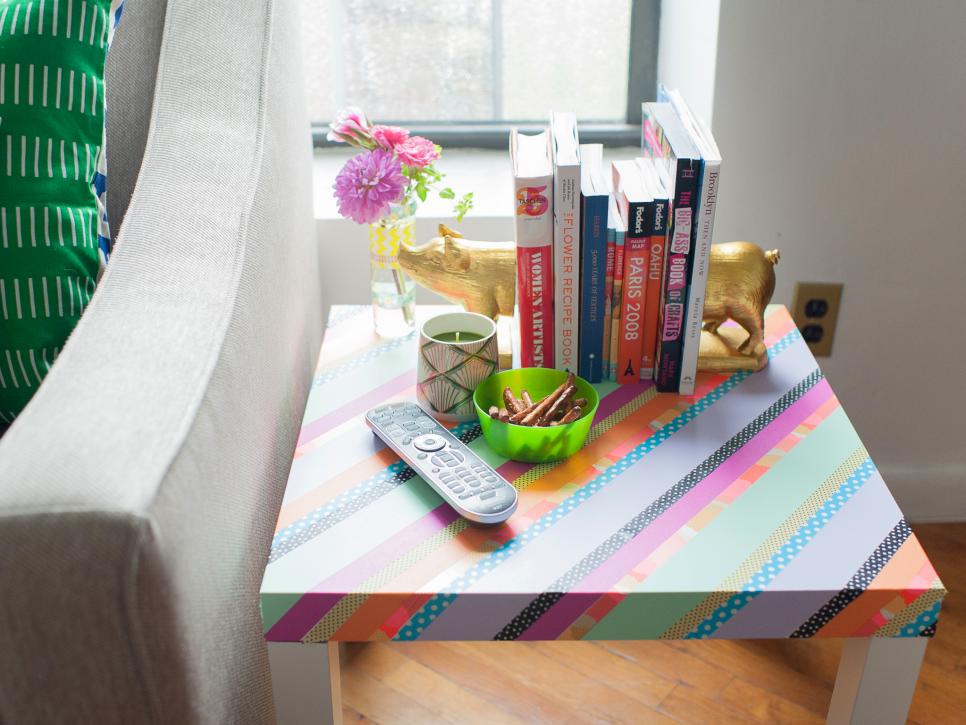
You can even create fun patterns or images with the tape. If you want to change things up later, simply peel off the tape and try a new design. This is a cheap and easy way to add some personality to your furniture!
Glam up the party spoons
You don’t need to be a party planner to add some glamor to your event! Just use washi tape to dress up ordinary silver party spoons. It’s an easy way to add a pop of color and create a unique theme for your party.

Stick the washi tape horizontally across the middle of the spoon, starting at one end and smoothing it down as you go. If needed, trim off any excess tape so that it doesn’t hang over the edge of the spoon. Repeat for all of your disposable party spoons.
Upcycle old clock with washi tape
Clocks are such whimsical objects that we feel guilty leaving them languishing on a shelf. One fantastic idea is to upcycle them with washi tape! Washi tape comes in all sorts of fun patterns, so you can give your old clock a new lease on life.
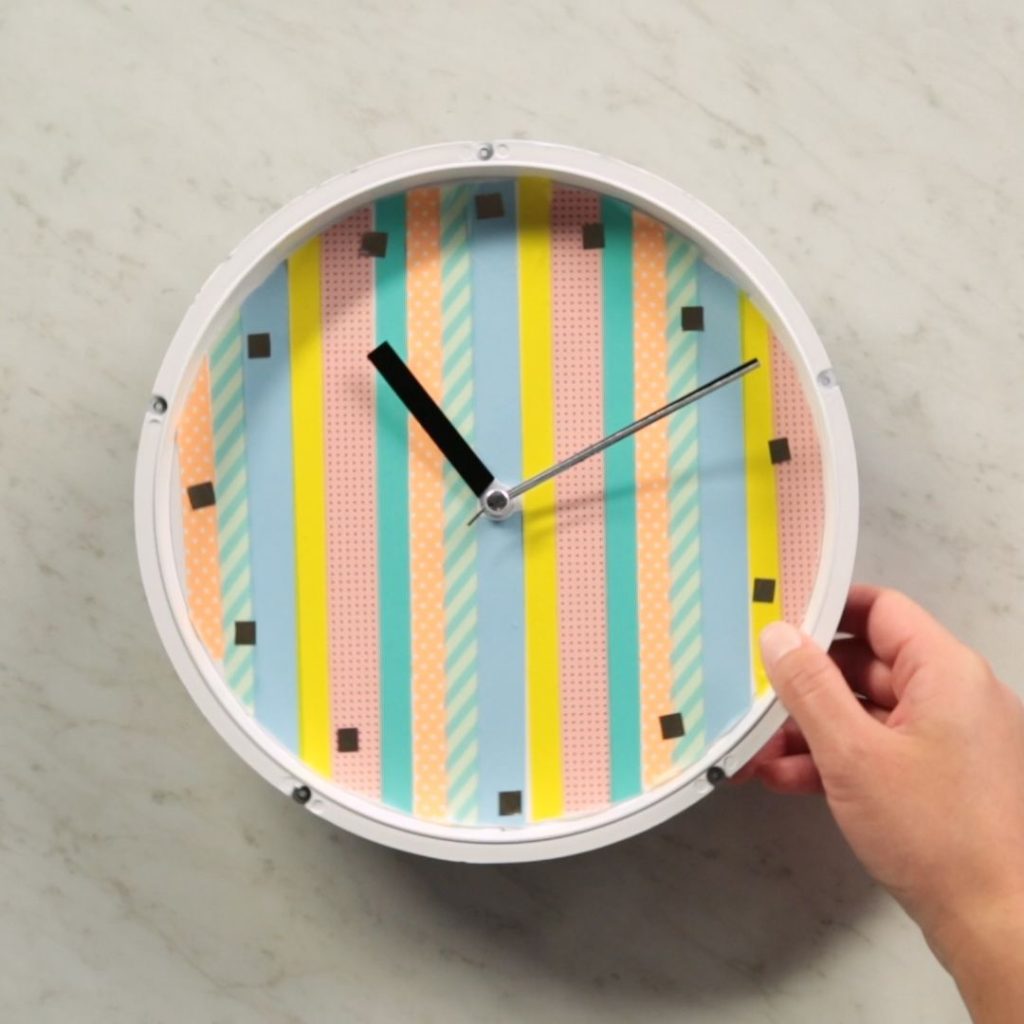
This could be a great weekend project, and you’ll end up with a beautiful new piece of art for your home. Just wrap the tape around the clock face, being careful not to cover up the numbers. You could even use different tape for each hour.
Makeover for your mouse pad
Changing up your mouse pad is pleasing to the eyes and can add to an otherwise dull desk! It’s also a super-easy way to spruce up an old mouse pad. All you need for this project is a mouse pad, some fancy washi tape, and scissors.
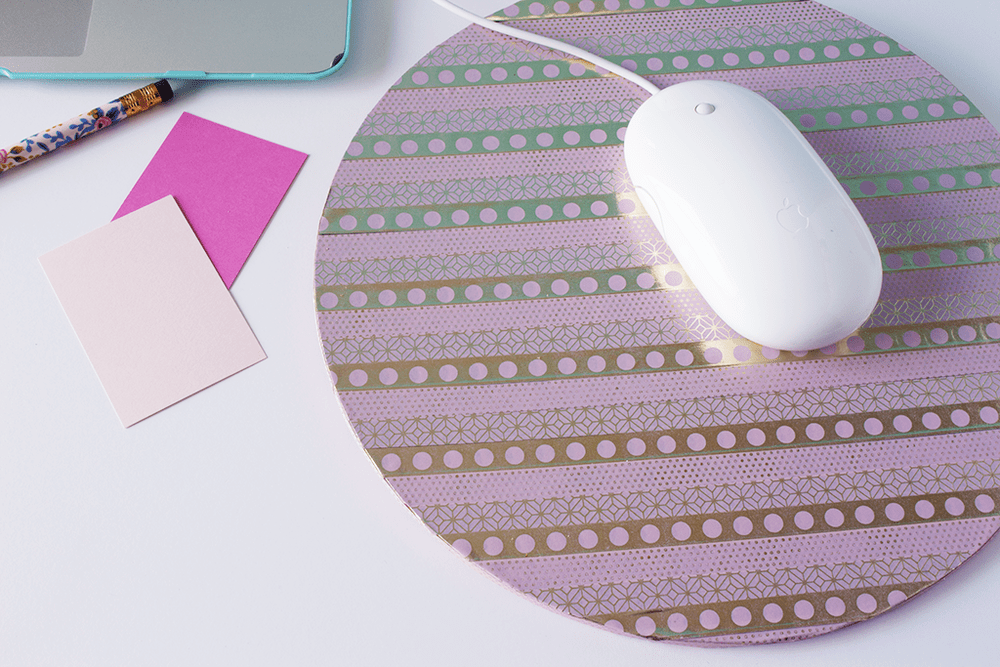
First, measure the width of your mouse pad and cut a piece of washi tape that is the same width. Next, place the washi tape down the center of your mouse pad, making sure it is straight and even. Finally, use scissors to cut off any excess washi tape.
DIY washi decorated hanger
Looking for a fun and easy way to spruce up your closet? Washi tape decorative hangers are the perfect solution! Using washi tape is a great way to add color and personality to your wardrobe, and it’s so simple.
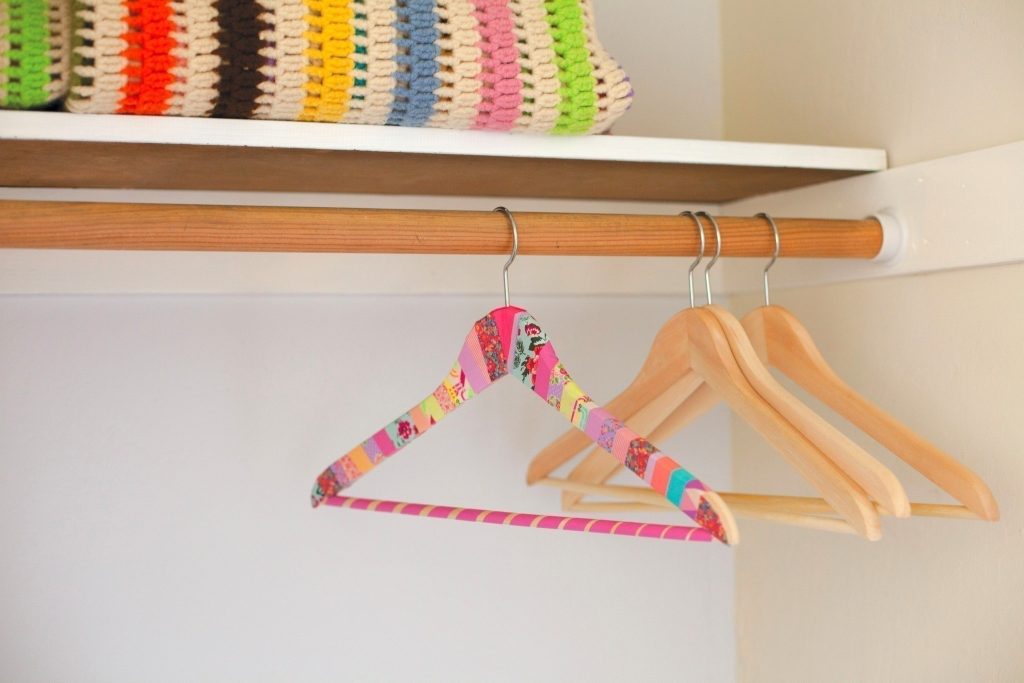
Wrap the washi tape around any hanger in your closet, starting at the top and working your way down. You can create any design you want – stripes, polka dots, zig-zags, or even randomly wrapped patterns. You may even color-code the hangers for seasonal clothing.
Colorful tea lights
The look of colorful washi tapes is perfect for spicing up boring tea lights. All you need is some tea lights, washi tape, and scissors. Begin by cutting a piece of washi tape that’s about twice as long as the tea light itself.
Stick the tape around the middle of the tea light, making sure to smooth it out, so there are no bubbles. Now, cut another piece of washi tape that’s about twice as wide as the first one. Wrap it around the top of the tea light. Trim any excess off the top and bottom.
Key covers for easy identification
If you’re looking for a way to quickly identify your keys, using washi tape on the handles is a frugal option! Choose a color or pattern that suits your style. This tape is easy to apply and remove from metal keys, so you can change up your design as often as you like.
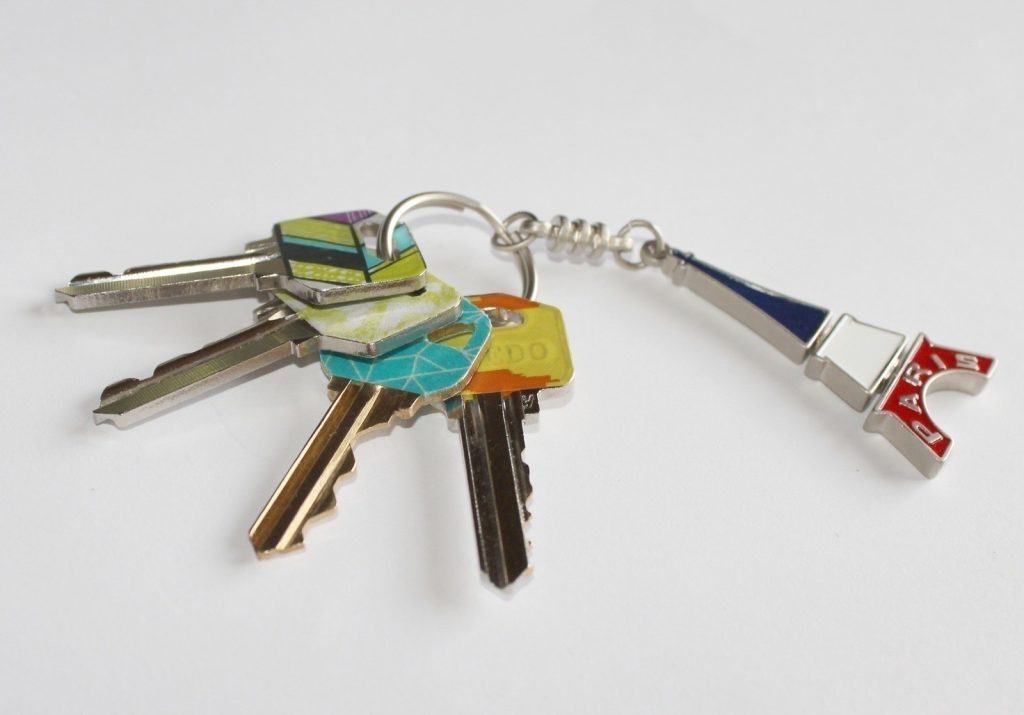
Instead of getting new keychains, washi tape will help you upcycle. You may also write the name of the room on the washi tape for quicker identification. Moreover, decorating with washi tape will make your keychain look super cool.
Cute phone charger
it’s time to make your phone charger adorable and functional! We recommend using washi tape on the adaptor to make it aesthetically pleasing. This cute little hack is a great way to add color to your boring charger and also conveniently keep track of which one is yours.
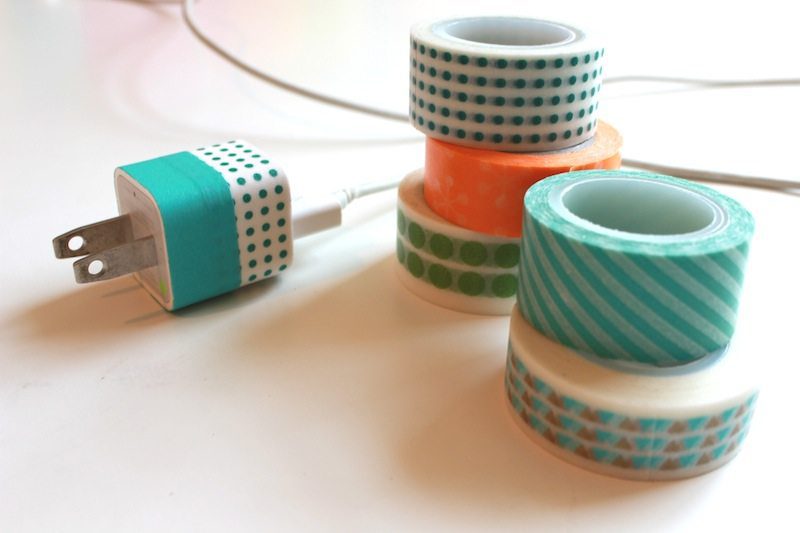
You may be as creative as you like with this project – just make sure it’s securely attached, so it doesn’t come undone. Take this charger in your bag and enjoy having a stylish and practical phone charger that shows off your bubbly personality!
Decorative twisty ties
Add a touch of art to your kitchen items. Or, you may like making cookies and gifting them to your loved ones. Using plastic clips for each bag may not be feasible for you. Use this hack to create twisty ties for these bags by using wires and washi tape.

You can make these colorful twist ties by sticking two pieces of washi tape to a piece of thin wire. In just a few minutes, you can successfully create a custom twist tie that’s unique and makes it easy to tie a plastic bag without any spilling.
Washi tape your bicycle
You can use washi tape to decorate your bicycle in a number of ways. There’s no wrong way to decorate your bicycle with washi tape, as endless possibilities exist. Wrap it around the frame, handlebars, or tires. You may also use it to create patterns or designs on the bike.

Try wrapping the frame in flowers or geometric shapes for a touch of whimsy. You can also use washi tape to add stripes or polka dots. If you want something slightly more conservative, stick to solids or muted patterns. This will still make your bicycle stand out.
Bookmarks for the readers
Cut a piece of washi tape and stick the ends of the tape together to form a loop, and then fold it in half so that the sticky side is facing out. Attach one end of the bookmark to your book by sticking it to the spine near the top or bottom of the book.
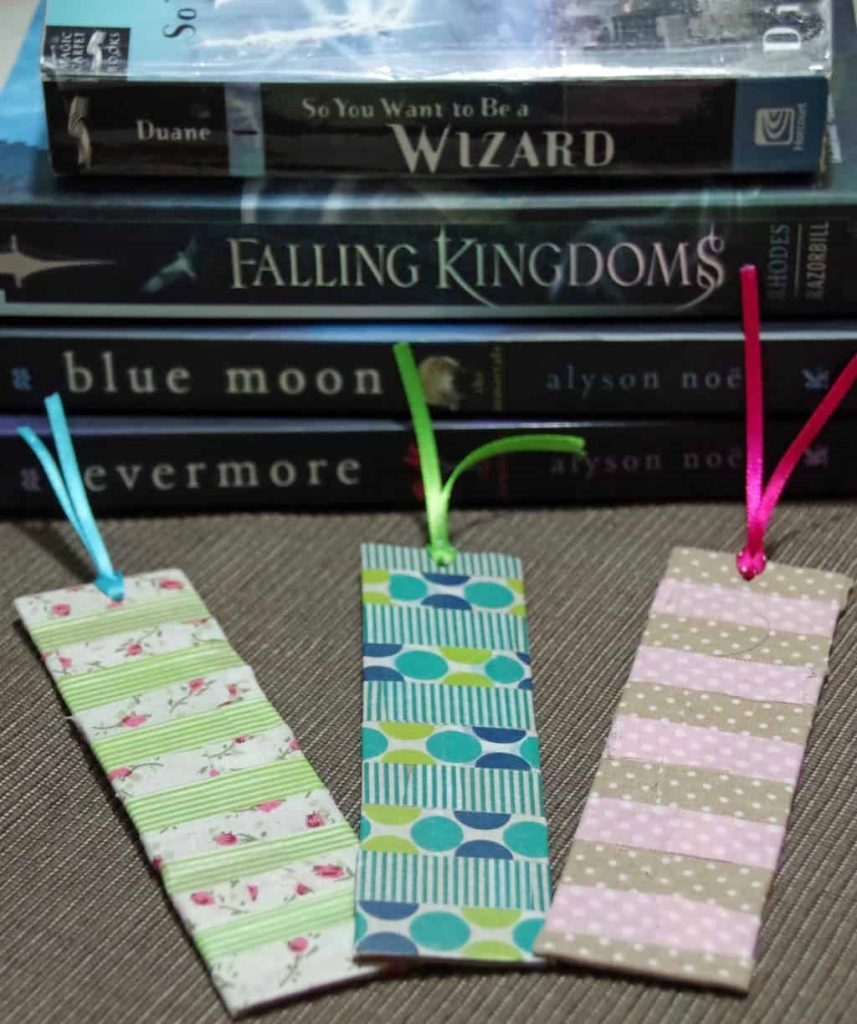
The rest of the washi tape will act as a bookmark to keep your place. If you want to make a more decorative bookmark, try adding some designs or patterns using different colors of washi tape. You may also add a tag or label to your bookmark by cutting a small piece of paper.
Mark your calendars
If you’re looking for a new way to spruce up your calendar, then why not try washi tape? With its vibrant colors and plethora of designs, it can add personality and flair to any boring ol’ calendar. Plus, it’s super easy to use! Simply adhere the tape to the desired area.
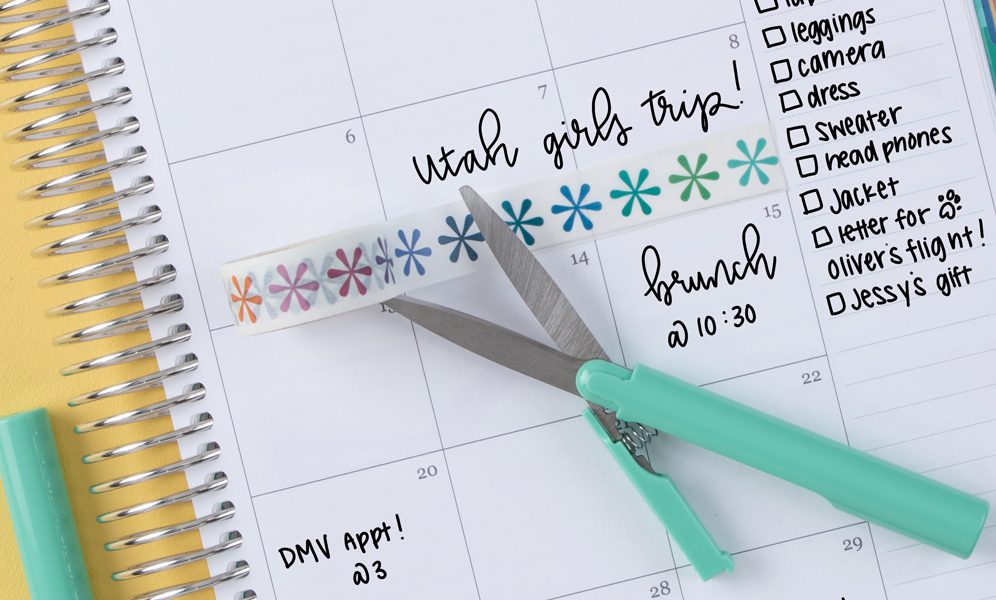
You may use it to create different sections for different types of appointments, highlight important dates, or just decorate your calendar. With a few rolls of washi tape at hand, you’ve got yourself a stylish new calendar. And if you ever feel like it’s too crowded, simply peel off the tape and start fresh!
Accessorize mason jars
This is a trendy way to dress up your mason jars for any occasion! All you need is some washi tape in your favorite colors and designs and some scissors. Begin by cutting a strip of washi tape about two inches wide, and wrap it around the top of the jar.
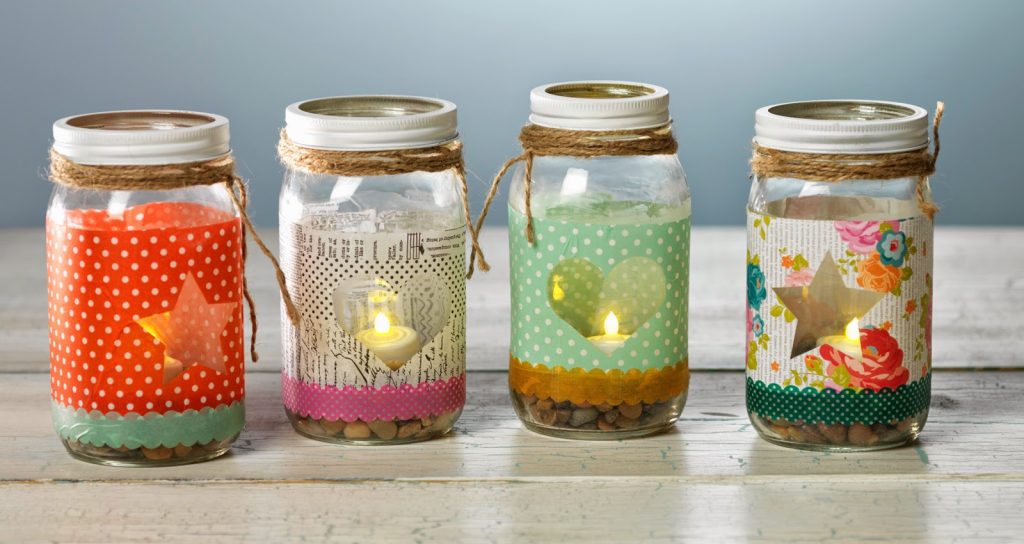
Ensure the tape is tight against the glass, so it doesn’t come loose. Then continue wrapping the tape around the jar in whatever design you want. You can make stripes, polka dots, or any other pattern you like. You may cut the tape in circles to create more interesting designs.
No more boring stationary
This is a great way to add some color to your binder clips and make them more fun and interesting to look at. All you need is some washi tape in any color or pattern you like, and start with decoration.
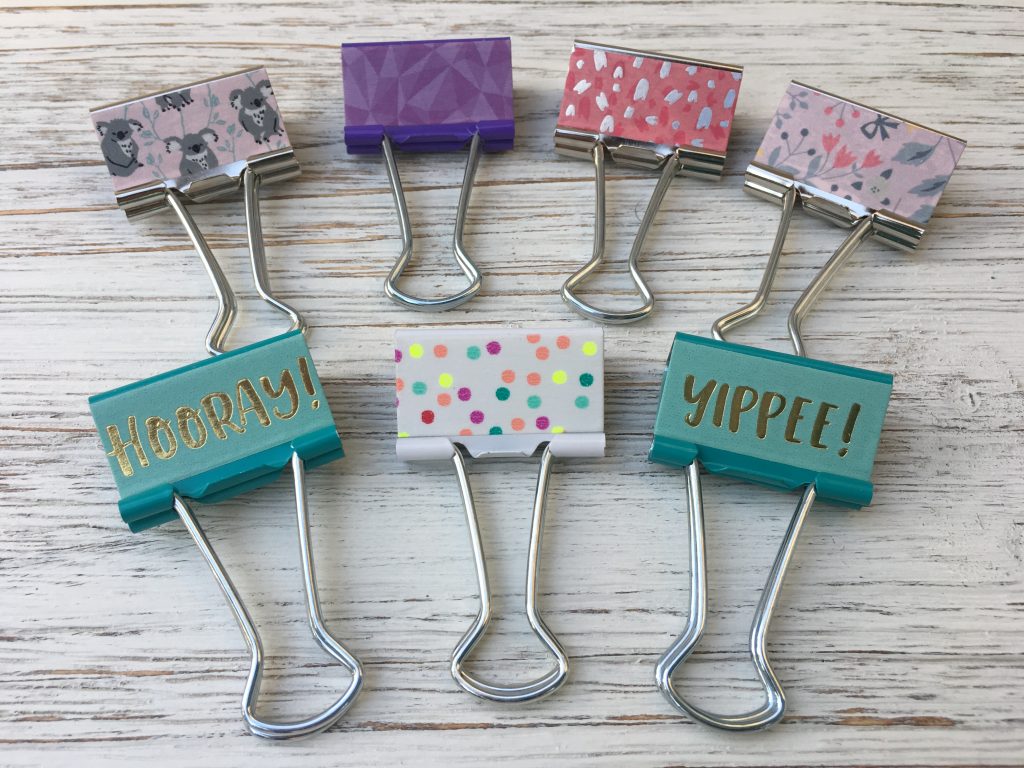
Start by cutting a piece of washi tape that is roughly the same size as the top of the binder clip. Stick the washi tape to the top of the clip, making sure to smooth it out so there are no wrinkles or bubbles. Repeat with as many pieces of washi tape as you want.
DIY a garland
DIYing a garland using washi tape and thin strings is incredibly easy – and surprisingly inexpensive! All you need is a roll of washi tape and a spool of thin string or fishing line. Simply cut the string to your desired length and then use the washi tape to secure it in place.
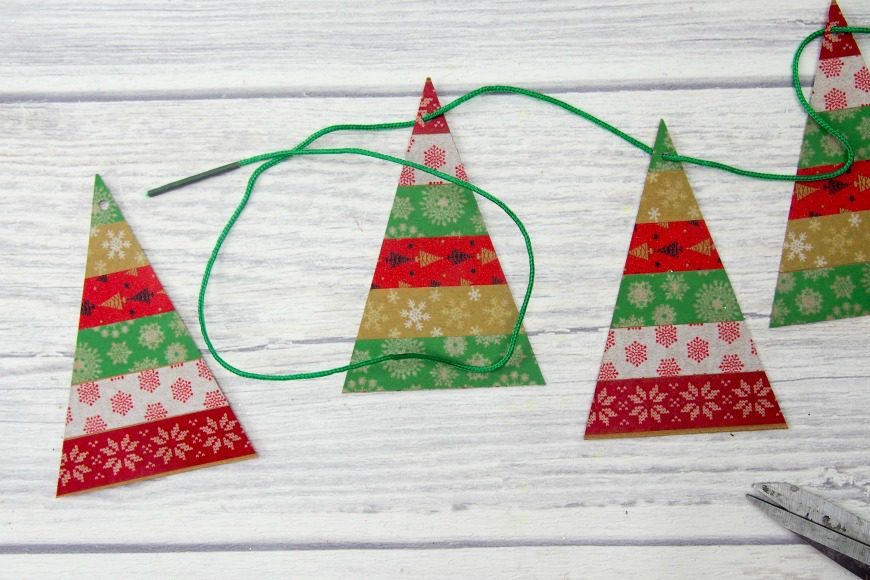
You may then add additional decorations like beads, shells, or even small pieces of paper or fabric to personalize your garland. Make sure that whatever you add is lightweight so that it doesn’t weigh down the string too much.
Stylish vases for your home
Are you searching for a quick and convenient option to add a touch of style to your home décor? Well, look no further than washi tape! The vibrant colors and patterns of the tape make it perfect for dressing up vases, picture frames, planters, and more.
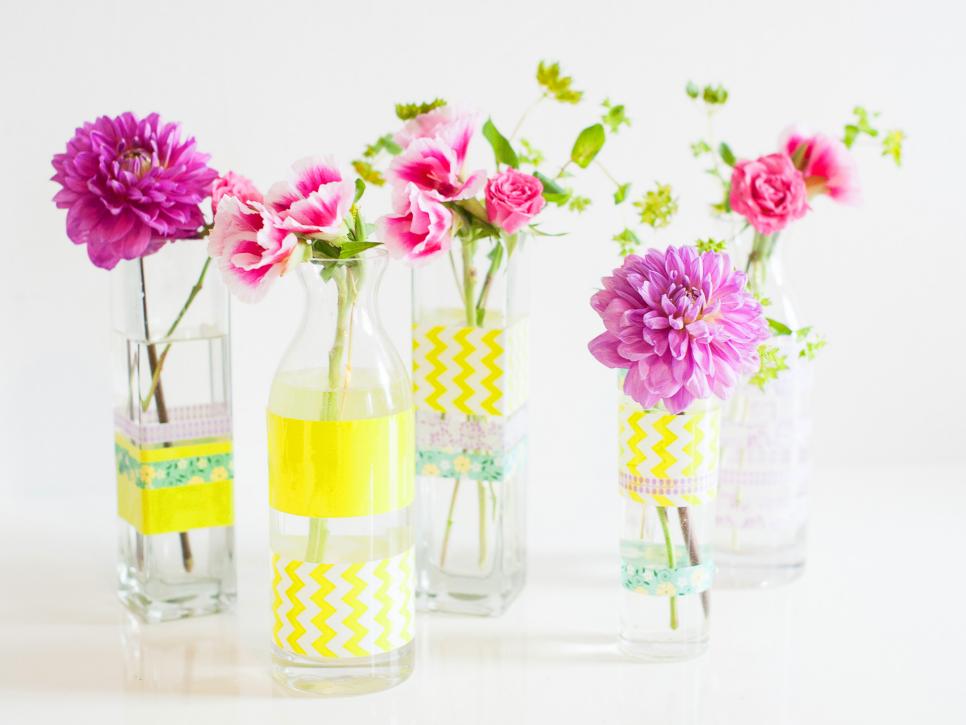
Plus, it’s inexpensive and easy to find online or at your local craft store. To get started, simply choose the washi tape you want to use and wrap it around your vase. You may go for a single color, pattern, or mix and match different types to create your unique look.
Trendy glasses for cheap
There’s no need to spend a lot of money on trendy glasses when you can easily jazz up an old pair with some washi tape! Start by wrapping the tape around the arms of the glasses, and you’ll have a new look in seconds.
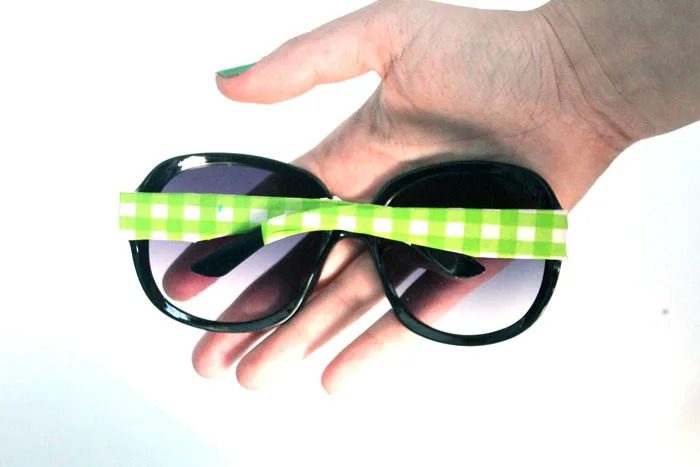
Press the tapes firmly so that they stick well. Besides, this is a great way to express your personality and show off your unique style. You may make these to match different outfits. So, go ahead and try out this trend – you won’t be disappointed!
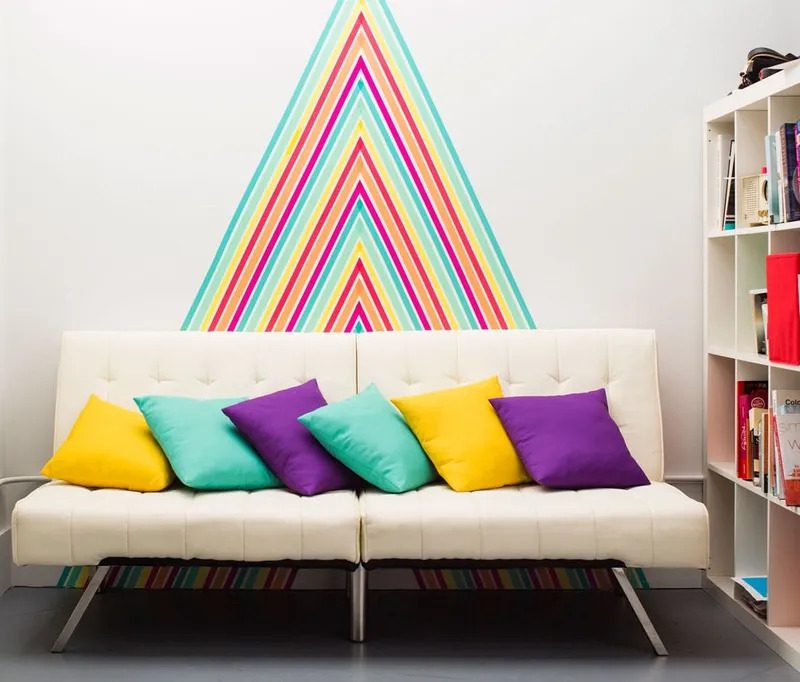
Mural for kids’ room
With the help of some brightly-colored washi tape, you can easily create a one-of-a-kind mural for your child’s room. Choose a design that your child will love. Be creative and let their imagination run wild! Measure the wall space you want to cover and purchase enough washi tape to complete the project.
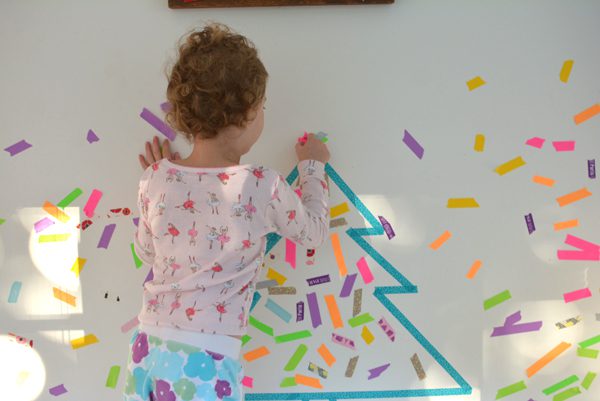
Use a level or ruler to help create evenly spaced lines on the wall, and then start taping! Before processing, you may use chalk to outline the design for easy application. If you make any mistakes along the way, don’t worry – just remove the tape and try again.
Corkboard makeover
If your corkboard looks a little bland, try giving it a makeover with washi tape! Let your creative side out when it comes to decorating your board with different patterns and shades of washi tape. Plus, it’s less time-consuming to use – just peel and stick.
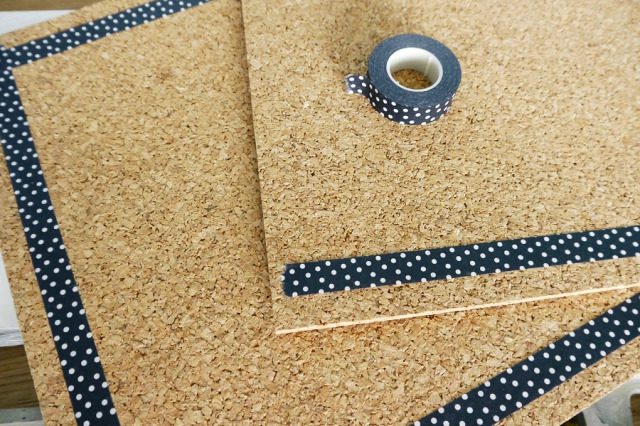
Pick out a few different colors or patterns you like, and experiment with combinations until you find something you’re happy with. You may use a blend of vertical and horizontal lines to create a design. Put the board over your desk to pin important papers and files.
A fresh look to a boring box
If you’re eager to spruce up a boring box for storage, then washi tape is your friend! You can give a boring box for storage a fresh look without much effort. To use washi tape to decorate a box, simply measure and cut strips of tape to fit around the perimeter of the box.
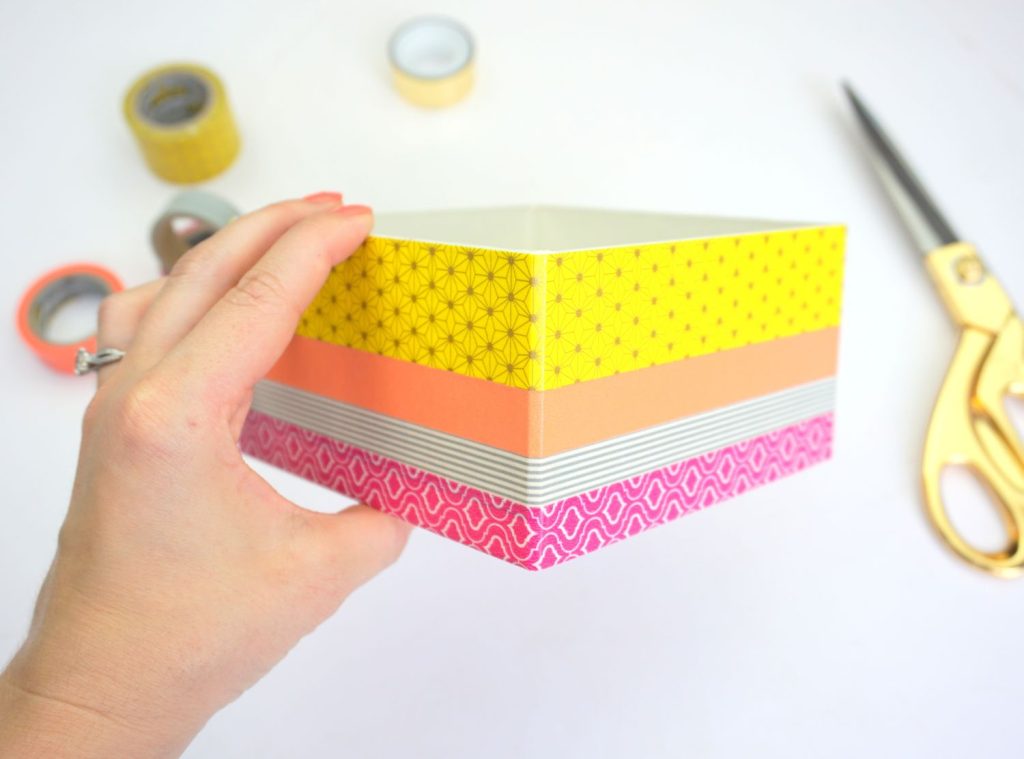
Start by peeling off the back of the first strip and sticking it down. Repeat with the remaining strips until the entire box is covered. You may leave some spaces empty to create a pattern for an extra touch. Finish it by covering the lid of the box with tape.
Adorable cupcake bunting
This cupcake bunting is so easy to make, and it’s a great option to add some festive flair to your next party! All you need are some colorful washi tapes and some toothpicks. Cut a piece of washi tape that can work as a flag over a toothpick. Stick the tape to the top of a toothpick.
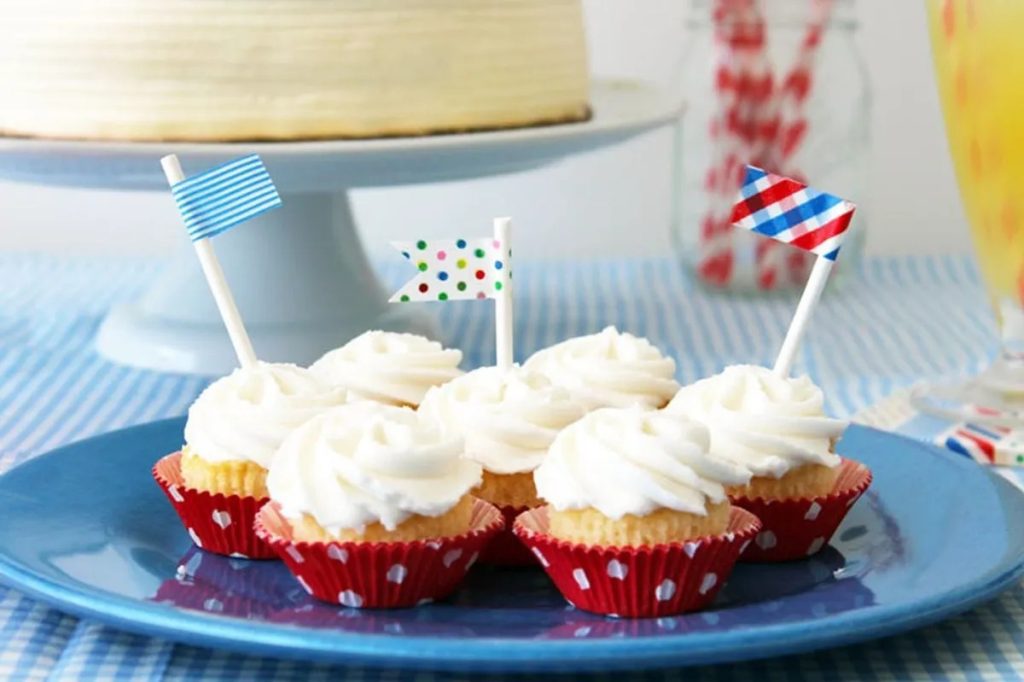
Then, cut another piece of washi tape. Stick it to the toothpick to cover it vertically. Repeat these steps with additional pieces of washi tape and toothpicks until you have created as many flags as you desire. You may also connect two toothpicks using a string and add flags along the length.
Cover old phone cover
You can easily cover an old phone case with washi tape. You may need a few strips of tape in your desired pattern and design, and then you can just adhere them to the case. This way, you can give your old phone case a new look without spending any money.
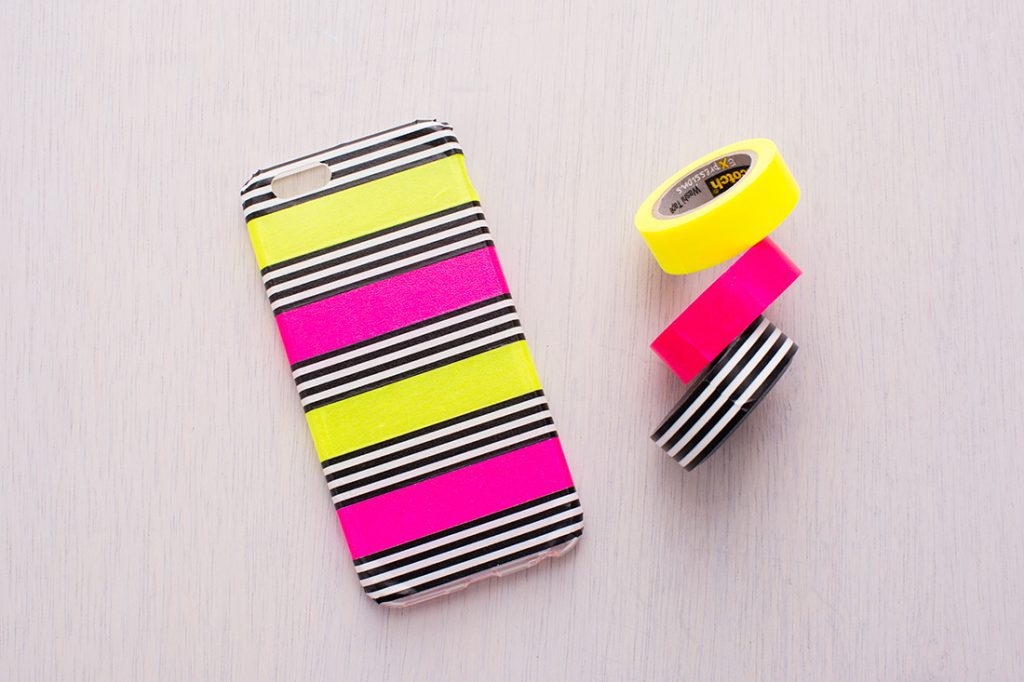
Start by cleaning your phone case with a damp cloth to remove any dirt or residue. Stick the tape in a fancy design and feel proud of your DIY skills! If you ever get tired of the design, you can just peel the tape off and start fresh.
Candy and chocolate bar wrappers
Create your unique candy and chocolate bar wrappers using washi tape! With so many colors, you may pick different ones for each flavor. Best of all, washi tape is easy to use and far less expensive than buying pre-made wrappers. To get started, measure the circumference of your candy or chocolate bar.
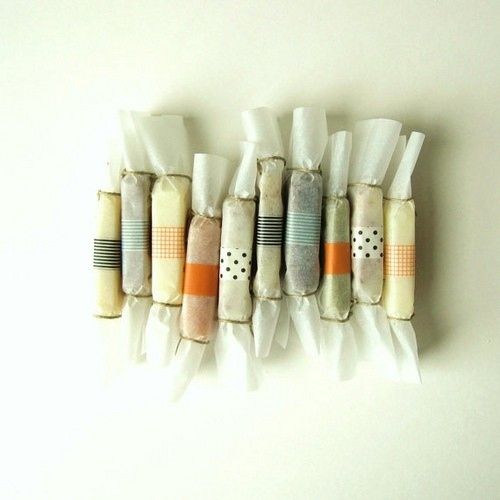
Cut a piece of washi tape to that size, and wrap it around the candy. You may overlap the ends of the tape or trim them off so that they’re snuggly placed against each other. If you want extra security, you may use a bit of clear packing tape to secure the edges.
DIY jewelry storage
This is a space-saving hack to store your necklaces, bracelets, and body chains on the wall. You won’t have to worry about them tangling in a box. In addition, you’ll have easy access to all your pieces when you’re getting ready in a hurry.
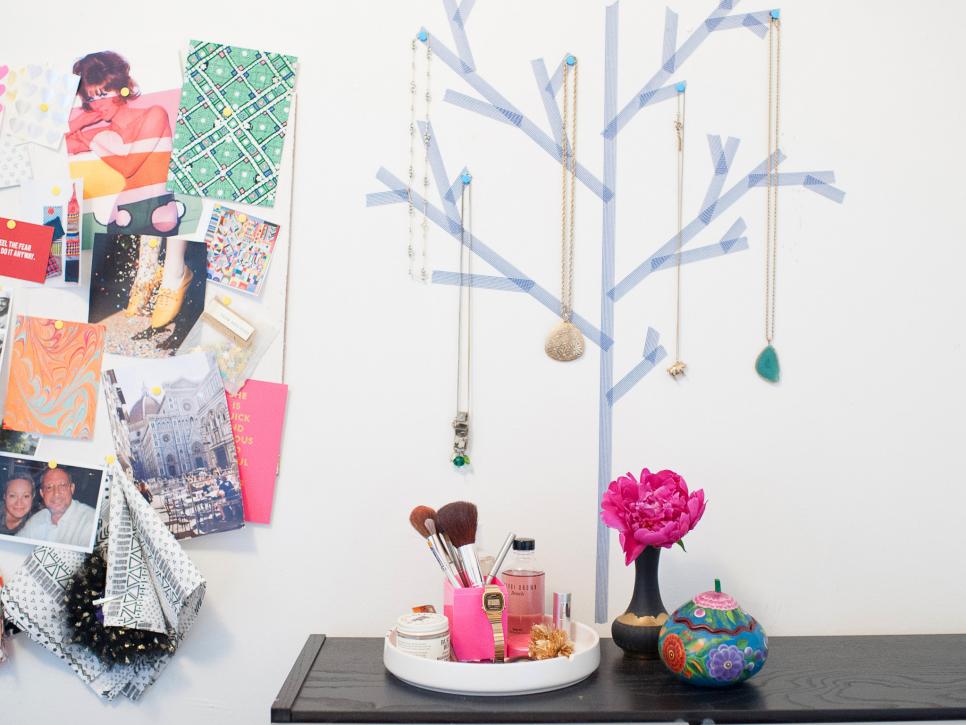
Choose a wall next to your dresser or any other convenient space. Use washi tape to create patterns such as trees, flowers, leaves, and long stems. Hang your jewelry using thumb pins on the washi tape patterns in an organized way.
Custom makeup brushes
There are a few reasons why custom makeup brushes using washi tape on the handles can be a great idea. First, it’s much cheaper than buying new brushes or specialized sets. Second, you’ll get exactly the style of brush you want – no more struggling to find the right shape or size in the stores.
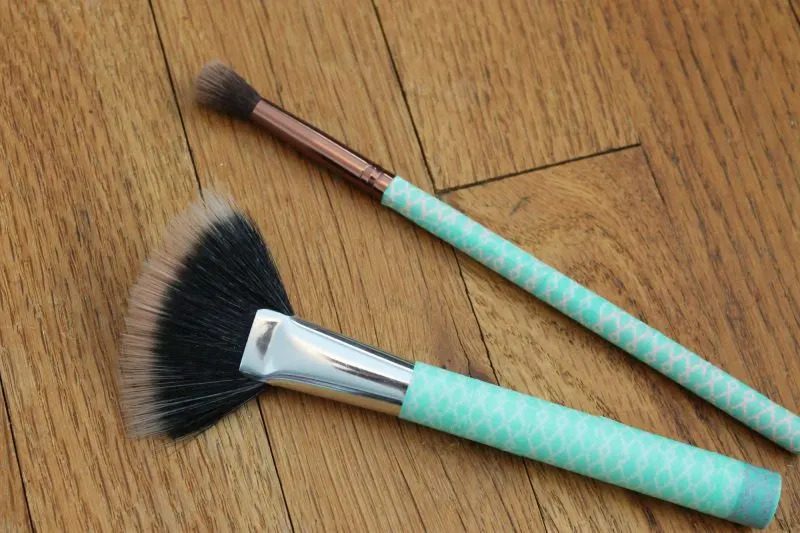
Lastly, it’s a fun DIY project that you can do with friends or family. To get started, simply choose the design you want to create and select a few coordinating washi tape colors. Then, apply the tape to the handle of the brush, starting at the base and working your way up.
Personalized washi tape photo frames
Picture frames are one of those things that you can never have too many of. They come in all different shapes, sizes, and colors, and they’re a great way to personalize your home décor. But sometimes, creating new and creative ways to display your photos can be challenging.
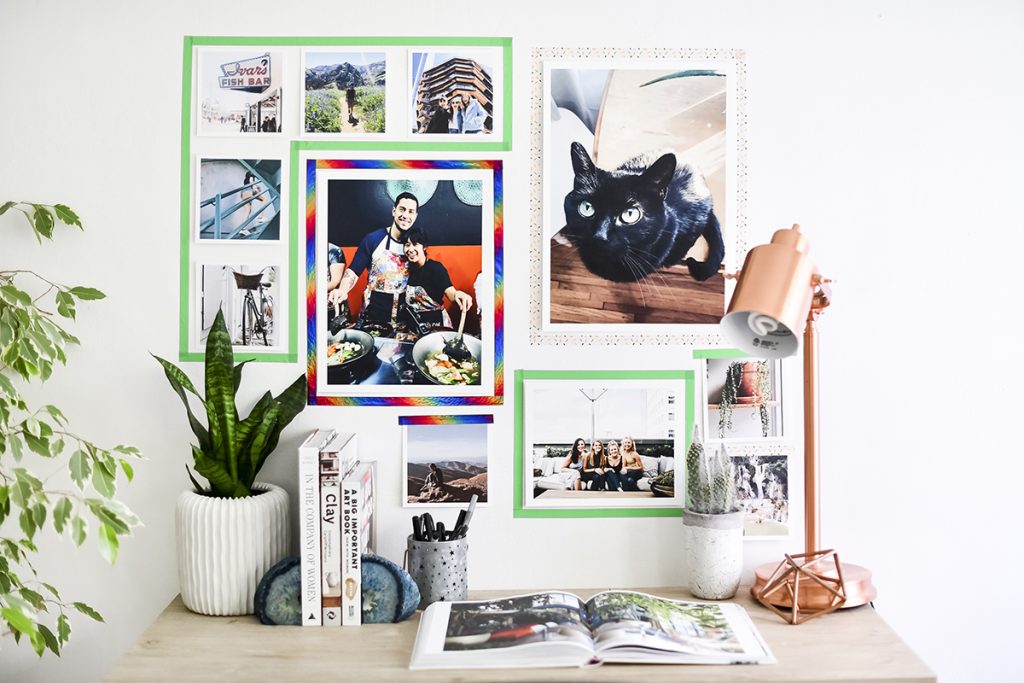
That’s where washi tape comes in! It’s perfect for use on picture frames because it’s easy to remove and doesn’t damage the surface underneath. To get started, simply peel off a piece of washi tape and stick it to the photo on the wall.